Overview
This guide provides instruction on configuring both Medical-Objects Capricorn and MedTech32 to import electronic results.
If you require any assistance with the installation or configuration, or if you have any questions, please contact the Medical-Objects Helpdesk on (07) 5456 6000.
If you have not Installed the Medical-Objects Download client, Please see the guide for Installing Capricorn on Windows.
Configuring Capricorn Software
Accessing the Capricorn Configuration Window
Note:
In some cases, the Capricorn may be configured as a service. See this guide for instructions on how to launch the Capricorn if it is set up as a service.
- To launch the HL7 Tray application, Go to Start Menu, All Programs, Medical-Objects and select the Medical-Objects Capricorn. Alternatively, You can go to C:\MO\Capricorn and run the Capricorn.exe.
- The following icon will appear in the tray. Double click on it to bring up the log window.

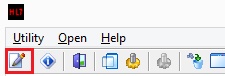
- When the log window is displayed, Click on the Configuration icon highlighted below, or select Utility and select Configuration.
Capricorn Configuration Settings
- Click on Ack Management.
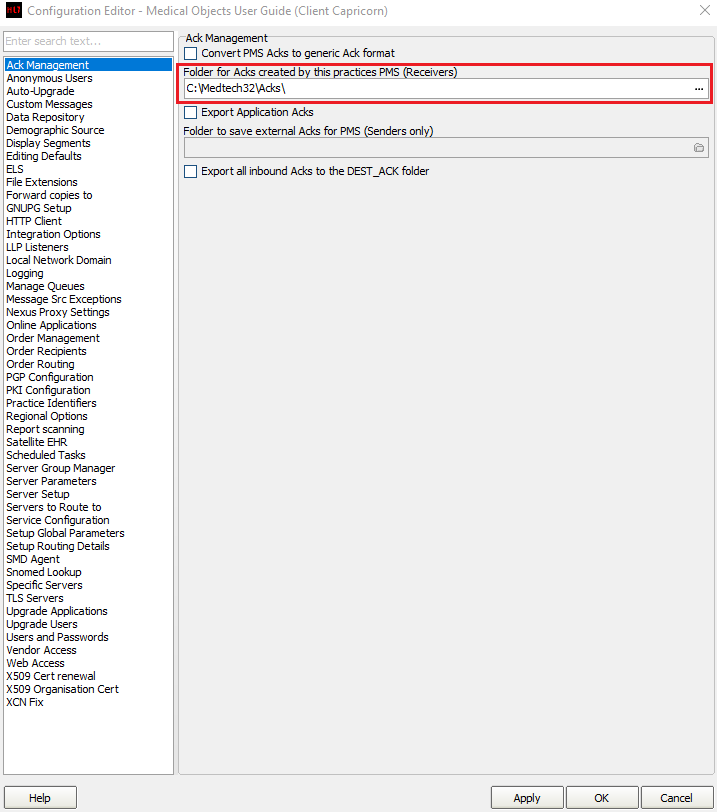
Set the Ack Management path to the local import folder on the server or the network path on a workstation that points to the server import folder, For example:
(Capricorn installed on the server) --> C:\Medtech32\Acks\

(Capricorn installed on the Workstation) --> \\server\Medtech32\Acks\
- Click on Integration Options.
3.1 Check that the Incoming Modifier is set to MedTech32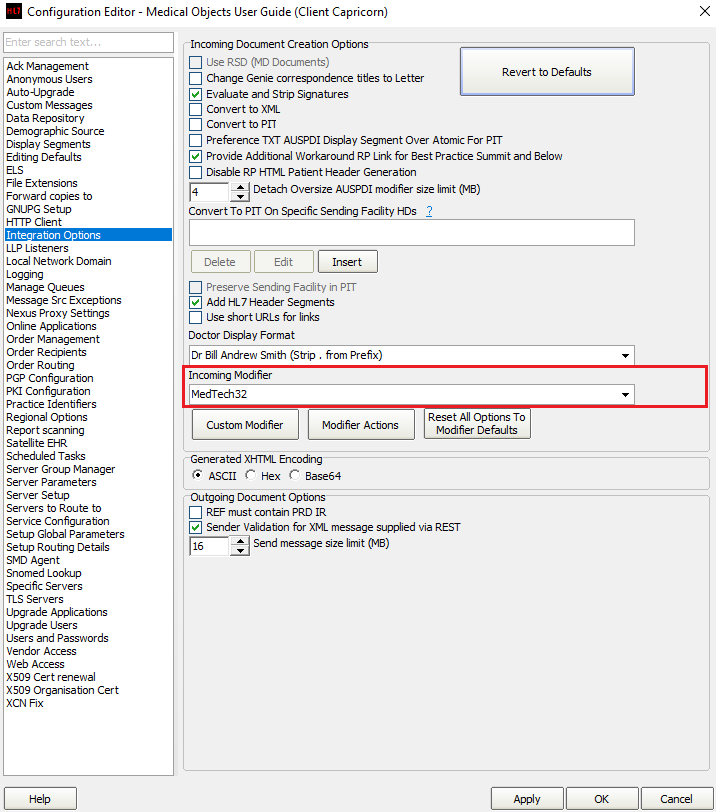
- Click on Server Parameters in the left hand side panel.
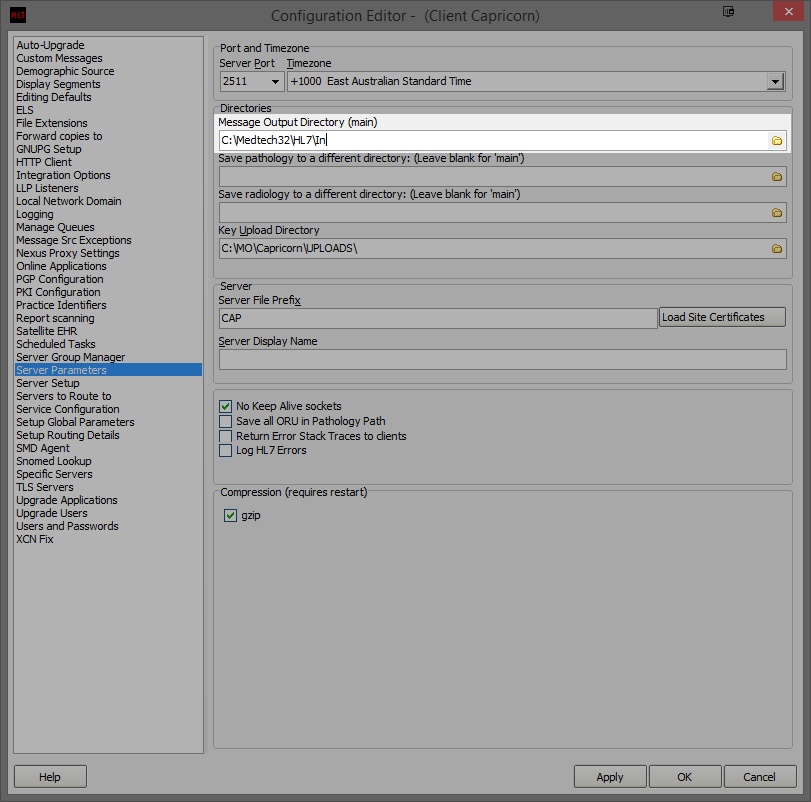
Under the Message Output Directory (Main) set the results import path.
(Capricorn installed on the server)      --> C:\Medtech32\HL7\In

(Capricorn installed on the Workstation) --> \\server\Medtech32\HL7\In
- Click Apply / OK. Capricorn configuration is complete.
MedTech32 Configuration
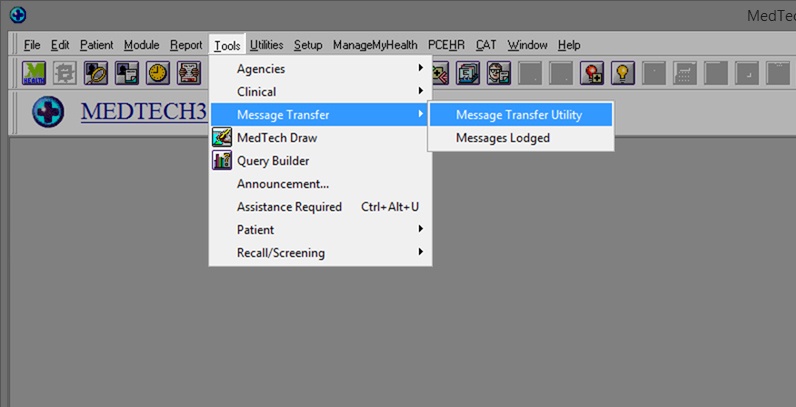
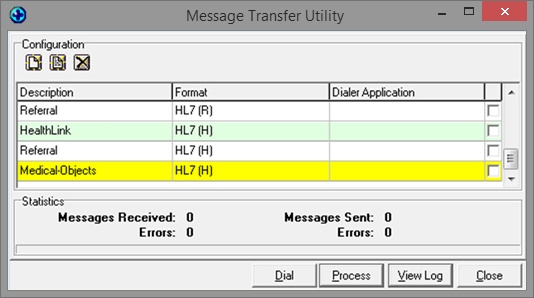
- Open the MedTech32 software. In the toolbar, Select Tools > Message Transfer > Message Transfer Utility.
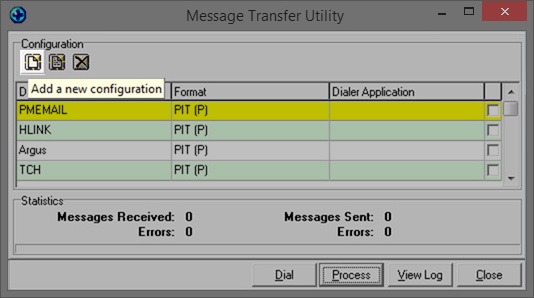
- Select the Add New Configuration button highlighted below.
- This will open the New Configuration window. In Description, Type Medical-Objects. make sure that the File Format is set to HL7(H).
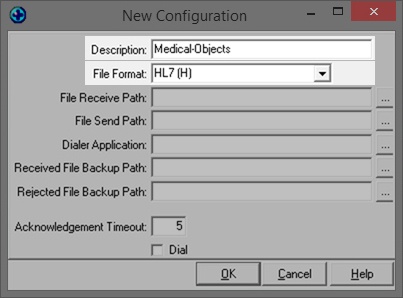
You will want to configure the file paths to the correct folder:
File Recieved Path:       -->  C:\Medtech32\HL7\In
Received File backup Path -->  C:\Medtech32\HL7\Bac
Rejected File Backup Path -->  C:\Medtech32\HL7\Reje
For Medtech Evolution, Please use the C:\Mo\Results\... directory. Make sure you are using UNC paths.File Recieved Path --> \\server\Mo\Results\In Received File backup Path --> \\server\Mo\Results\Bac Rejected File Backup Path --> \\server\Mo\Results\Reje
Done correctly, It should look like the image below.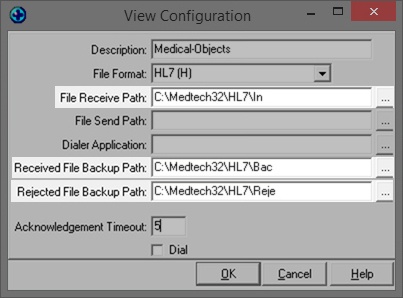
- You should see Medical-Objects in the Message Transfer Utility List. Click the process button to import.
Note:
Please note that you will also need to configure the Import paths and the scheduler on the Server. Please see this guide on how to do this.
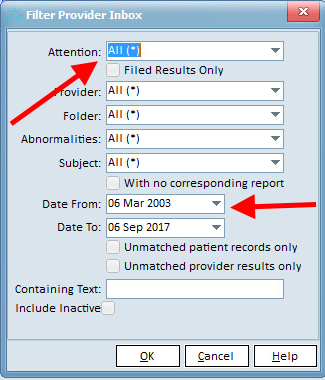
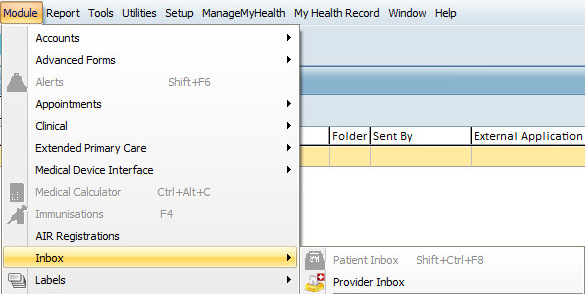
Viewing Imported Results
Module → Inbox → Provider Inbox
Choose the filter button and set the date range and Attention field (it may be best to set this to "All(*)").