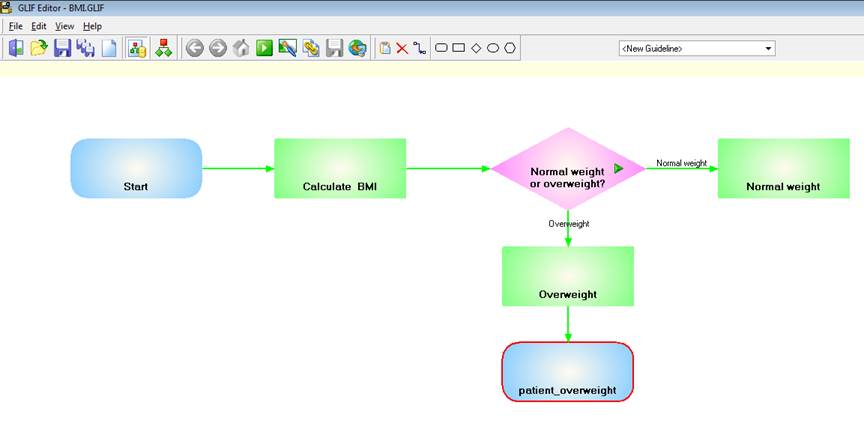
Next up is a worked example for embedding an archetype in the GLIF. We will use the archetype editor contained within the GLIF Editor and put some GELLO in the archetype itself to calculate a Body Mass Index (BMI) for some inputted values. Then we will retrieve the BMI value out of the persisted archetype instance to execute a GLIF Decision.
-- -- -- -- -- -- -- -- --
Open a blank GLIF file in the GLIF Editor and save it as BMI.GLIF
[We don't need to load test.xml as this example will use the archetype as the data source.]
Click on the the Allow Modifications button again to enable editing.
Now we build the archetype.
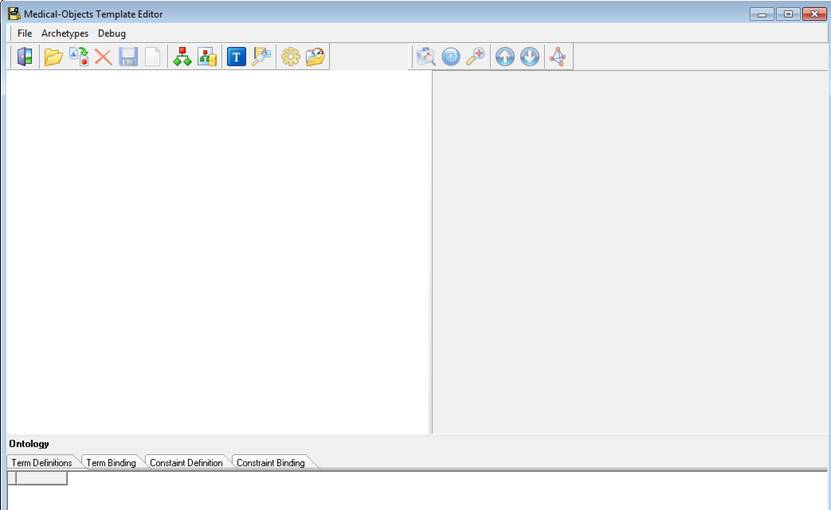
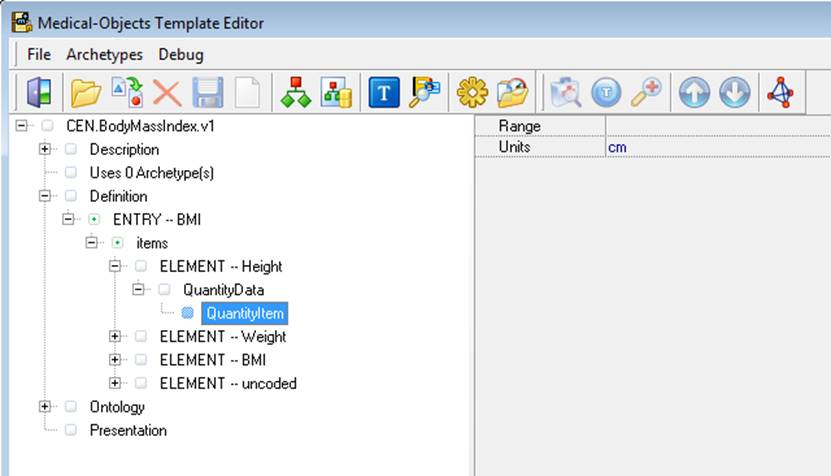
Click on the Edit Archetypes button and you get the Medical Objects Template Editor screen opening:
Click on the New Archetype button ( looks the same as the Edit Archetypes button in the GLIFEditor top menu). And give the the archetype a name such as CEN.BodyMassIndex.v1.
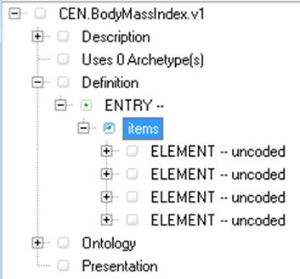
Unfold the archetype in the workspace. Unfold on 'Definition' and 'ENTRY'.
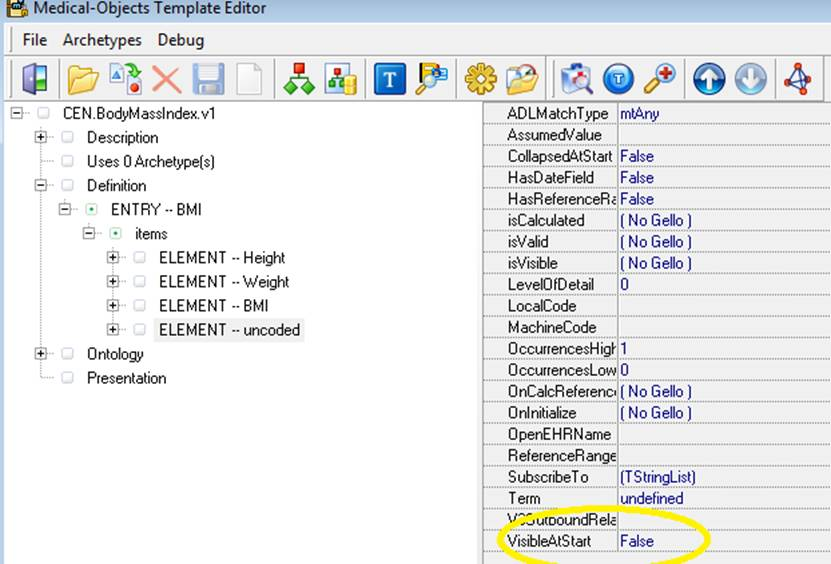
Click on 'ENTRY' and note how the right hand side (RHS) now shows attributes for this archetype node. Now right click on 'ENTRY' and go Add Local Term. Give the it the name 'BMI'. Notice this now appears in the bottom pane. We need to change the Local Code to a new at code - namely 'at0000'. You can do that by double clicking on 'at0002' and typing over it. Click then in the same row to commit it, then go to the RHS for the ENTRY node again up above where you were and change the at code again for where it says LocalCode. Don't worry that the local term has now temporarily disappeared on the LHS. It will come back.
Select Items and then right click and go Add Element, do this four times.
Click on the first ELEMENT. Then right click on it. Give it a Local term name of 'Height'. name the following two ELEMENTS 'Weight' and 'BMI' . Leave the fourth ELEMENT blank. In fact the fourth element is just there as it is a good idea to have some blank elements in reserve for if you want to extend the archetype at a later time. Hide it away now by clicking on it and saying False for VisibleAtStart in RHS .
Lets have a look in the preview mode for what we have done. Click on Preview Archetype in the editor ` The fields are blank as this is the default UI representation for the 'Any' datatype which is the default for the ELEMENT nodes we have done. We will add some types soon.
Notice the View HL7 button bottom right. This will show a sample HL7 v2 message for any archetype we enter data for in Preview. Try entering a value in a field and then finding it in the resulting HL7 message. (yes its a string type in the OBX and don't worry about PIT - its an Australian display segment)
Ok out and back in the main screen click on the Height ELEMENT and then in RHS click in the field next to ADLMatchType ( ie click on mtAny). We want Height and Weight to be Quantities - so they will have a unit and a value ( similar to the PQ data type in Gello, but not the same thing as these are different datatypes in the archetypes). So scroll through the pulldown menu ( click on the down arrow to the right ), until you find mtQuantity. Make it that and then unfold the Height ELEMENT back on LHS. Notice we have a child node called QuantityData there now. When you click on that and inspect its attributes the only thing you might want to change is the number of decimal places. To get some units, right click on QuantityData and choose New Child. Click on QuantityItem and enter units in the RHS - make it 'cm' for Height.
Do all the same for Weight and make its units to be 'kg'.
Have a look in Preview and it should look like this:
Now we should save the archetype as we go, so do this by clicking any time on the exit button in the top menu and then clicking on again in the GLIFEditor top menu , and unfolding.
Time now to calculate the BMI. But first, what units does a BMI have? It's going to be a number, so you can make it one of the Integer options, or leave it as mtAny. The formula to calculate a BMI is weight in kilograms divided by height in meters squared. We will need to convert our cm units.
For the BMI ELEMENT node, click on [No Gello] field next to the isCalculated attribute on the RHS. Then click on the '...' far right hand side of this field:
It should look familiar, as we are in a GELLO editor enviornment again ( but this time it's to do event handling for the archetype instance). Note the context statement is set up for this, and we will not need to return a GLIF Decision Result this time either. We want to return a number based on previously inputted values in the higher nodes. This is how to do it.
Let's set up the GLIF to allow population of the archetype we have so far. We can then use this to write code against.
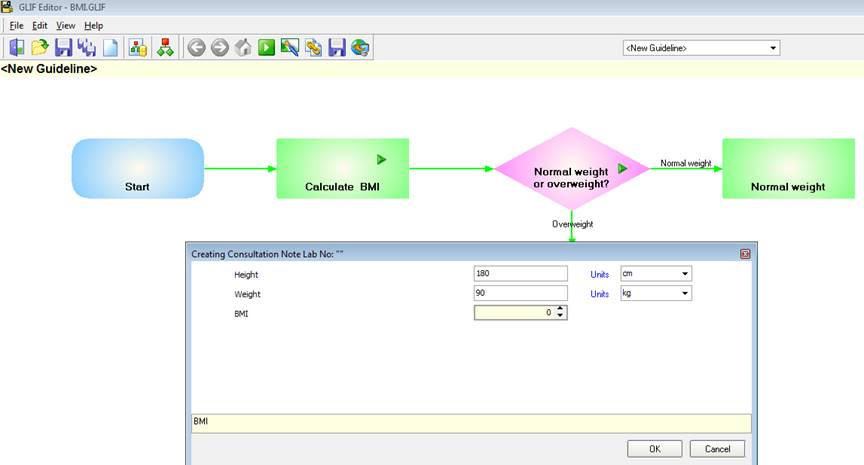
Close out of the archetype editor, and then right click on the 'calculate BMI' action step. Go Edit Properties . Click on the bottom of the two Add buttons. Choose Add Archetype. Click on CEN.BodyMassIndex.v1. Leave everything else alone, then ok out twice. Save the GLIF file. Ok we have a green arrow in the action step now. Turn off the Allow Modifications button. Click on the new little green arrow in "Calculate BMI". Populate the archetype with the values as in the image, and go OK:
Now go back into the archetype editor and open up the GELLO for isCalculated for the BMI node (the one lower down with the at-code of at0004).
We need to get any stored height and weight out of the archetype. Let's start with getting the height.
     Context CEN_BodyMassIndex_v1::ArchetypeRoot
     Let ht: PQ = template.BMI.items.Height.value.oclAsType(PQ)
     ht.value
Because we are setting the context to be that of the root of the archetype CEN_BodyMassIndex_v1 we are stepping down through the tree to height which is an Observation then we are getting the value out of that as a PQ. Then for testing purposes we are returning a number which is the value of the PQ. Let's test that in preview mode:
Well thats a pretty bad BMI value if it was for real! So let's trust we are on the right path with the GELLO and go back to the GELLO editor and complete the code:
Context CEN_BodyMassIndex_v1::ArchetypeRoot
     Let ht: PQ = template.BMI.items.Height.value.oclAsType(PQ)
     Let wt: PQ = template.BMI.items.Weight.value.oclAsType(PQ)
     --- get result
     Let htInMetres: Real = ht.value/100
     wt.value/(htInMetres.power(2))
In preview:
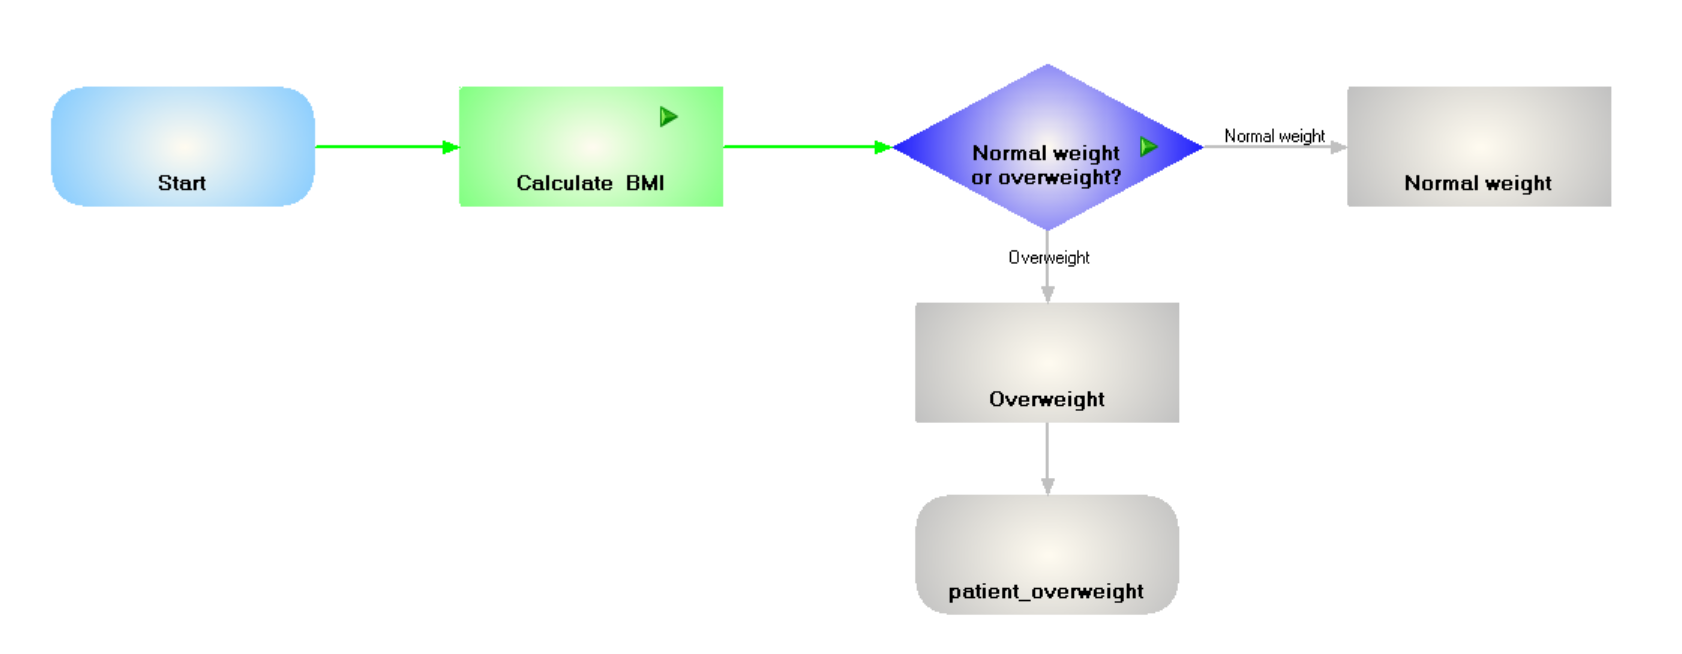
Good, so close out of the archetype and save the GLIF file. Now lets run the GLIF and see if we get all that working:
The GLIF is running past the Calculate BMI action step so we can fix that up by unclicking on the Run button, then go back to edit mode with the Allow Modifications button, and right click on the Action step , go Edit Properties, then click on Wait for Action Done and Ok. Now in Run mode it pauses on the Action step so we click the green arrow in the green Action step and we have some persisted data.
Now we need to go back to the "Overweight" arrow GELLO for the subsequent decision (yep after Allow Modifications).
We need a way to get at the persisted archetype data in particular the BMI value, to do a GLIF Decision Result for this and the other decision execution arm. We use a dot notation to get at the path for the required archetype node ( the '1.1.3') and this forms part of a local variable the used to select the correct Observation presenting through the vmr. The way to find the dot path is to use the Select Archetype Path button back in the archetype editor. Here is the entire GELLO code for this decision ( its been a long tutorial!):
Context GLIF_VMR::GLIFDecisionNode
     Let derivedArchetypeNodeValue:CD = CD {code = '1.1.3',
      codeSystem = 'CEN.BodyMassIndex.v1',
      codeSystemName = 'CEN.BodyMassIndex.v1'}

     Let BMI_Obs: Observation = vmr.observations ->select(observationCode.implies(derivedArchetypeNodeValue).asBoolean())->last()
     Let BMI : Real = BMI_Obs.value.oclAsType(REAL).value

     Let q: String = "Is patient overweight?"
     Let aWeight: Integer = 50
Let result:GLIFDecisionResult =
     if not BMI.oclIsDefined() then
      GLIFDecisionResult{Question = q,Answer = unknown, Reason = "No BMI data entered",Weight = aWeight}
       else
        if BMI > 25
       then
      GLIFDecisionResult{Question = q,Answer = true, Reason = "Patient is overweight",Weight = aWeight}
       else
      GLIFDecisionResult{Question = q,Answer = false, Reason = "Patient is not overweight",Weight = aWeight}
      endif
      endif
result
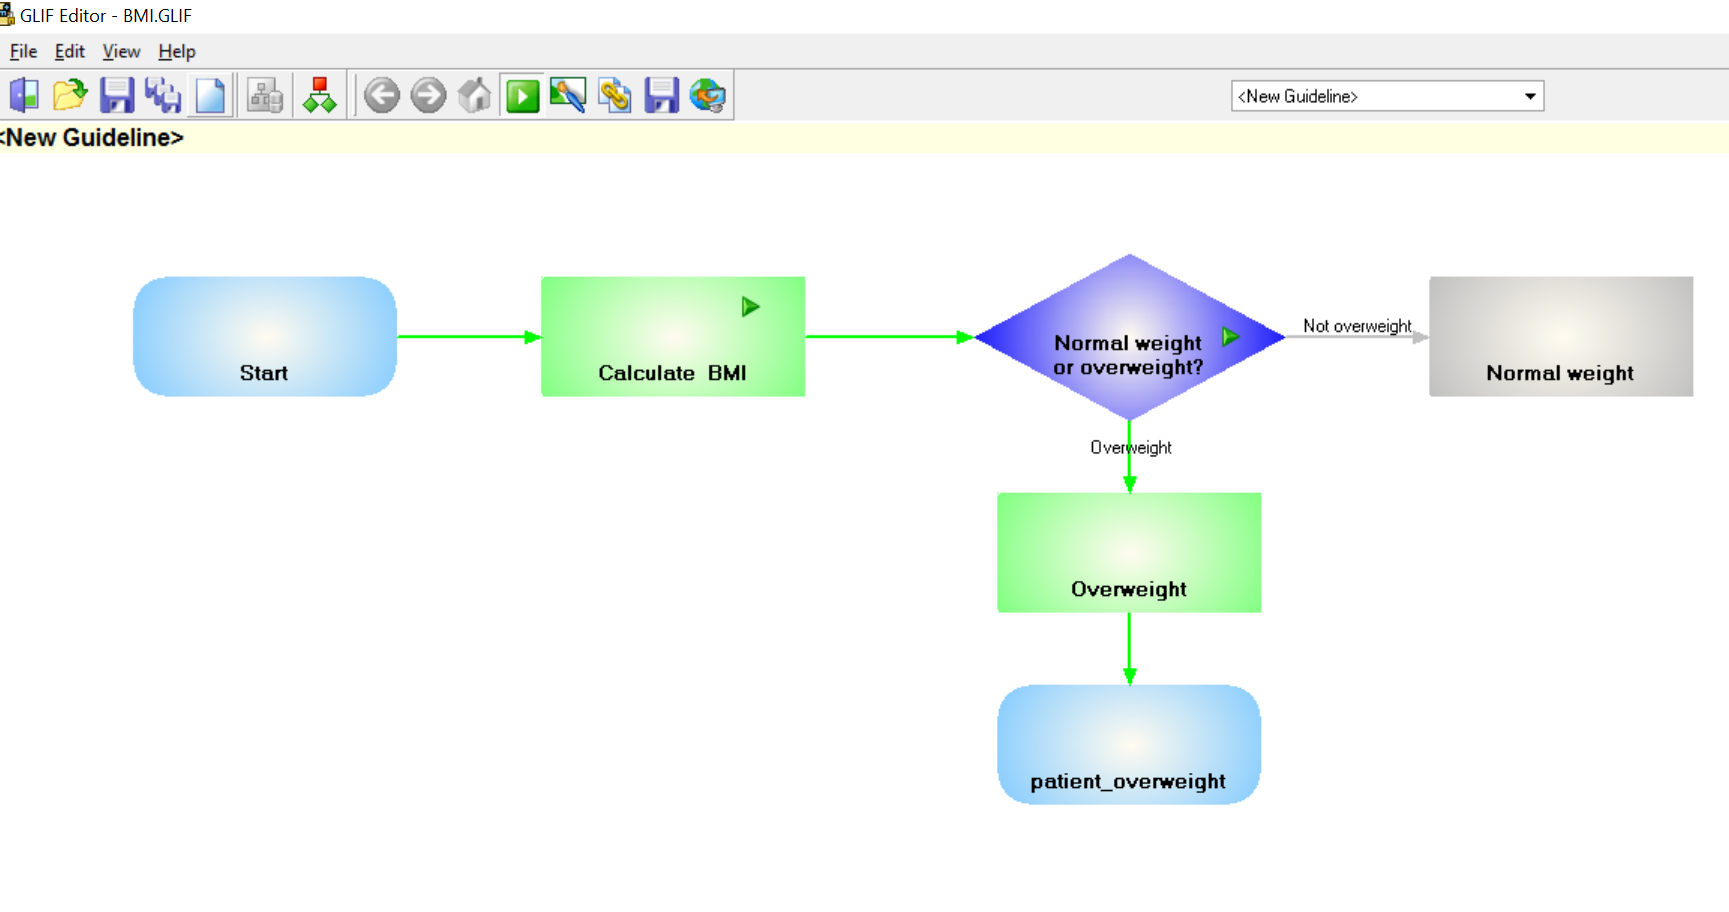
And again putting similar code but with changes in the other decision arrow and running the GLIF file with a height entered on 180 cm and a weight of 90 kg we get:
Notice the changed name for the other arrow. All we have so far really is whether the patient is overweight or not. We should add another arrow called "Underweight" for a BMI below say 18.5 .Then we could adjust the code for "Not overweight" and call it " Normal weight"
Anyway thats it for now. Next tutorial will be on using GELLO code in Patient states.
