Overview
Medical-Objects’ Explorer Online is an online software solution specifically designed for health practices to streamline and automate the common tasks of practice management. Explorer Online (EO) offers a diverse range of features specialising in allied health and makes creating and managing clinical correspondence simple, with the ability to seamlessly receive and send clinical correspondence from your personal desktop, laptop or tablet. EO has the ability to hold a confidential client database and clinical documentation, perform correspondence between health professionals and clients, send and receive online forms for client intake and assessment, automate assessment scoring and interpretation, and customise clinical note templates - all integrated in one place. Some examples of ways in which EO can be used as a part of Occupational Therapy practice include registering and intaking new clients, sending out client questionnaires or self-assessments, writing and storing progress notes following each appointment, reviewing client assessments and results, sending confidential client files and much more.
Explorer Online Dashboard
Opening Explorer Online will bring you to the ‘Dashboard’ of Explorer Online. The Dashboard is the default page that will appear once you have logged in.

The Dashboard is split into three sections: Navigation Menu, Sidebar and the main content area which includes your recently loaded patients.
Navigation Menu
These menus will direct you to the main features of the application.
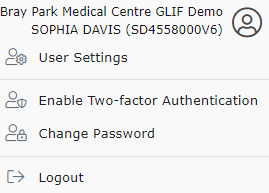
User Menu
This menu shows your user details, and if clicked, will open a menu to access settings, change your password and logout.
Sidebar
Holds all of the patients and documents.
Patients Section in Sidebar:
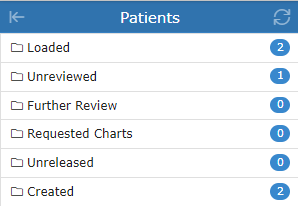
Loaded – contains any patients you’ve done a lookup on or retrieved documents for.
Unreviewed – contains patients that have unreviewed documents. Selecting documents from this folder will give you the option to mark the document as reviewed.
Further Review – contains patient documents that have been parked. A document can be parked by clicking the “Park” document action button.
Requested Charts – contains patient documents with the requested chart status. A document can be moved to the Requested Charts folder by clicking the ‘Request Chart’ document action button.
Unreleased – contains patient documents that have not yet been released. Documents in this folder can either be released or deleted.
Created – contains a recent list of documents that you have created. This includes both progress notes and documents that you have sent.
Documents Section in Sidebar:
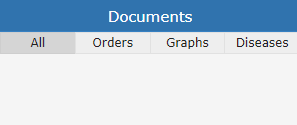
This section of the sidebar will show all the documents that the selected patient has.
*NOTE: The Dashboard includes the option to complete a 'Dashboard Tour' which will step through the instructions outlined above.
Medical-Objects offers a platform that details how to use Explorer Online through their guides. The platform is called Knowledgebase and can be accessed here. The guides on Knowledgebase provide step by step instructions including how to log in and out of Explorer Online and further details on the Dashboard layout.
Managing Patients
Creating a New Client
Patients → Register Patient
Select the Patients button in the top navigation and then click Register Patient in the dropdown menu.
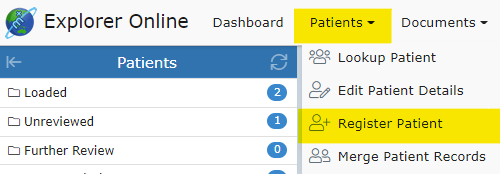
Once clicked, a window will pop up with the text fields to input patient information, as seen below:
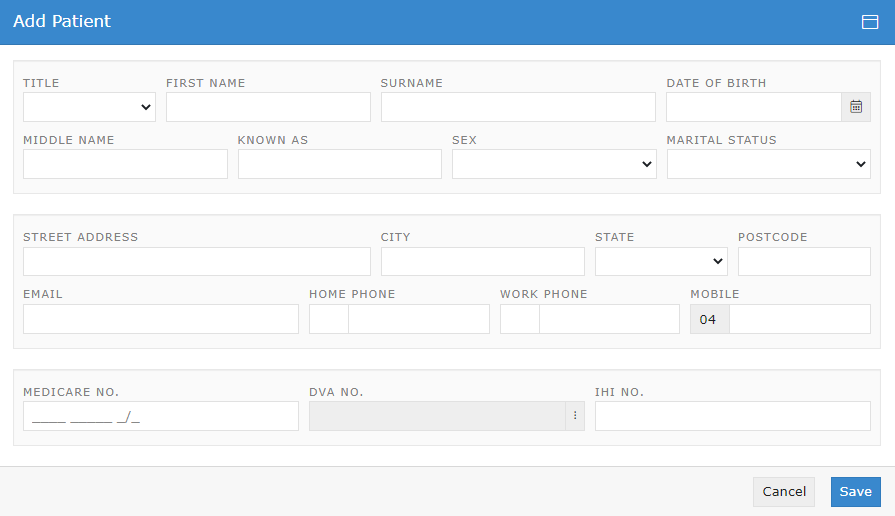
Fill in the client's details including their first name, surname and date of birth.
*NOTE: It is recommended to enter as many of the fields as possible to ensure the client's documents include as much information as possible.
Patient Lookups
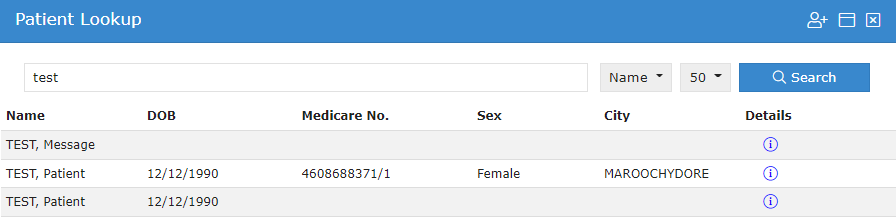
Patient → Lookup Patient
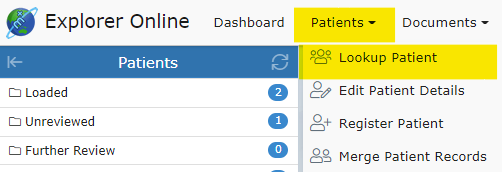
As a part of information gathering, Occupational Therapist’s require client information such as the client’s demographics including age, location, and family contacts as well as previous reports. By looking up a patient, clinicians can view clients’ details and all of their documents. The patient lookup window is used to search for current clients that your practice has already created with Medical-Objects. You have three different options in which to search for: their name; ID; or lab number. You can change these on the dropdown to the right of the search field. You can then type a search term into the text field and press the Search button.
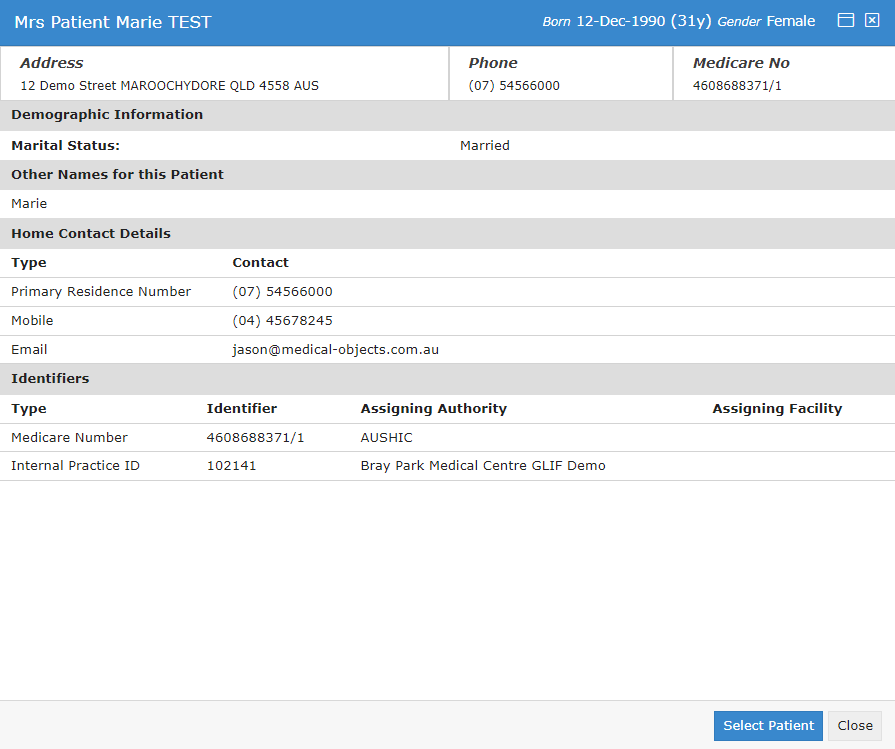
Clicking on the ![]() below Details will bring up the client's details. An example of the layout of the client detail's is shown below.
below Details will bring up the client's details. An example of the layout of the client detail's is shown below.
Clicking on the client within the list or clicking 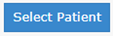 in the client details viewer will load the client and all of their documents.
Editing Patient Details:
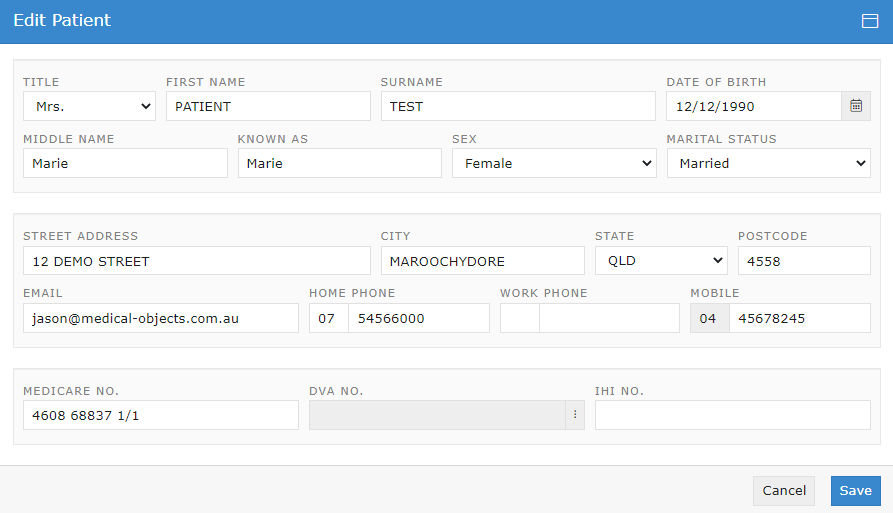
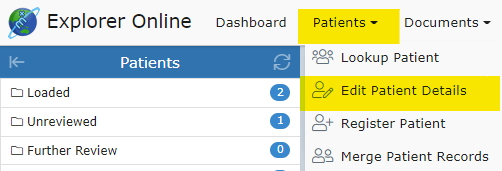
Patients → Edit Patient Details
To edit a client's details, select the Patients button and then click Edit Patient Details in the dropdown menu.
This will load the patient lookup window. Search and select on the client you wish to edit details. Once the client has been selected, the Edit Patient window will pop up. Fill out the fields that you wish to edit or add, and then click the Save button.
Documents
The Documents tab is spit into 3 different sections: Send; Create; and Manage.
Sending Documents
Documents → Document
Examples of how documents can be sent or received include:
- sending letters to the client’s doctor once assessments are complete with associated score
- sending/receiving reports or progress updates to/from any other health professionals the client is involved with (e.g. their paediatrician, psychologist, dietician, etc.)
- sending/receiving patient questionnaires or self-assessments to/from the client
- a client’s school requesting documentation from the clinician
- sending/receiving relevant documents to/from the client’s school or day care
- sending/receiving any other type of document, PDF or image file
*NOTE: A clinician is required to be setup with Medical Objects to be able to receive incoming documentation. Being setup with Medical Objects is quick, simple and also free – completed by either filling out an online form or calling the Sales team. The setup time takes about 10 minutes.
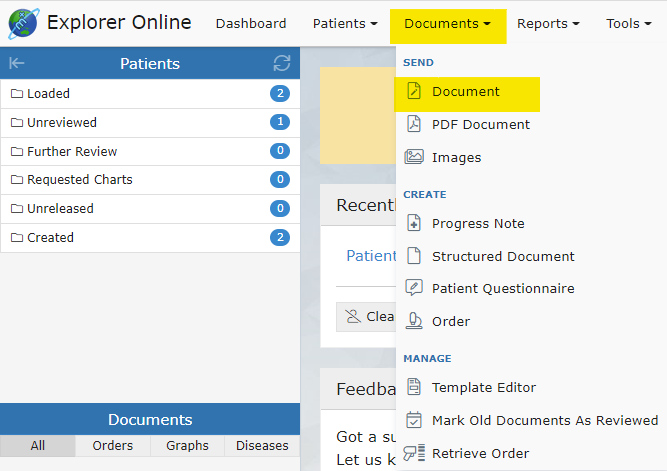
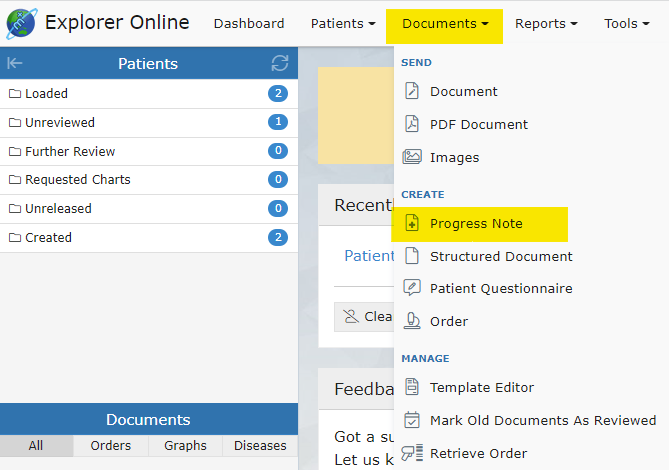
To send a document, select Documents in the main Navigation Menu and click Document in the drop-down menu:
This will open the 'Send Document' page:
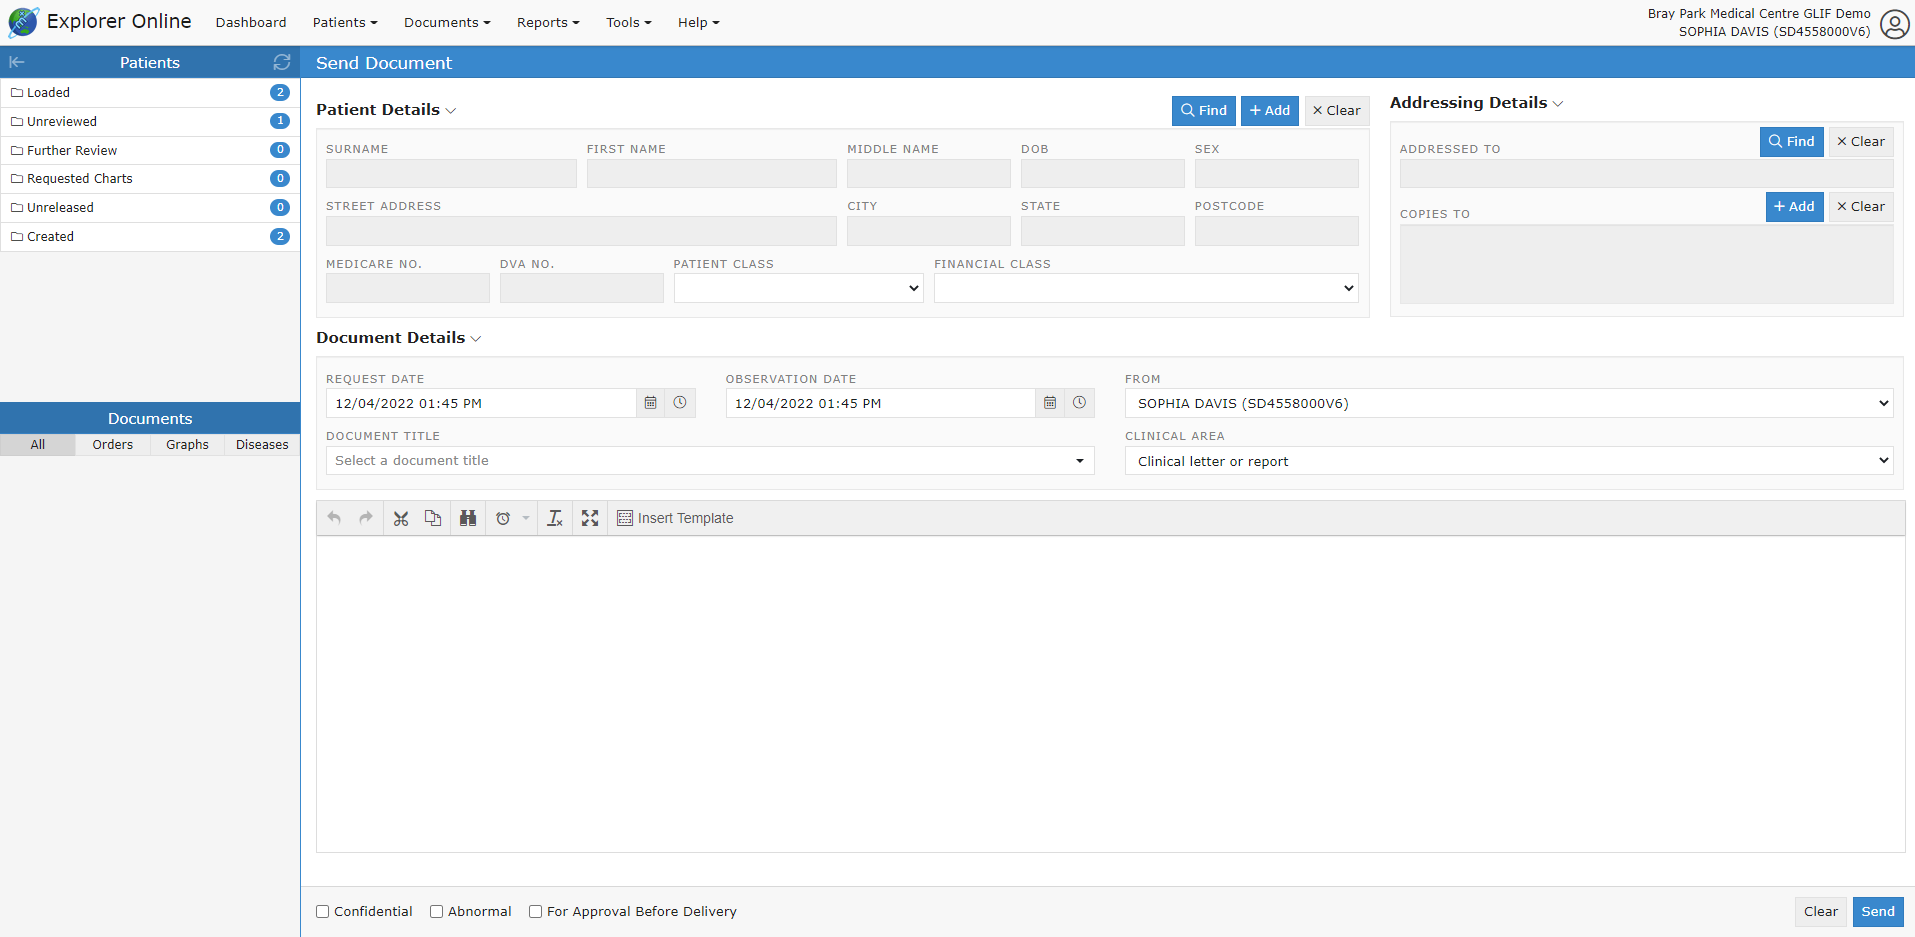
If you have a patient loaded in the Patients Sidebar, the Patient Details will automatically be filled out. If not, then you can click the Find button in the Patient Details section and find the patient details required. You can also Add a patient on this screen, if the patient whose document you want to send isn’t in the system yet. Once the patient’s details have been loaded, select the title of your document as well as who the report is addressed to.
Address Details
To add a practitioner to send to, go to the Address Details section. To add providers, click the Find and Add buttons, to either add the main provider, or to send copies to certain providers.

Creating Documents
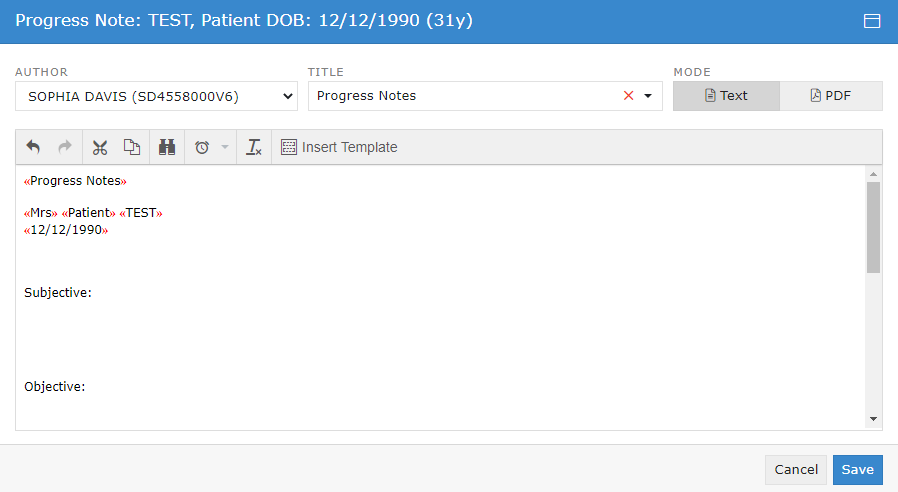
Progress Notes
Documents → Progress Note
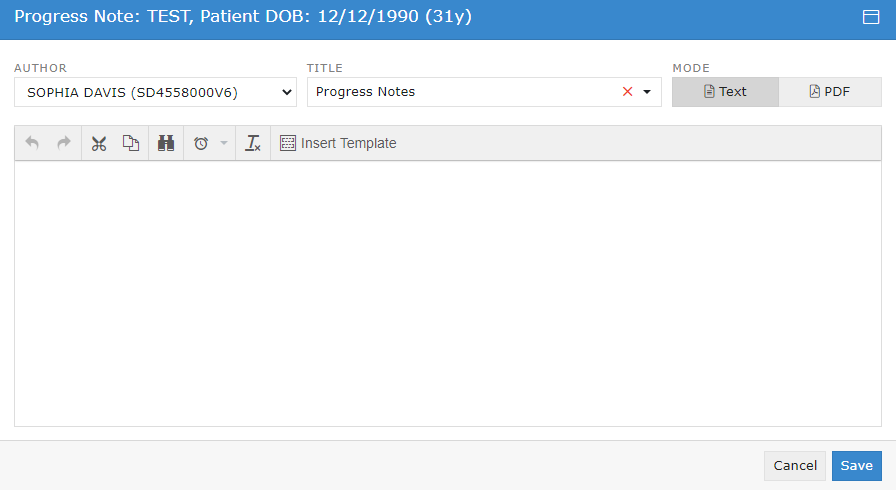
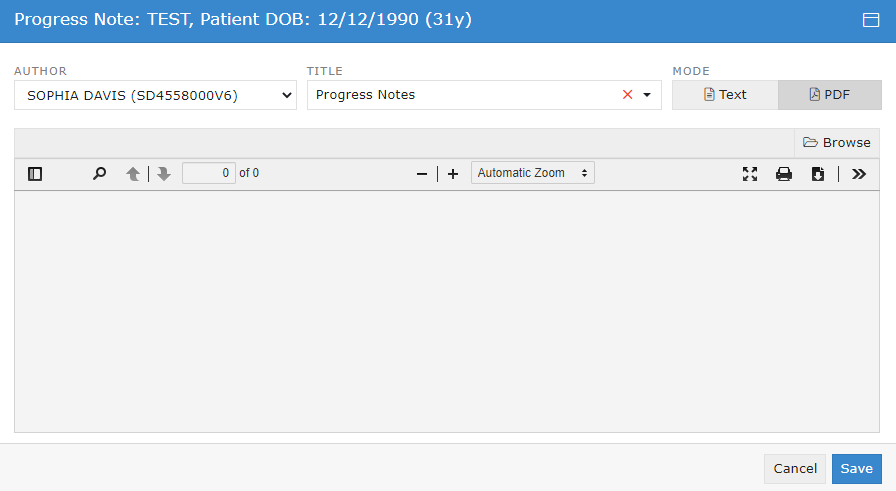
Writing progress notes can be completed on EO by clicking the ‘Progress Note’ option under the ‘Documents’ Tab.
Search for the client’s name and select the client you wish to write a progress note for.
A free text space is provided to type a note that will be saved under the client’s name.
The mode can be as a free text option:
Or as an uploaded PDF file (by clicking the Browse button and choosing the file):
Customised note structures can also be inserted into the progress note by clicking ‘Insert Template’:
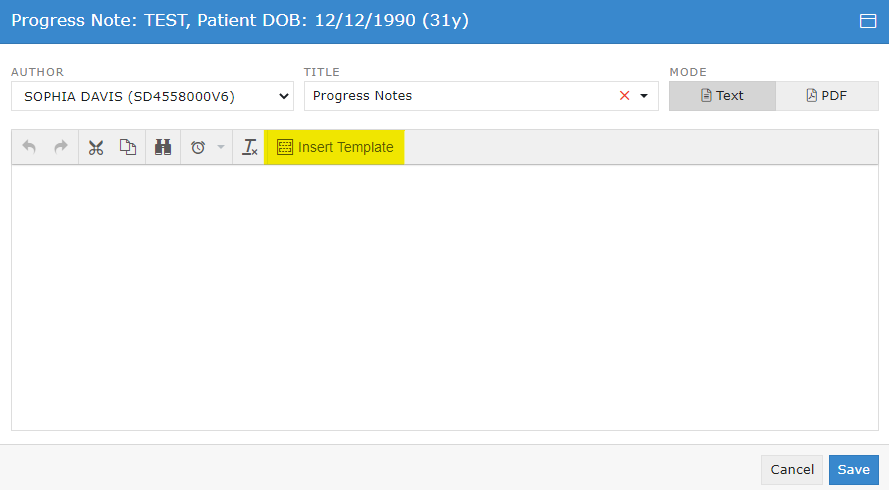
and choosing from the selected existing templates and clicking ‘Load’.

The layout of the selected template will then be uploaded into the current progress note and can be edited as needed.