Overview
Medical-Objects’ Explorer Online is an online software solution specifically designed for health practices to streamline and automate the common tasks of practice management. Explorer Online (EO) offers a diverse range of features specialising in allied health and makes creating and managing clinical correspondence simple, with the ability to seamlessly receive and send clinical correspondence from your personal desktop, laptop or tablet. EO has the ability to hold a confidential client database and clinical documentation, perform correspondence between health professionals and clients, send and receive online forms for client intake and assessment, automate assessment scoring and interpretation, and customise clinical note templates - all integrated in one place. Some examples of ways in which EO can be used as a part of Occupational Therapy practice include registering and intaking new clients, sending out client questionnaires or self-assessments, writing and storing progress notes following each appointment, reviewing client assessments and results, sending confidential client files and much more.
Explorer Online Dashboard
*NOTE: The EO Dashboard includes the option to complete a 'Dashboard Tour' which briefly steps through the instructions outlined below.
Opening Explorer Online will bring you to the ‘Dashboard’ of Explorer Online. The Dashboard is the default page that will appear once you have logged in.

The Dashboard is split into three sections: Navigation Menu, Sidebar and the main content area which includes your recently loaded patients.
Navigation Menu
These menus will direct you to the main features of the application.
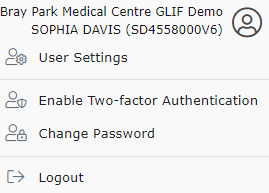
User Menu
This menu shows your user details, and if clicked, will open a menu to access settings, change your password and logout.
Sidebar
The sidebar holds the loaded patient and their documents.
Patients Section in Sidebar:
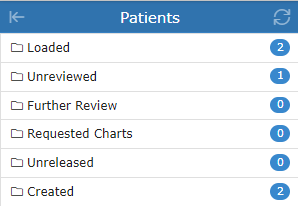
Loaded – contains any patients you’ve done a lookup on or retrieved documents for.
Unreviewed – contains patients that have unreviewed documents. Selecting documents from this folder will give you the option to mark the document as reviewed.
Further Review – contains patient documents that have been parked. A document can be parked by clicking the “Park” document action button.
Requested Charts – contains patient documents with the requested chart status. A document can be moved to the Requested Charts folder by clicking the ‘Request Chart’ document action button.
Unreleased – contains patient documents that have not yet been released. Documents in this folder can either be released or deleted.
Created – contains a recent list of documents that you have created. This includes both progress notes and documents that you have sent.
Documents Section in Sidebar:
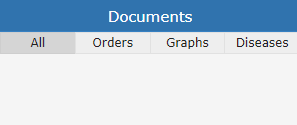
This section of the sidebar will show all the documents that the selected patient has.
Managing Patients
Creating a New Client
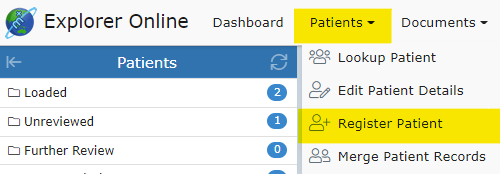
Patients → Register Patient
Select the Patients button in the top navigation and then click Register Patient in the dropdown menu.
Once clicked, a window will pop up with the text fields to input patient information, as seen below:
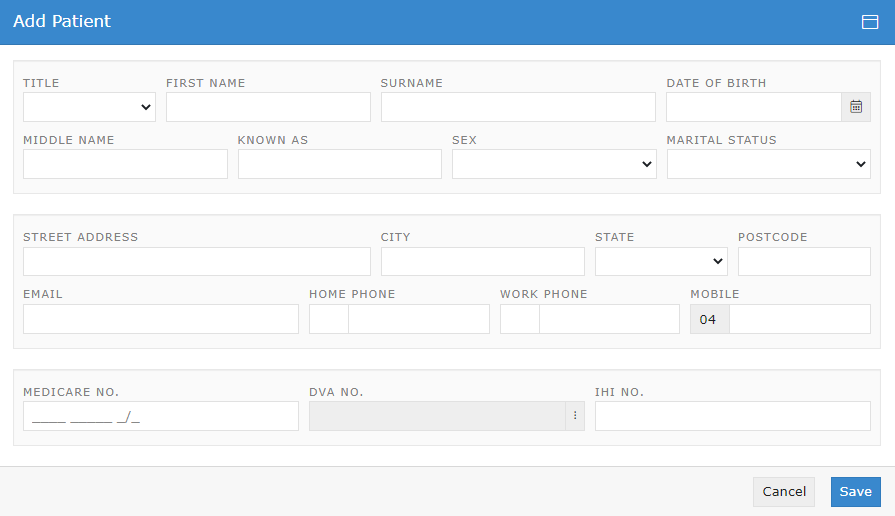
Fill in the client's details including their first name, surname and date of birth.
*NOTE: It is recommended to enter as many of the fields as possible to ensure the client's documents include as much information as possible.
Patient Lookups
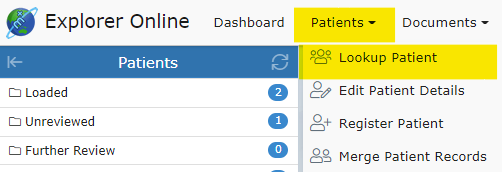
Patient → Lookup Patient
As a part of information gathering, Occupational Therapist’s require client information such as the client’s demographics including age, location, and family contacts as well as previous reports. By looking up a patient, clinicians can view clients’ details and all of their documents. The patient lookup window is used to search for current clients that your practice has already created with Medical-Objects. You have three different options in which to search for: their name; ID; or lab number. You can change these on the dropdown to the right of the search field. You can then type a search term into the text field and press the Search button.

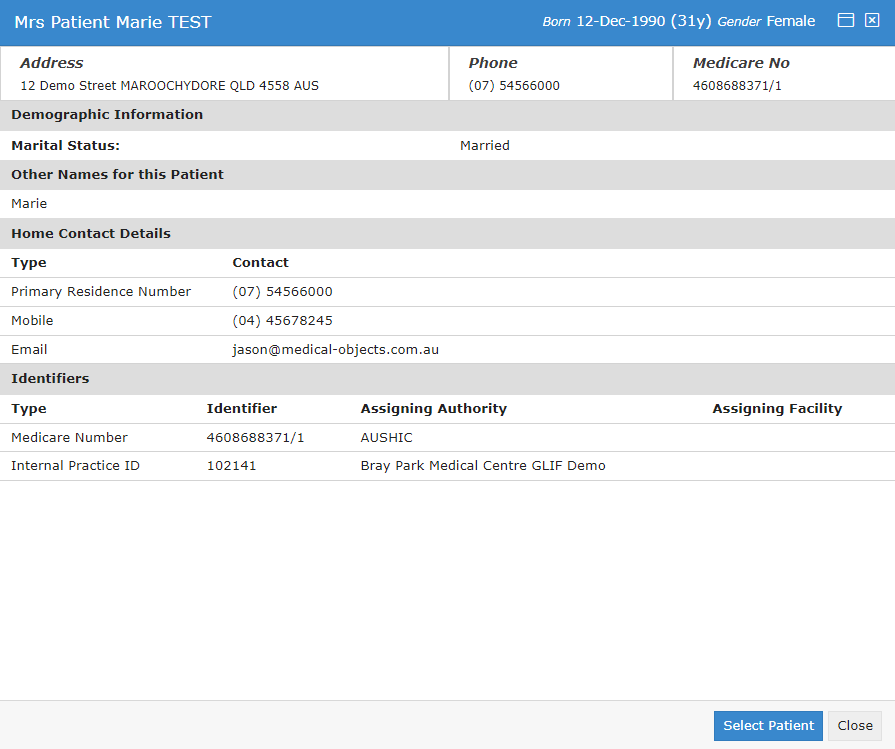
Clicking on the ![]() below Details will bring up the client's details. An example of the layout of the client detail's is shown below.
below Details will bring up the client's details. An example of the layout of the client detail's is shown below.
Clicking on the client within the list or clicking  in the client details viewer will load the client and all of their documents.
Editing Patient Details:
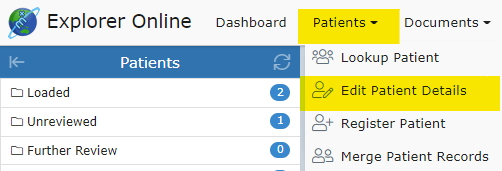
Patients → Edit Patient Details
To edit a client's details, select the Patients button and then click Edit Patient Details in the dropdown menu.
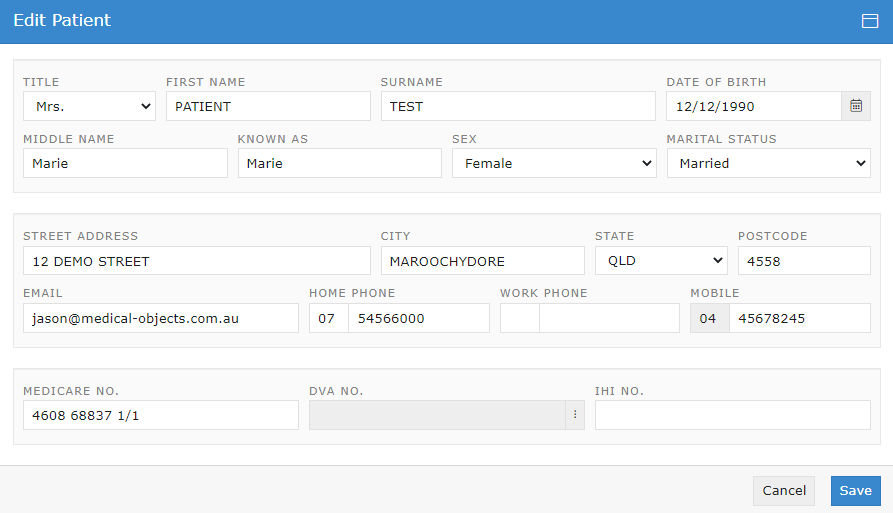
This will load the patient lookup window. Search and select the client you wish to edit details. Once the client has been selected, the 'Edit Patient' window will pop up. Fill out the fields that you wish to edit or add, and then click the Save button.
Documents
The Documents tab is spit into 3 different sections: Send; Create; and Manage.
Sending Documents
Documents → Document
Examples of how documents can be sent or received include:
- sending letters to the client’s doctor once assessments are complete with associated score
- sending/receiving reports or progress updates to/from any other health professionals the client is involved with (e.g. their paediatrician, psychologist, dietician, etc.)
- sending/receiving patient questionnaires or self-assessments to/from the client
- a client’s school requesting documentation from the clinician
- sending/receiving relevant documents to/from the client’s school or day care
- sending/receiving any other type of document, PDF or image file
*NOTE: A clinician is required to be setup with Medical Objects to be able to receive incoming documentation. Being setup with Medical Objects is quick, simple and also free – completed by either filling out an online form or calling the Sales team. The setup time takes about 10 minutes.
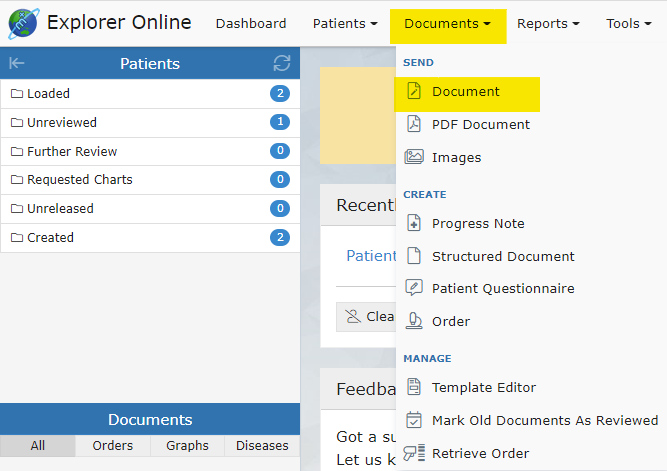
To send a document, select Documents in the main Navigation Menu and click Document in the dropdown menu:
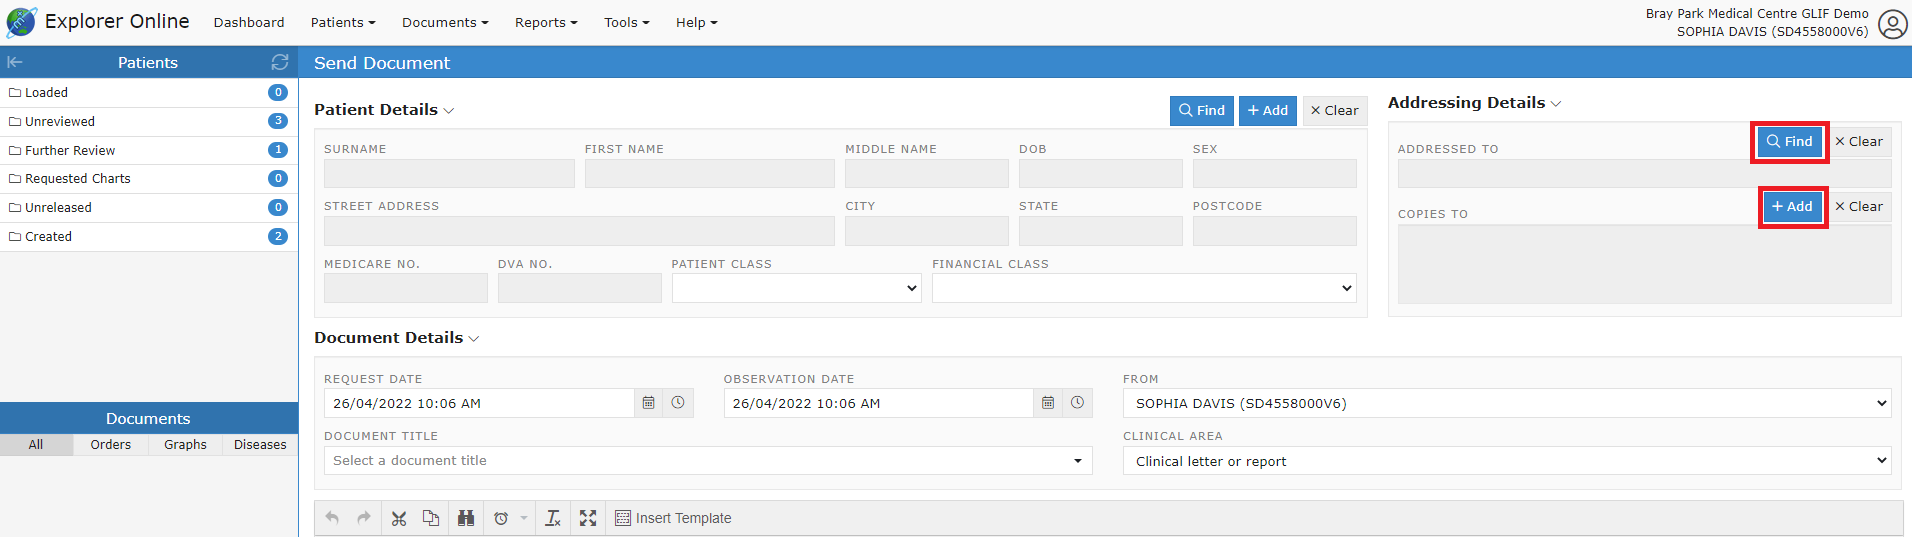
This will open the 'Send Document' page:
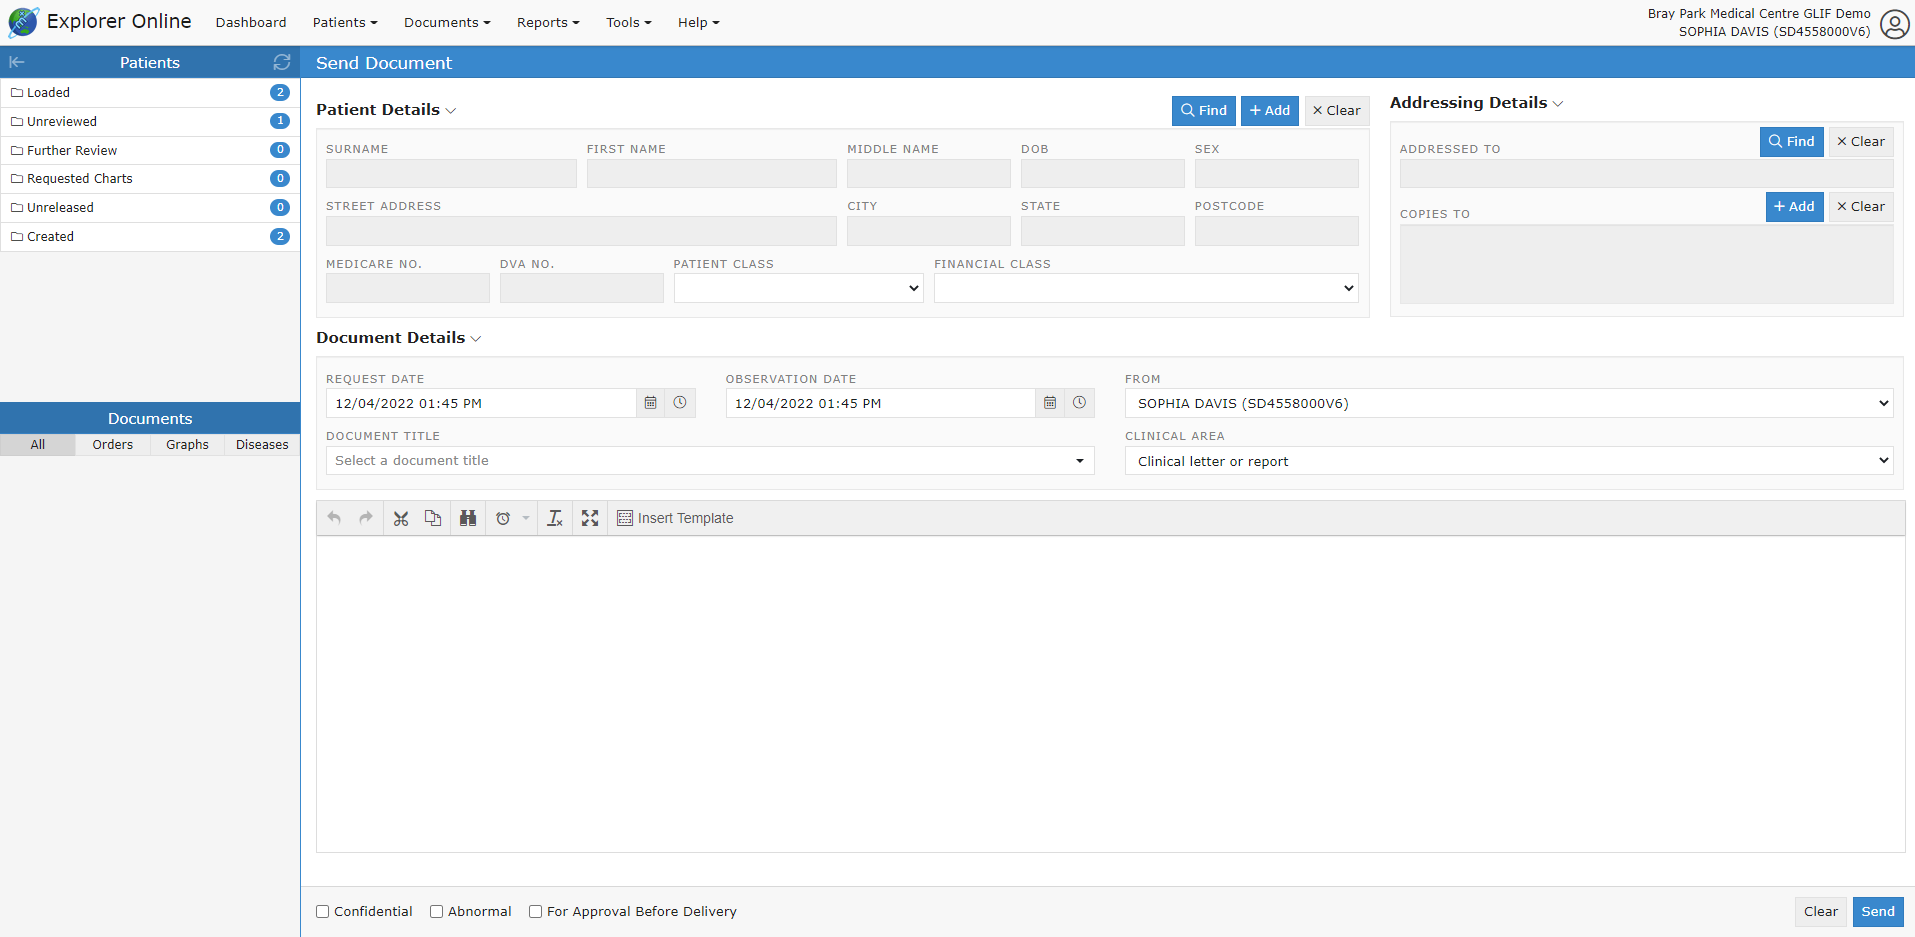
If you have a patient loaded in the Patients Sidebar, the Patient Details will automatically be filled out. If not, then you can click the Find button in the Patient Details section and find the patient details required. You can also Add a patient on this screen, if the patient whose document you want to send isn’t in the system yet. Once the patient’s details have been loaded, select the title of your document as well as who the report is addressed to.
Addressing Details
To add a practitioner to send to, go to the Address Details section. To add providers, click the Find and Add buttons, to either add the main provider, or to send copies to certain providers.
Creating Documents
Progress Notes
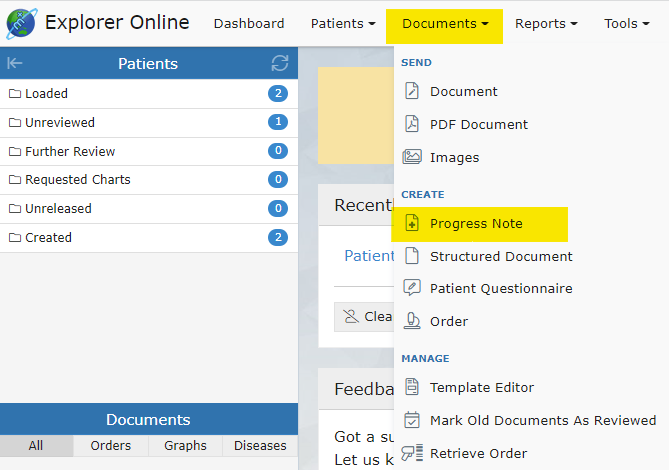
Documents → Progress Note
Writing progress notes can be completed on EO by clicking the Progress Note option under the Documents tab.
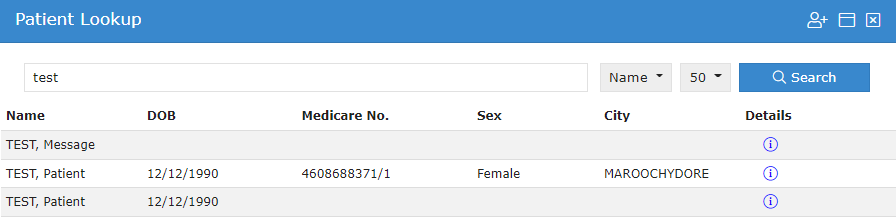
Search for the client’s name and select the client you wish to write a progress note for.
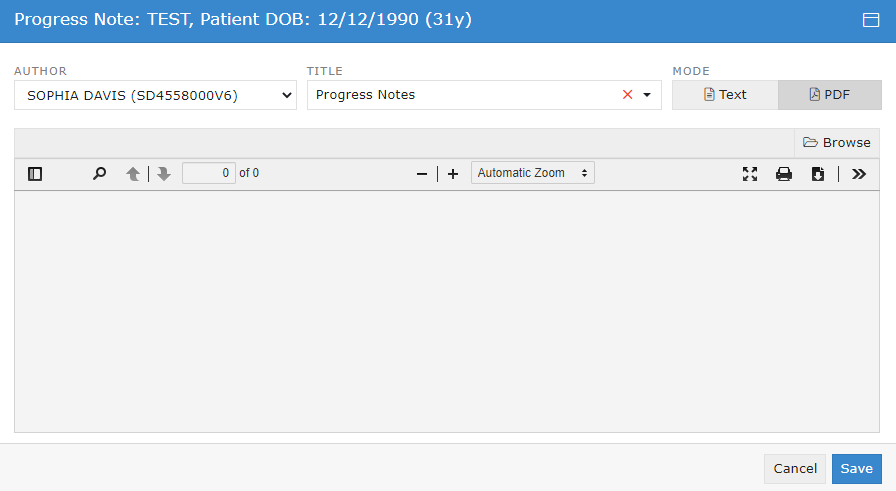
A free text space is provided to type a note that will be saved under the client’s name.
The mode can be as a free text option:
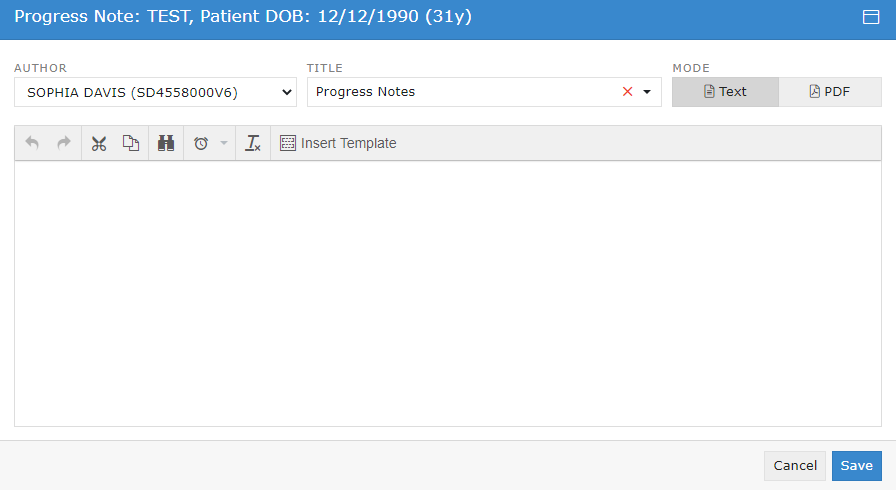
Or as an uploaded PDF file (by clicking the Browse button and choosing a file):
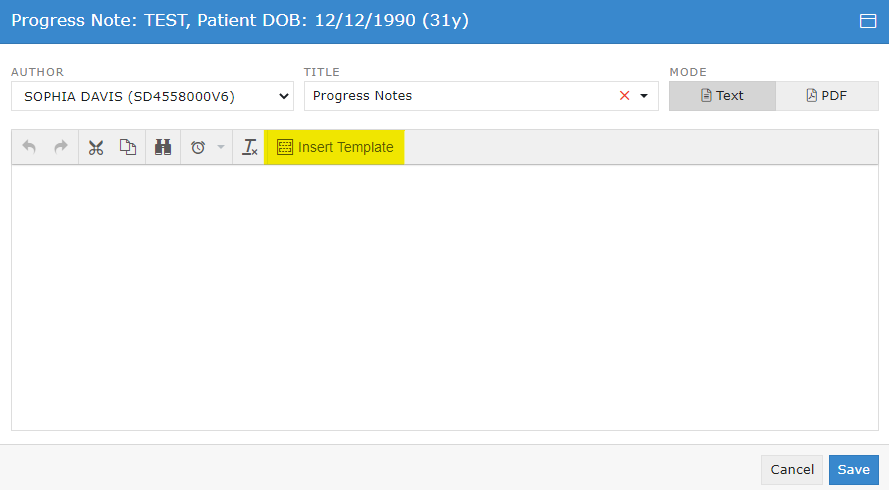
Customised note structures can also be inserted into the progress note by clicking Insert Template:
and choosing from the selected existing templates and clicking Load.
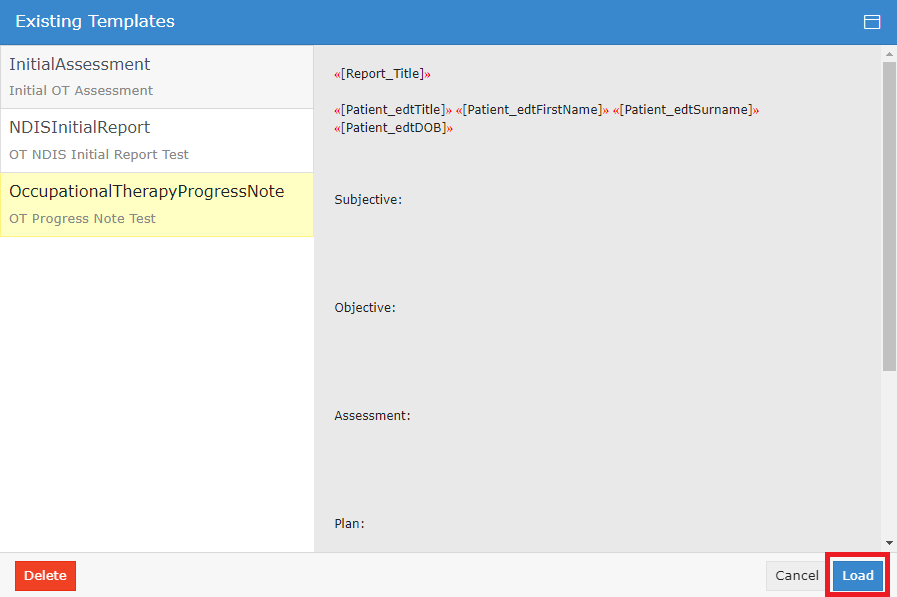
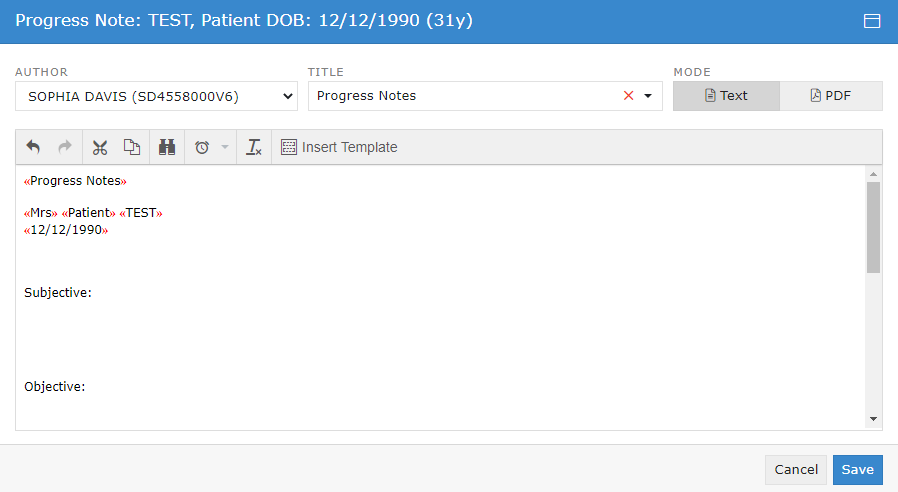
The layout of the selected template will then be uploaded into the current progress note and can be edited as needed.
Structured Documents
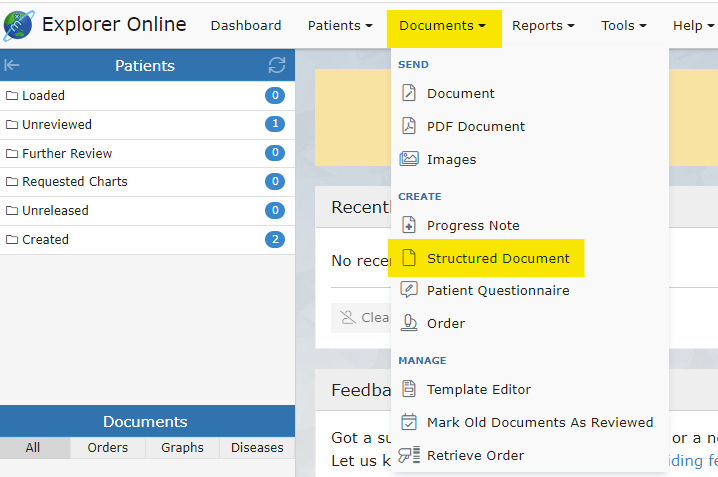
Documents → Structured Document
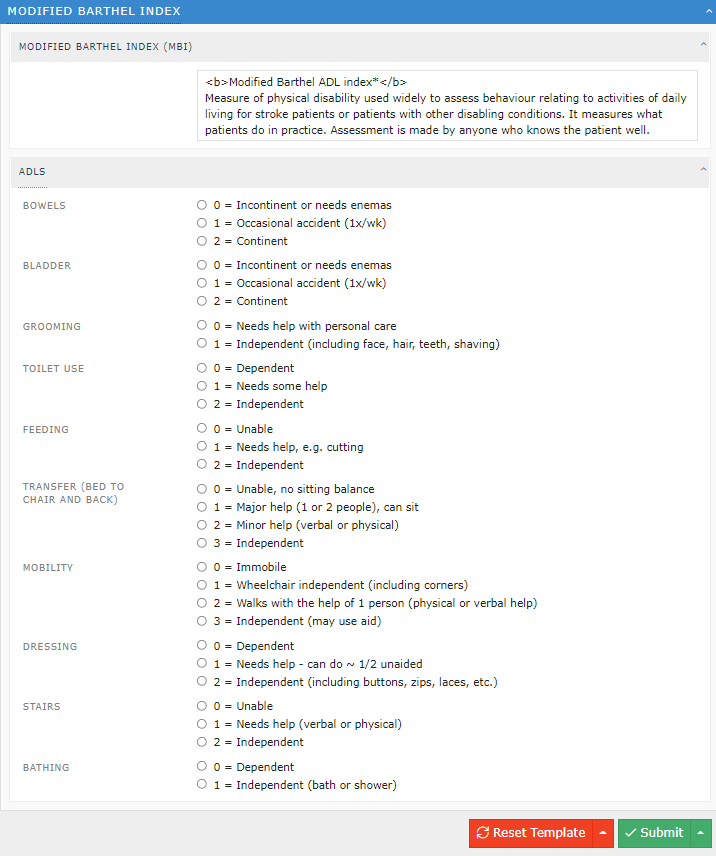
A collection of Occupational Therapy-related assessments has been created and currently exist on Explorer Online as ‘Structured Documents’. These assessments are located in the Structured Documents tab under Documents.
These assessments have been created and uploaded to Explorer Online. With licensing permission, other assessments can be created and utilised on Explorer Online to complete assessments with clients or to send the assessment to a client, to instantly calculate the assessment score and it’s scoring interpretation, to send the assessment and results, and to store the assessments under the client’s file on EO.
Other assessments can be created for the purpose of re-assessment to determine client performance progress as a growth percentile in which the data could be reused in further clinical queries. If you require additional patient questionnaires to be digitised or added, please contact the Sales team here.
A list of the created assessments can be found in the Structured Documents on Explorer Online.
Examples of existing OT-related structured documents include:
- New Client Form
- Parent Questionnaire
- Initial Assessment
- WHODAS
- Stroke Impact Scale
- Home Modification Details
- Assistive Technology and Equipment
- DASS42
- Dementia Screening Interview (AD8)
- The Falls Behavioural Scale (FaB)
- Feedback forms
- Modified Barthel Index
- Westmead Home Safety Assessment
Patient Questionnaires
Patient questionnaires are similar to structured documents and can be utilised to send to clients or in a waiting room scenario. The client fills out the questionnaire online on their selected device and submits the questionnaire. Once the client has submitted the questionnaire, the results are automatically sent back to Explorer Online under the client’s file for review.
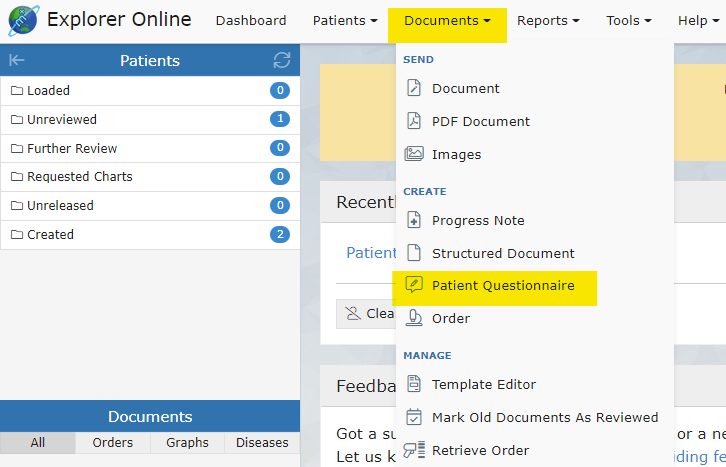
Patient Questionnaires can be sent by clicking on Documents in the Main Navigation Menu and then by clicking Patient Questionnaire.
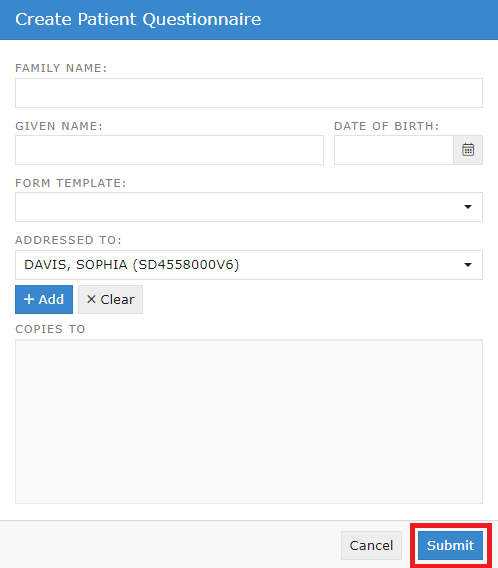
Enter the client’s family name, given name and their date of birth. Select the questionnaire you would like to be sent under the Form Template tab and then click submit.
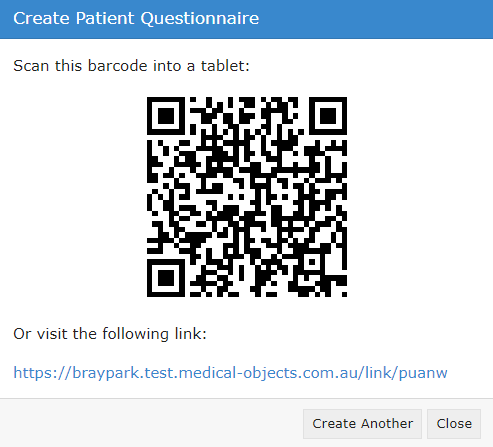
Clicking submit will bring up a QR code option and a URL link option to open the questionnaire.
The link will bring up the questionnaire in the following format:
Once the client clicks Submit, the completed form and result are automatically sent back to Explorer Online under the client’s file. The client sees the following view after clicking Submit:
Managing Documents
Template Editor
Documents → Template Editor
The template editor is a platform to create, edit or delete existing templates. Templates can be utilised to write progress notes and save them under a client’s file. Utilising this function will allow the note to be structured as preferred.
Creating a New Template
To open the Template Editor, select Documents and then Template Editor:
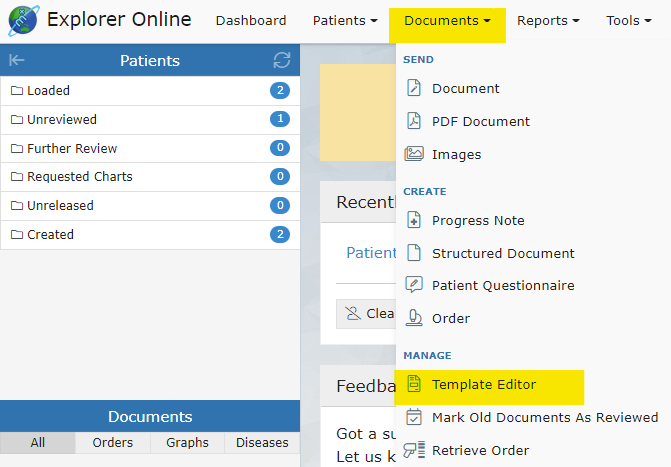
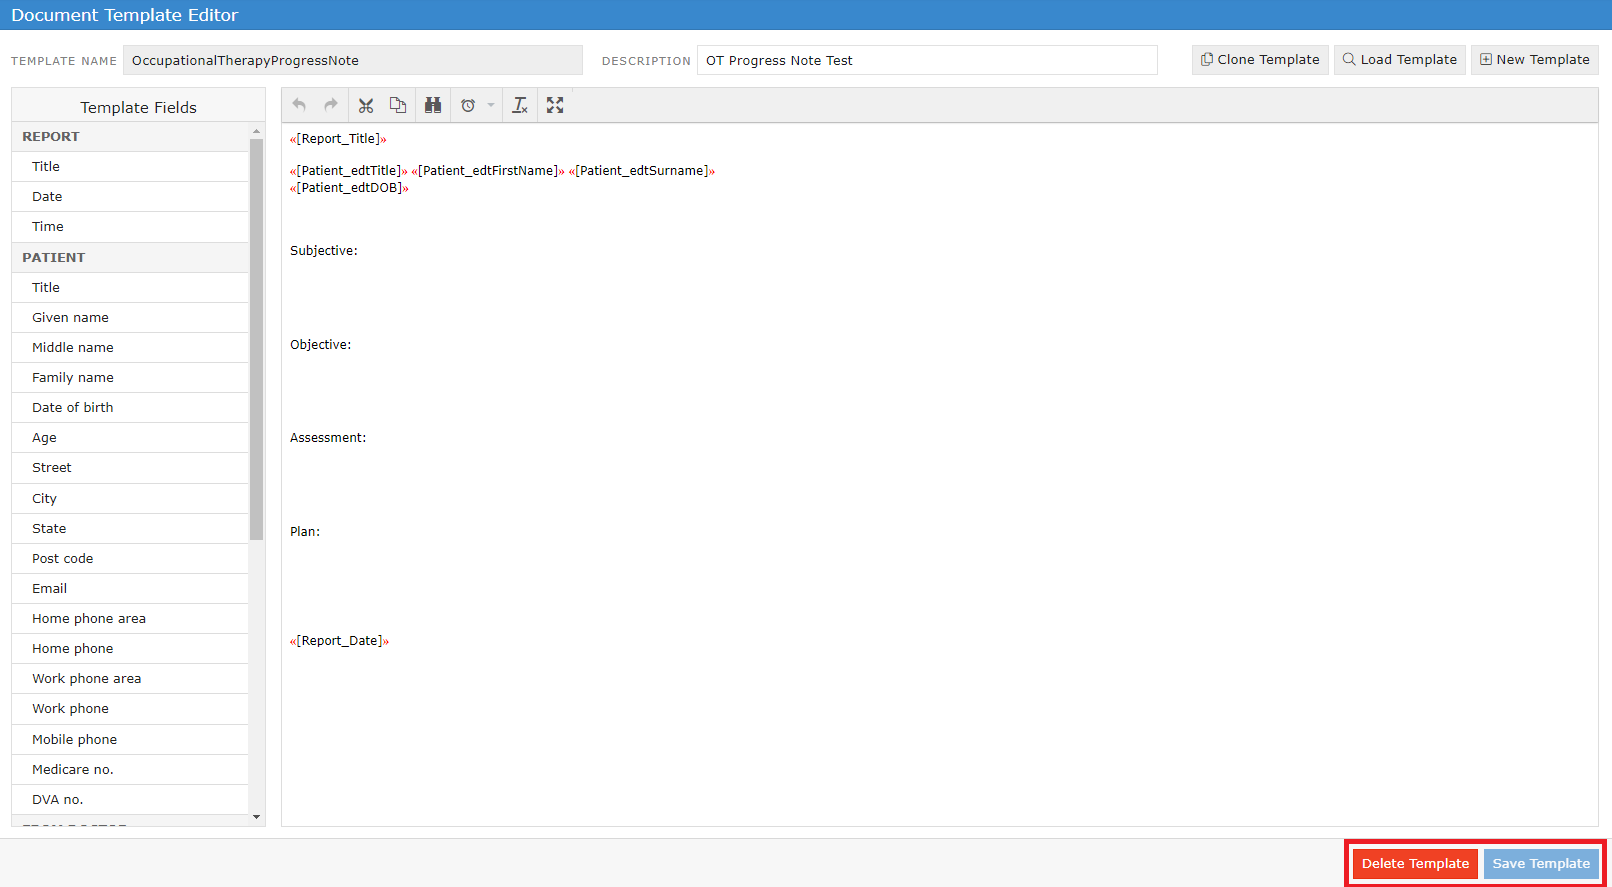
This will open the following view called the Document Template Editor:
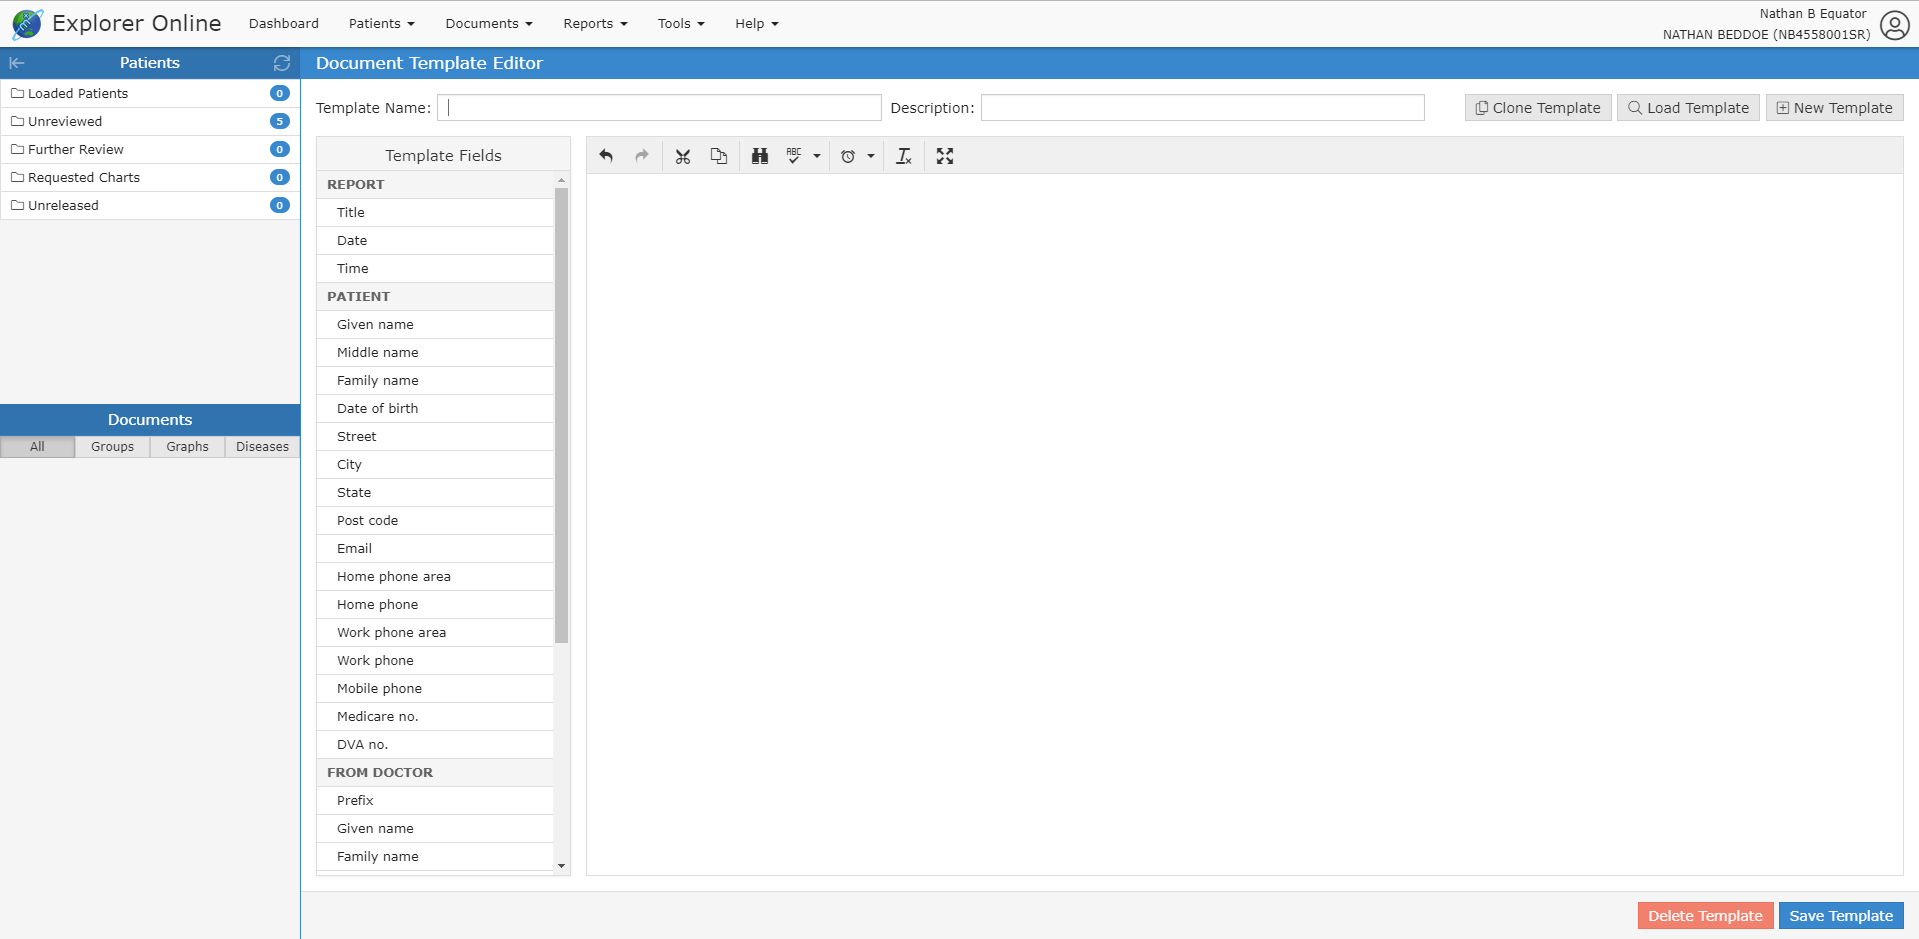
The content is what will automatically be generated into the document when a template is selected. You can see on the left of the template editor the "Template Fields". When these fields are imported into the document, they will fill out automatically with the selected client’s details. For example, if you have selected a patient named "John Smith", then the Given name template field will be "John" and the Family name field will be "Smith". You can also write plain text with no template fields.
Once you have filled out the required fields, you can create the template by clicking the Save Template button.
Editing an Existing Template
To edit a template click Load Template:

Select a template and click Load in the bottom right corner. Make the desired changes in the template editor and click Save Template. Alternatively, to delete the template click the Delete button.
Viewing Documents
Loading a patient in EO will show all of their documents in the Sidebar grouped by either the date or the title of the document. A menu of various actions is shown above each document.
![]()
The document actions are detailed below:
All Documents | This button will show up when viewing a document from any sidebar folder except the Loaded Patients folder. When clicked it will load all the documents for the patient of the currently selected document. |
Mark as Reviewed | This button is only visible when viewing a document from within the Unreviewed sidebar folder. It will mark the document as reviewed. |
Release | This button is only visible for unreleased documents. It will release the document and send it to the addressed provider/s. |
Cumulative Results | This button will show all of the values inputted within in the document. |
Park | Adds the document to the Further Review sidebar folder. |
Unpark | Removes the document from the Further Review sidebar folder. |
Request Chart | Adds the document to the Requested Charts sidebar folder. |
Cancel Chart | Removes the document from the Requested Charts sidebar folder. |
Create Order (?) | |
Create Response | Brings up the Send Document form with the patient, ordering provider and copies to fields pre-populated from the document. |
History | Loads the transaction history of the document. |
Audit Report | This button shows the selected documents audit log. |
Edit | Editing the document allows the addressing details, document details, and parts of the written document to be altered. |
Forward | Allows you to forward the document to another provider. |
Allows you to print the document. |
Documents can also be viewed in a grid format allowing for bulk actions by clicking on the (![]() ) icon in the sidebar from either the documents section or when hovering over each folder.
) icon in the sidebar from either the documents section or when hovering over each folder.
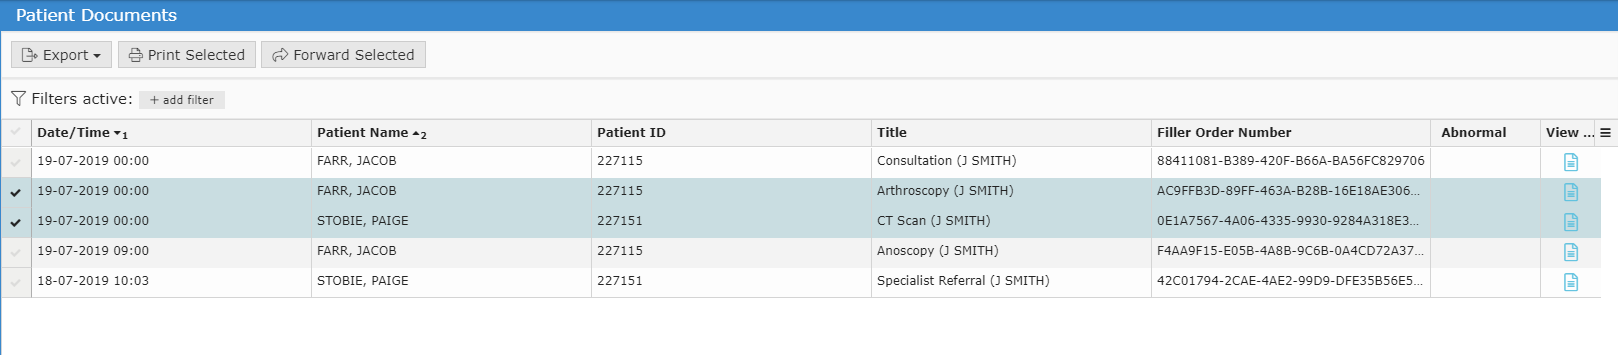
Bulk Actions
Multiple documents can be selected in the grid to perform an action. Some of the bulk actions include:
- Exporting to CSV: this exports the transaction details which may be useful for auditing purposes
- Printing: allows the documents to be printed as a combination or as separate files. Alternatively, the documents to be saved as a PDF
- Forwarding: allows the selected documents to be sent to a selected provider
Marking Documents as Reviewed:
Documents that appear in the Unreviewed folder require reviewing for the sender to receive an acknowledgement that the document has been reviewed.
Reports
Activity Report
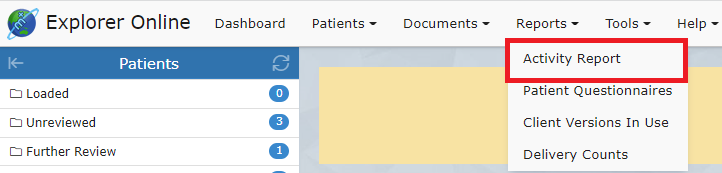
Reports → Activity Report
The Activity Report allows you to view incoming and outgoing documents.
Incoming documents are documents sent by other providers that appear in an inbox-manner.
Select Activity Report from the Reports tab.
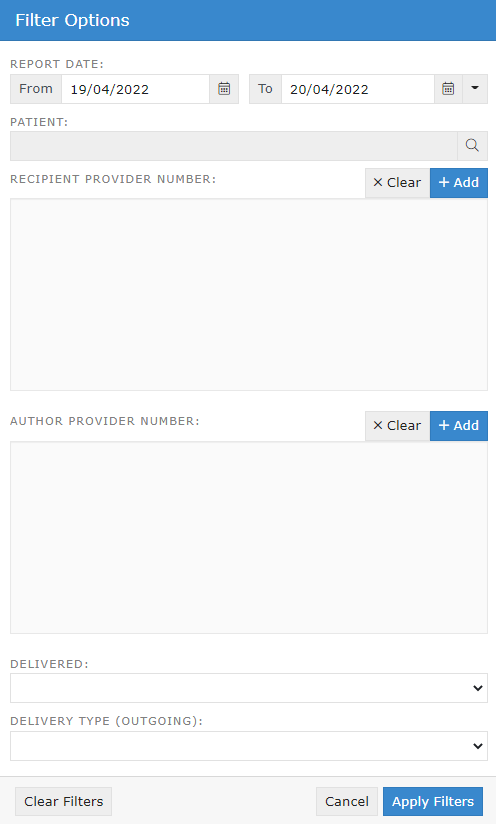
Input the fields to filter the search results and click Apply Filters.
The Activity Report will show as follows:
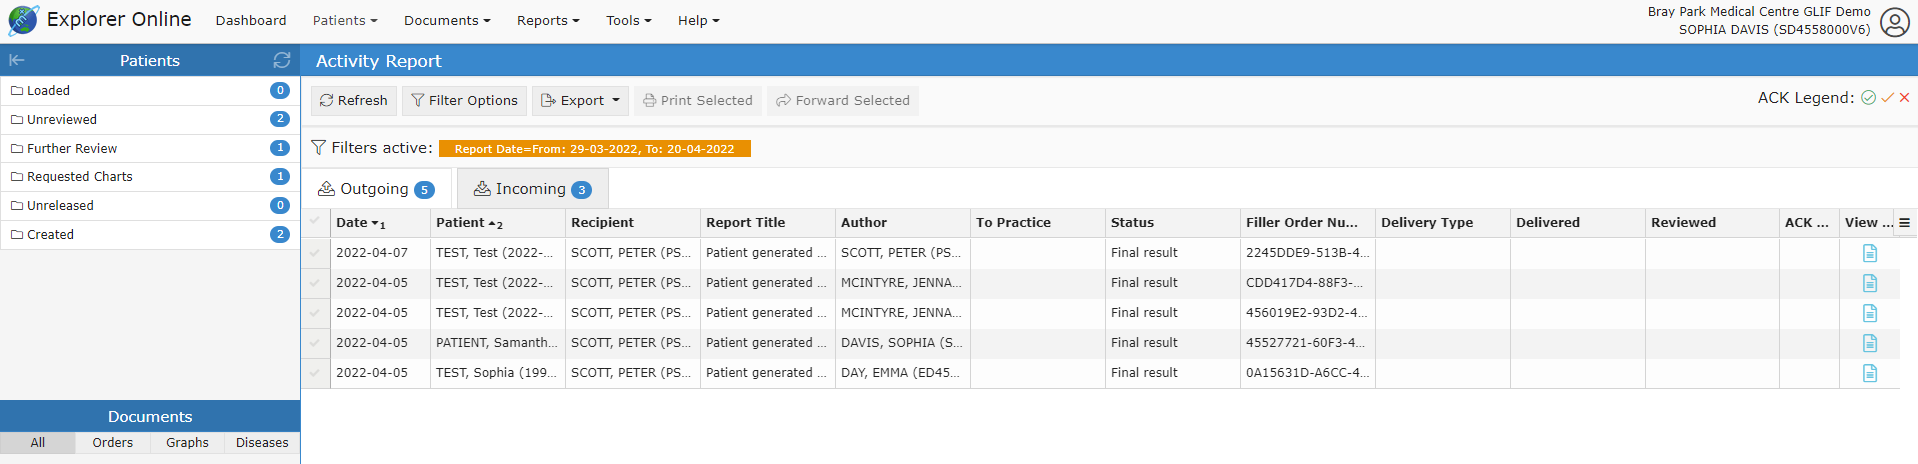
The tabs in the activity report are explained below:
Date | The date the document was created. |
Patient | Patient name’s name as displayed: SURNAME, First name (date of birth). |
Recipient | The provider the document was addressed to. |
Report Title | The document title. |
Author | The provider that authored the document. |
To Practice | The server name of the practice that the document was sent to. This is generally the practice name. |
Status | The status of the document. The most common are:
|
Delivery Type | The software of the recipient that received the document. |
Delivered | This is a timestamp for when the document was delivered. It does not necessarily mean that the document has been viewed or reviewed - only that it has been delivered. If this field is blank then the document has not been delivered. |
Reviewed | The document has been marked as reviewed at the receiver's end. This column will only be populated if the receiver's Delivery Type is EQUATORDXTRAY. If not then it's best to look at the ACK column for an indication if the document has been acknowledged. |
ACK | This column allows you to know whether or not the document has been acknowledged. To see what each icon in this column means; refer to the ACK Legend that can be found in the top right. Hover your mouse over each icon for a description. |
View | Clicking the icon in this column will display the document. |
Viewing Documents in the Report
Documents can be viewed by clicking the ![]() button.
button.
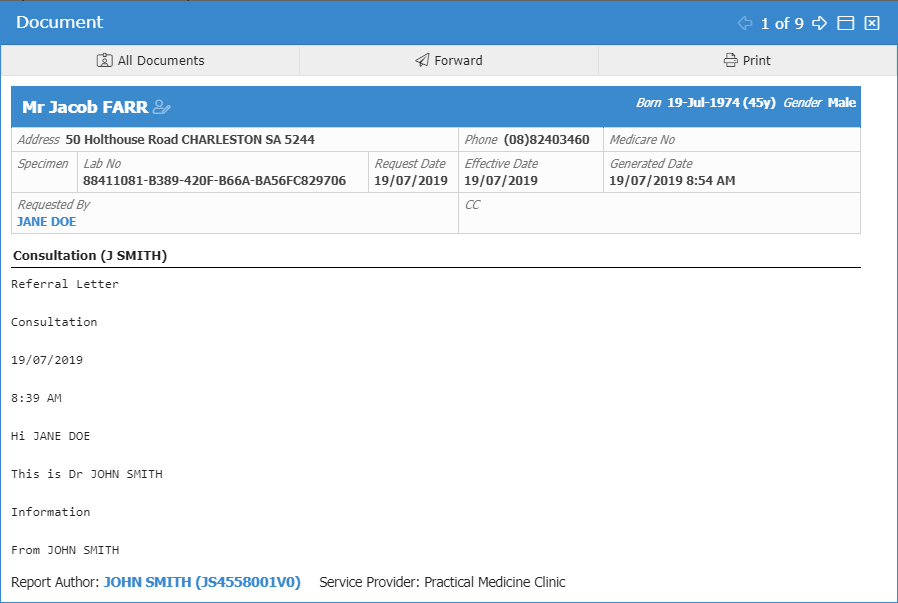
From this window, various actions can be performed including printing, forwarding and loading the patients file via the All Documents button.
Bulk Actions:
Multiple documents can be selected at once to complete a bulk action including:
- Printing
- Forwarding
- Exporting to CSV (exports the transaction details – useful for auditing purposes)
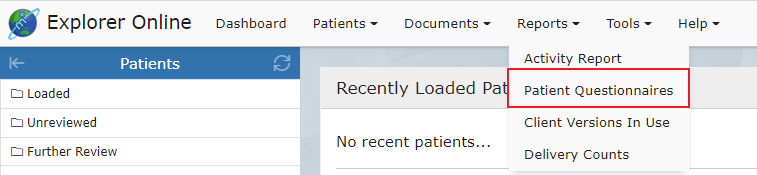
Patient Questionnaire History
To view the history of created PROMs, see if they have been completed or access the QR and link;
Select Patient Questionnaire from the Reports tab.
Input the following filter options and click Apply Filters:
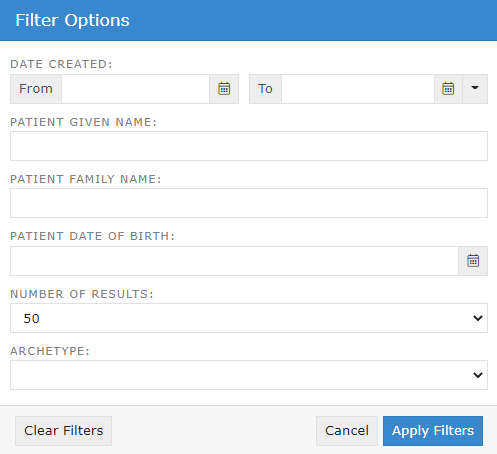
To create a new PROMs questionnaire, click the plus button in the top right corner.

Select the refresh button to update results and click the filters button to edit the filter options.
You can also sort, hide, show or reset columns via the grid menu. Additionally, forms can be sorted into columns and ordered by Patient, Date of Birth, Date Created, Archetype, and Date Satisfied.
Occupational Therapy Workflow
The main areas of Occupational Therapy include child development and assessment, home modifications, equipment and assistive technology prescription, rehabilitation, activities of daily living skills/functional assessment, cognitive assessments, report writing, mental health and much more.
Explorer Online supports the Occupational Therapy workflow from registering a new client to discharging the client or referring on. Structured Documents and Patient Questionnaires are designed to be utilised to capture client information. Through embedded coding within the assessments - results and scoring interpretations can be calculated automatically. The assessments and results can be stored and reviewed within the client’s file. The client documents can be sent to other clinicians in an encrypted, confidential manner. Other forms such as PDFs, image files or progress notes can also be sent in an encrypted form to other clinicians or companies who are set up to receive files with Medical Objects. Being set up with Medical Objects is free to receive and send documents between clinicians.
The Occupational Therapy workflow begins with a new client registration. A pre-appointment questionnaire can then be sent to the client to state what they are seeking from OT services, list their medical history, what level of independence they are currently performing their everyday activities, and the goals they wish to achieve from the therapy service. Feedback forms can also be created and utilised as a Patient Questionnaire where the client completes and submits the form. All assessments required throughout the Occupational Therapy process can be completed with the client through the use of Structured Documents or sent to the client via Patient Questionnaires.
- Client registration
- Pre-appointment PROMs (patient reported outcome measure)
- Initial consult – information gathering goal setting
- Further assessments and goal setting
- Re-assessment and review of goals
- Ongoing therapy or discharge/referral