- Created by Anthony C, last modified on May 26, 2022
Overview:
This guide provides instruction on configuring Best Practice software to export electronic results.
If you require any assistance with the installation or configuration, or if you have any questions, please contact the Medical-Objects Helpdesk on (07) 5456 6000.
Pre-Configuration Checks for Best Practice
If you have not done so already please confirm you have followed the instructions here before proceeding
Sending
Contacts
- Contacts can be accessed from different screens via the top button bars. In the picture below the icon can be seen in the main BP landing screen.

Alternatively it can be accessed from View → Contacts. Or by pressing F11 on the keyboard.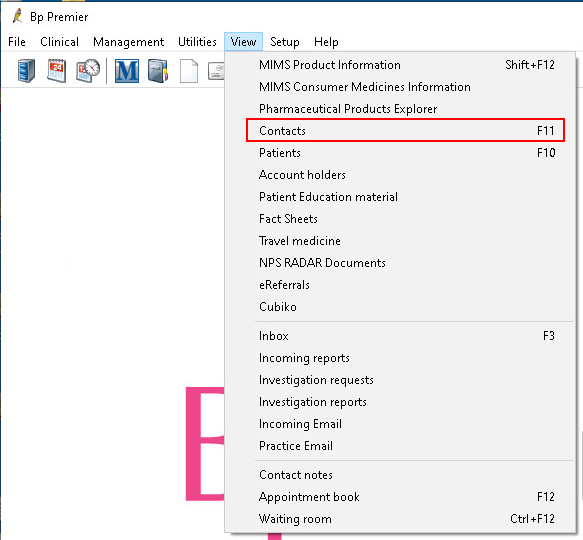
- Search can be used to find a previous entry to update by clicking the Edit button once the contact to edit has been selected.
Alternatively Add new can be used to create a completely new contact.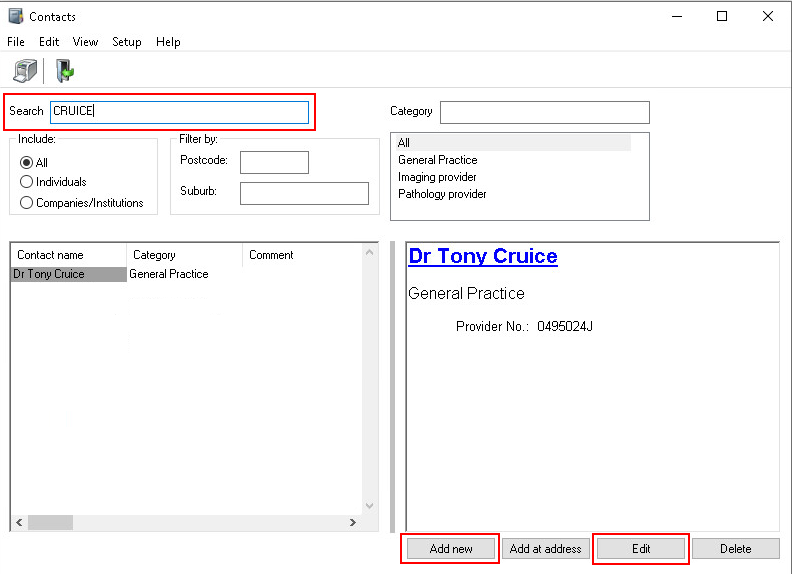
- Check that the provider you want to send to is part of the Medical Objects network before adding their details by following this guide: Provider Directory Lookup - Referral Client
- Enter the details of a contact you would like to receive messages.
Always set Messaging Provider to the name of the rule that was setup in the BP configuration per Step 8. This value is normally "Medical Objects".
A Provider Number or MO Routing ID is required to populate the entries. Follow the steps here to check if a recipient is setup with the Medical Objects network. Setting up providers that aren't setup on the network is pointless as messages addressed to them and supplied to the Medical Objects will not deliver.
If possible always supply a value in the Provider No. field.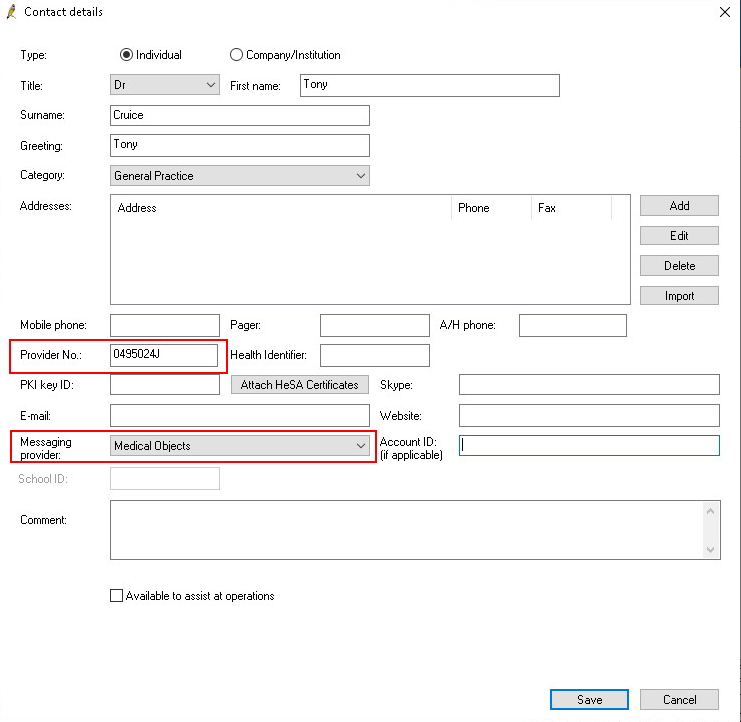
For Providers that don't have a Provider No an MO Routing ID can be entered in the Account ID field instead.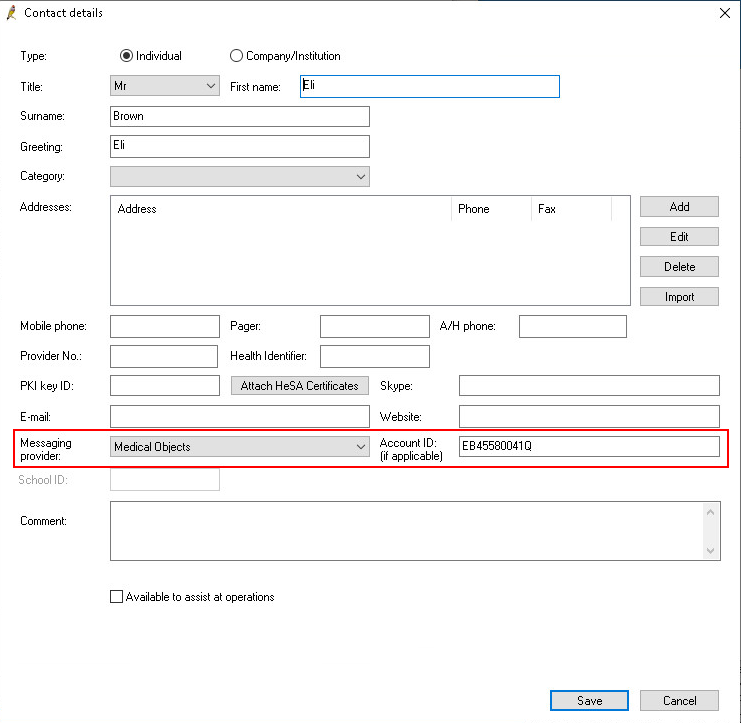
Click Save to complete the Contact.
Export a letter for delivery
- A Patient Health Summary or Letter can be sent. The walk through for Patient Health Summary generation can be found here: Creating a Patient Summary in Best Practice
- Letters can be generated from several places including the main landing screen or a Patient record.

or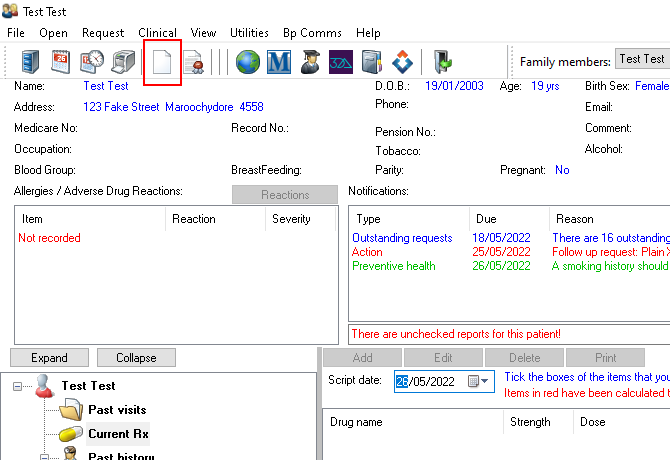
Once the message content is complete, click on the Send HL7 file button.
WARNING
If \E\ is anywhere in the body of the message the resulting HL7 will be invalid and cannot be sent.
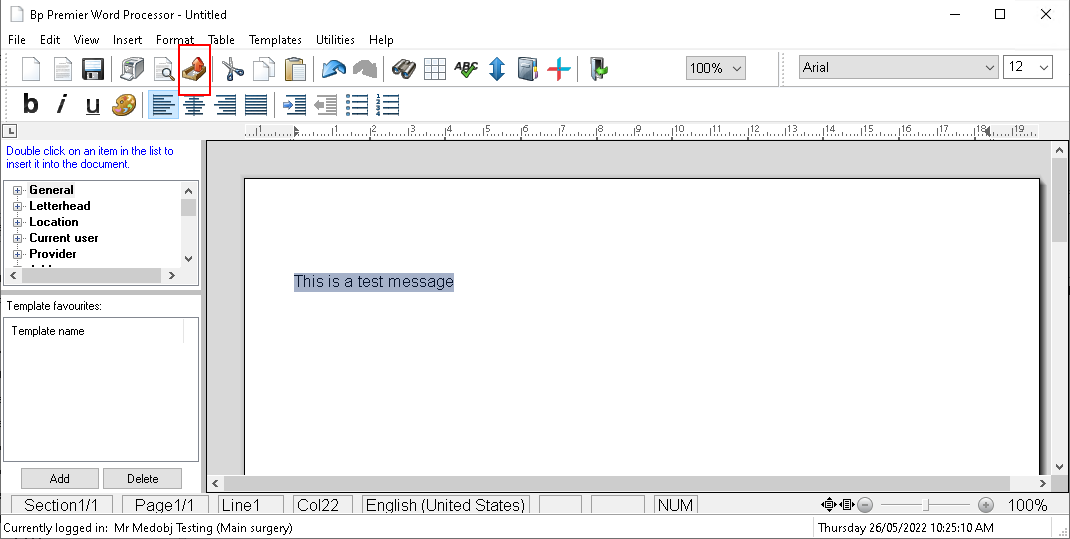
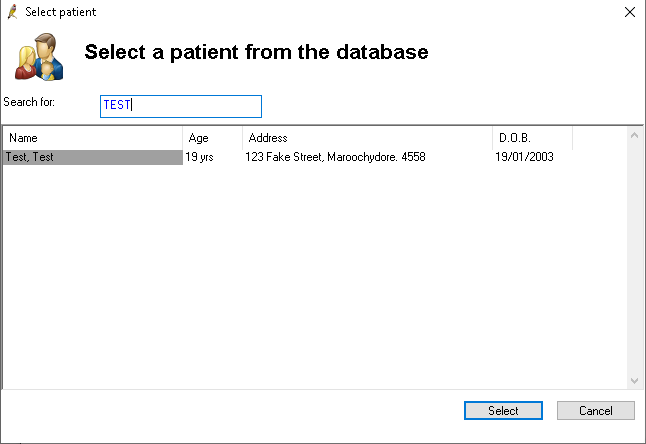
- If the letter was created outside a patient file a dialogue will display requesting a patient to associate the letter with. Search and select the appropriate patient.
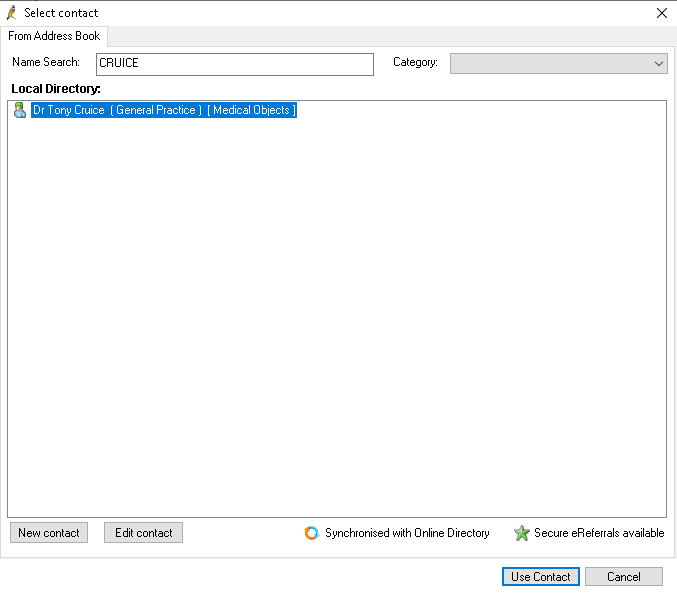
Next a dialogue will display where you can search for the Medical Objects contacts you have created in the previous steps.
The entry you select must have the name, in square brackets, of the import/export rule that was setup in the Best Practice Messaging configuration. In this case the rule was called Medical Objects and can be seen in the screenshot below. Failure to do this will mean the message is output to the incorrect folder and it will not be delivered.
- Check the details in the next dialog that appears.
The Save as draft checkbox when unchecked means the message can't be changed at a later date.
Select Save when ready to send.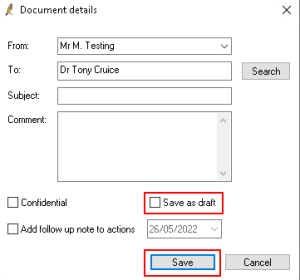
- Select the from provider in the next dialogue that appears
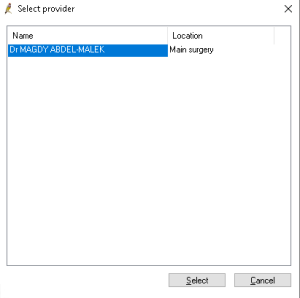
A dialogue should appear indicating the letter was successfully exported to the OUT folder UNC path that was setup.
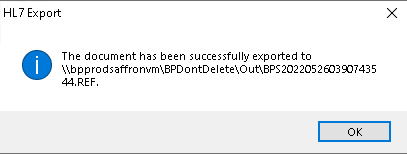
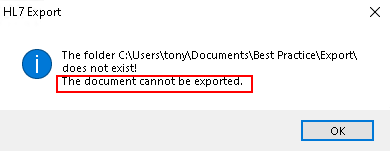
If the dialogue shows a path that contains the users documents folder in its path, the contact that was selected in step 5 above is not set to specifically use Medical Objects and needs to be corrected then the message resent.
Checking delivery
- The best way to check delivery is to check the Medical Objects delivery report. You can find how to do this here: Delivery Report
- Alternatively Best Practice contains a delivery report for the messages you send.
From the main landing page select View → eRefferals.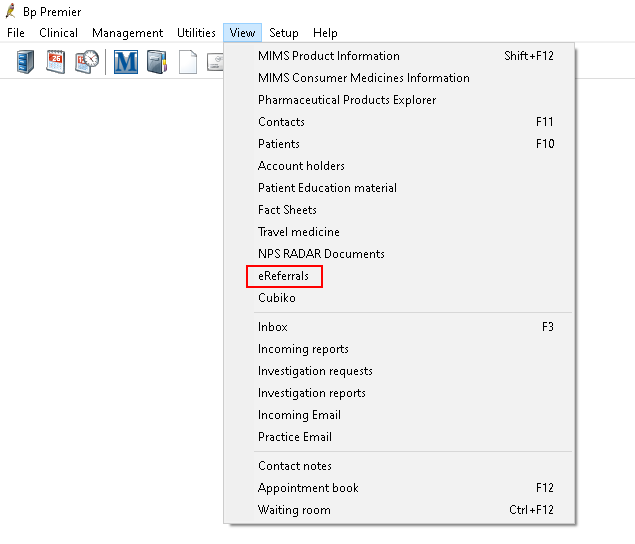
- The messages you send need to have a Status of Acknowledged, as it means the receivers practice software has confirmed it has the message.

- No labels