Overview
This article will cover the basic functionality of Medical-Objects Explorer Online. If you have any questions or require any further information, please contact the Helpdesk on (07) 5456 6000.
Medical-Objects Explorer Online is a web-based application that allows you to send and receive patient documents from your own personal web browser on a tablet, desktop or laptop device.
Requirements
Explorer Online was designed to run on desktops, laptops and modern tablets running Windows, MacOS or Linux. Mobile phones are not currently supported.
Please take note of the browser requirements below.
Supported Browsers
- Microsoft Internet Explorer 10 and 11
- Microsoft Edge
- Chrome
- FireFox
- Opera
- Safari 8+
Logging in and out
When first loading Explorer Online you will be presented with a login screen. Simply enter in your username and password and click login to proceed.

Once logged in you can log out again by simply clicking on the User Menu in the top right hand corner of the screen.

Dashboard Layout
The Dashboard is the default page that will appear once you have logged into Explorer Online. The Dashboard is split into three sections, navigation menu, sidebar and the main content area.

Navigation Menu
This is the main navigation menu. The menu is dynamically built up based on what features your server has enabled and what permissions your user account has. If you're user has a menu item missing you may need to call the Helpdesk to correct your user permissions or enable a server feature.
User Menu
The User Menu is the menu in the top right hand corner. This will display the server you've logged into and also which provider you selected at login. When you click on the menu a drop down will appear with menu options related to your user account.
Sidebar
The Sidebar is a feature that allows you to access and manage your patient documents. The Sidebar is split into two sections, Patients and Documents.
If you're using Explorer Online on a smaller screen you have the option to collapse the sidebar by clicking the collapse icon ![]() found on the left side of the Patients header. You can then expand the Sidebar again by clicking the
found on the left side of the Patients header. You can then expand the Sidebar again by clicking the ![]() icon.
icon.
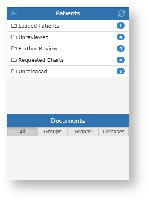
Patients
The Patients section of the Sidebar consists of individual folders which contains patient documents. The folders will list each unique patient that has a document for that folder. The count to the right is the amount of patients in the folder and not the amount of combined documents.
Hovering over a folder will reveal a grid icon (![]() ). This button will load all the documents in that folder into a grid. From there you can then perform bulk actions on the documents such as printing or forwarding to another provider.
). This button will load all the documents in that folder into a grid. From there you can then perform bulk actions on the documents such as printing or forwarding to another provider.
To refresh the contents of the folders simply click the refresh button (![]() ) in the title bar.
) in the title bar.
| Loaded Patients | Contains any patients you've done a lookup on or retrieved all documents for. |
|---|---|
| Unreviewed | Contains patients that have unreviewed documents. Selecting documents from this folder will give you the option to mark the document as reviewed. |
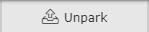
| Further Review | Contains patient documents that have been parked. A document can be parked by clicking the "Park" document action button.
To remove a document from this folder click the 'Unpark' document action button.
|
| Requested Charts | Contains patient documents with the requested chart status. A document can be moved to the Requested Charts folder by clicking the 'Request Chart' document action button.
To remove a document from this folder click the 'Cancel Chart' document action button.
|
| Unreleased | Contains patient documents that have not yet been released. Documents in this folder can either be released or deleted.
An unreleased document will have the following red text in the document title to indicate that it has not yet been released.
Unreleased documents are created by ticking the 'For Approval Before Delivered' option when sending a document. |
Documents
The Documents section will list all the documents for the selected patient that correspond to the folder the patient is in. For example if you select a patient in the Unreviewed folder, all unreviewed documents for that patient will be listed.
Hovering over the Documents section will reveal a grid icon (![]() ). This button will load all the documents listed into a grid. From there you can then perform bulk actions on the documents such as printing or forwarding to another provider.
). This button will load all the documents listed into a grid. From there you can then perform bulk actions on the documents such as printing or forwarding to another provider.
Abnormal results will show as red in the documents list.
Managing Patients
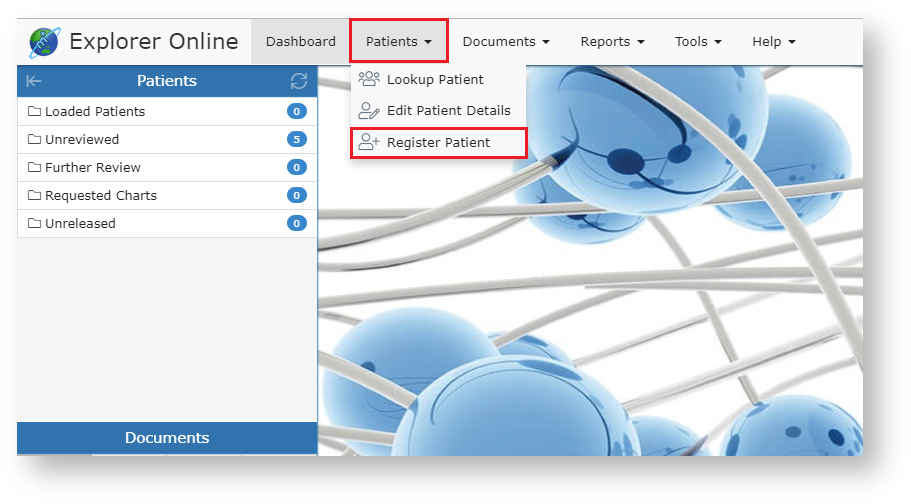
Registering a Patient
To register a patient, select the Patients button in the top navigation and then click Register Patient on the dropdown.
Once clicked, a modal will pop up with text fields to input patient information, as seen in the screenshot below.
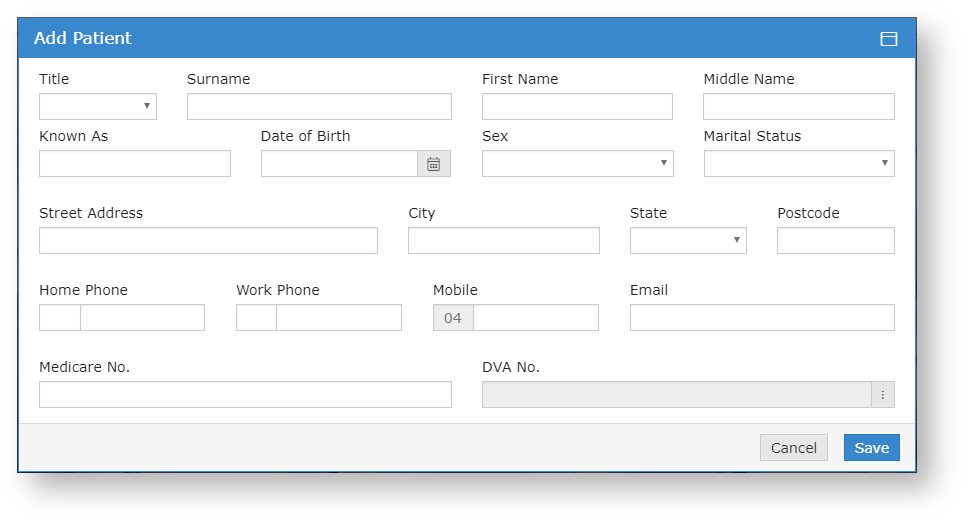
The required fields for registering a patient are Surname, First Name, and Date of Birth. While they are the only required fields, it's suggested that you fill as many of them out as possible, so you have as much information on documents as possible.
Editing a Patient
To edit a patient, go to the Patients dropdown in the top navigation bar, and then click Edit Patient Details.
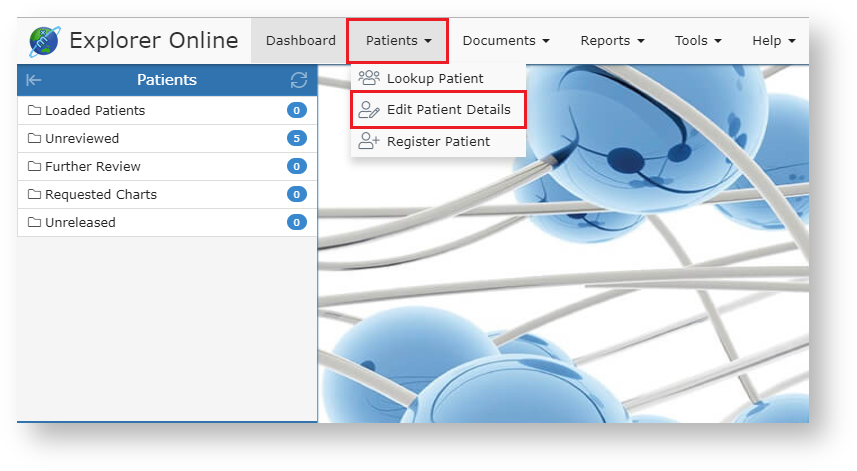
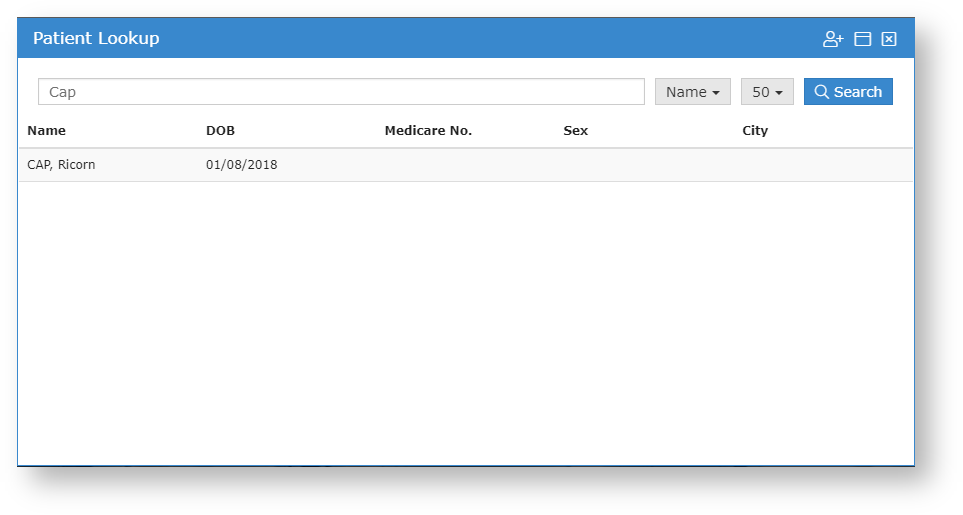
This will take you to the Patient Lookup modal. The patient lookup modal is used to search for current patients that your practice has previously created with Medical-Objects. You have three different options in which to search for, their name, ID or lab number. You can change these on the dropdown to the right of the search field. You can then type a search term into the text field, press the Search button and if all is well, you will see your patient.
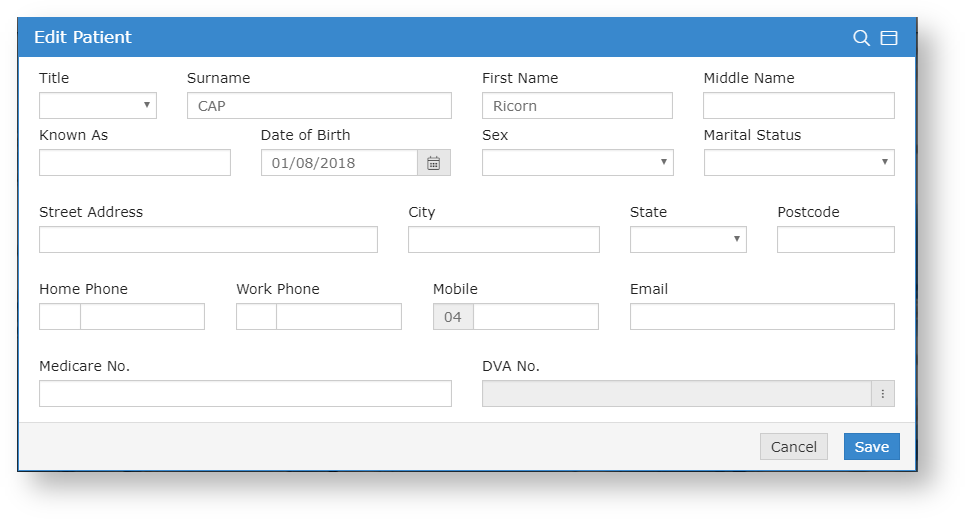
Once you have found your patient, you can then select the patient you wish to view, and then you will see the edit screen. Fill out the fields that you wish to change or add, and then click the Save button.
Viewing Documents
todo - looking patient / select from sidebar
todo - unreviewed results / mark as reviewed
todo - printing a document
todo - document action buttons and what they do
Sending a Document
todo - sending a regular document
todo - unreleased documents
todo - document templates
todo - sending a PDF
Creating a Progress Note
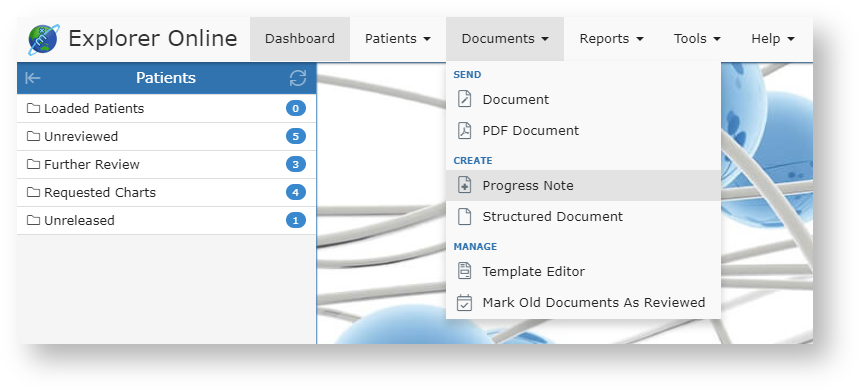
A Progress Note is an internal document for a patient that is stored against the patient's file. You can create a Progress Note for a patient from the Documents menu in the top navigation.
If you don't already have an active patient, you will be prompted to find a patient. Once a patient is selected you will be prompted with the Progress Note modal.
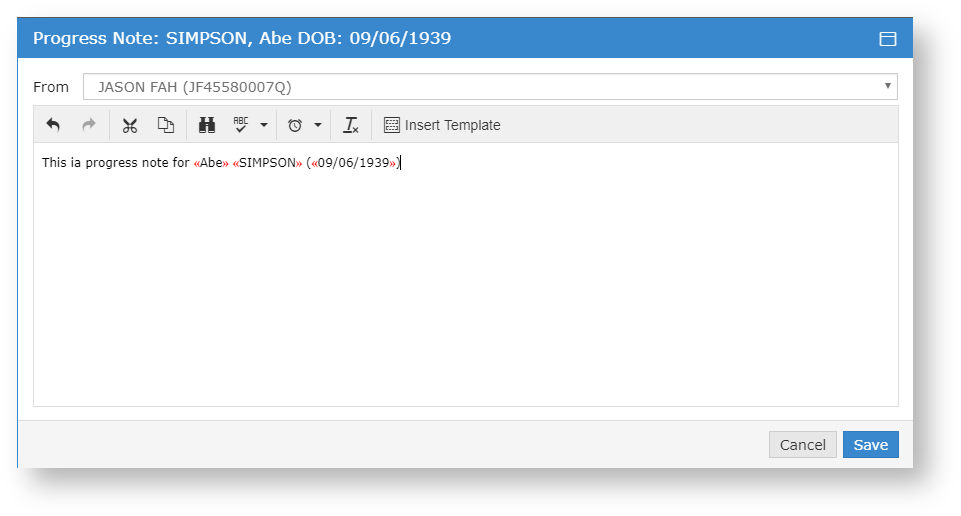
The patient details that the Progress Note is for will be displayed in the title.
Document Template Editor
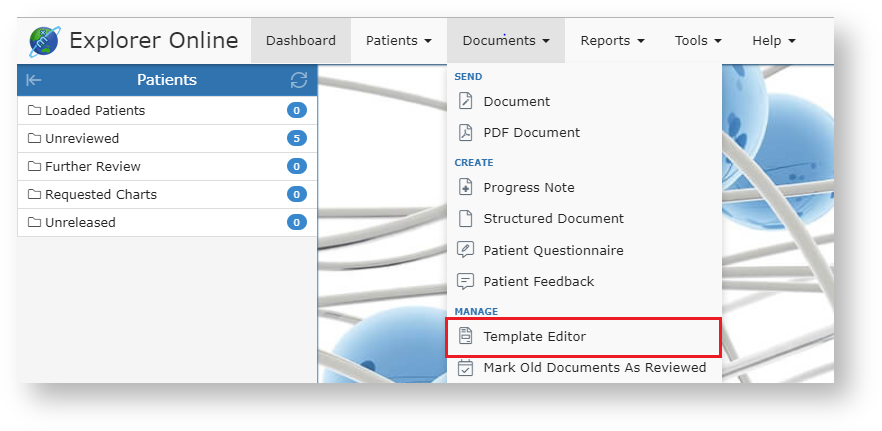
To get to the Document Template Editor, you can click Documents → Template Editor (Under manage). A screen should show up with text editors, and a sidebar.
After clicking that button, it should take you to the screen below.
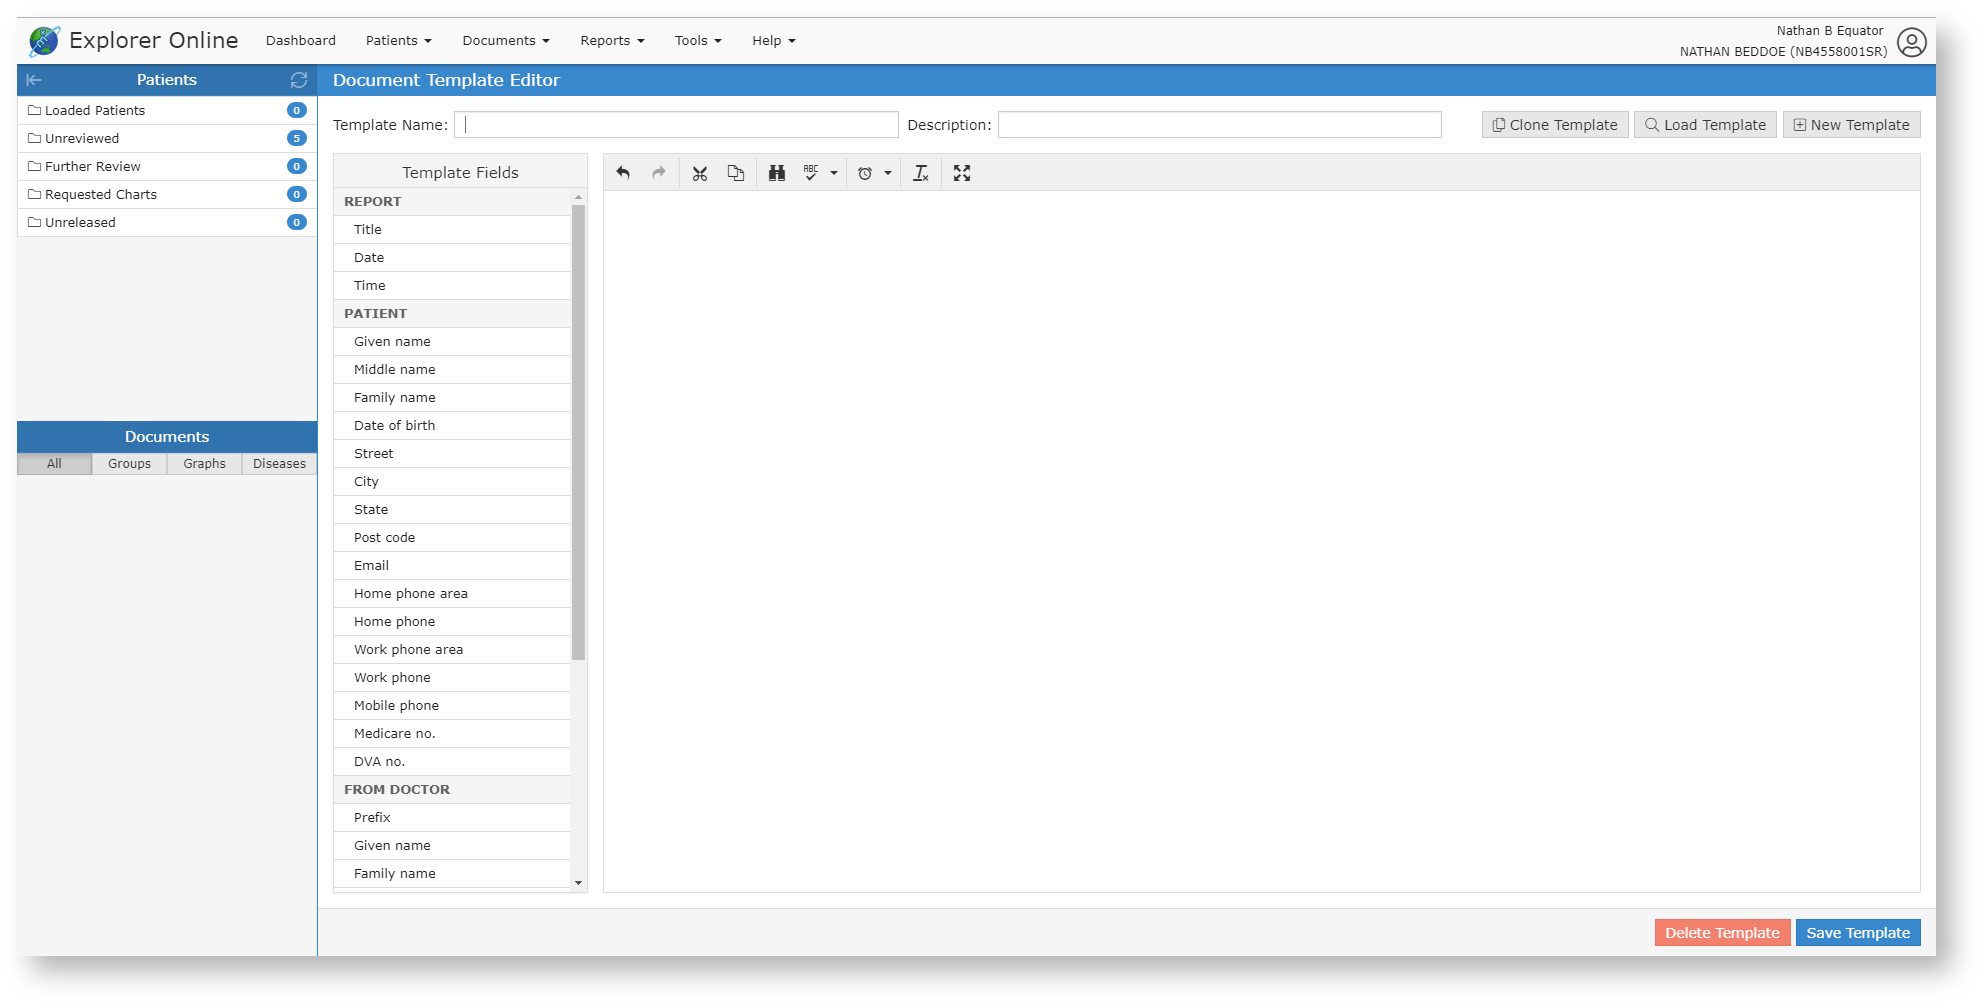
Creating a template
A document template must have a template name, description and some content.
Template Name
The template name is what you'll see on your end to identify each template. You should call it something descriptive, but also keep it concise.
Description
The description will show as a subheader when selecting the template. This is generally longer than the Template name and can help when you have a few very similar template names.
Content
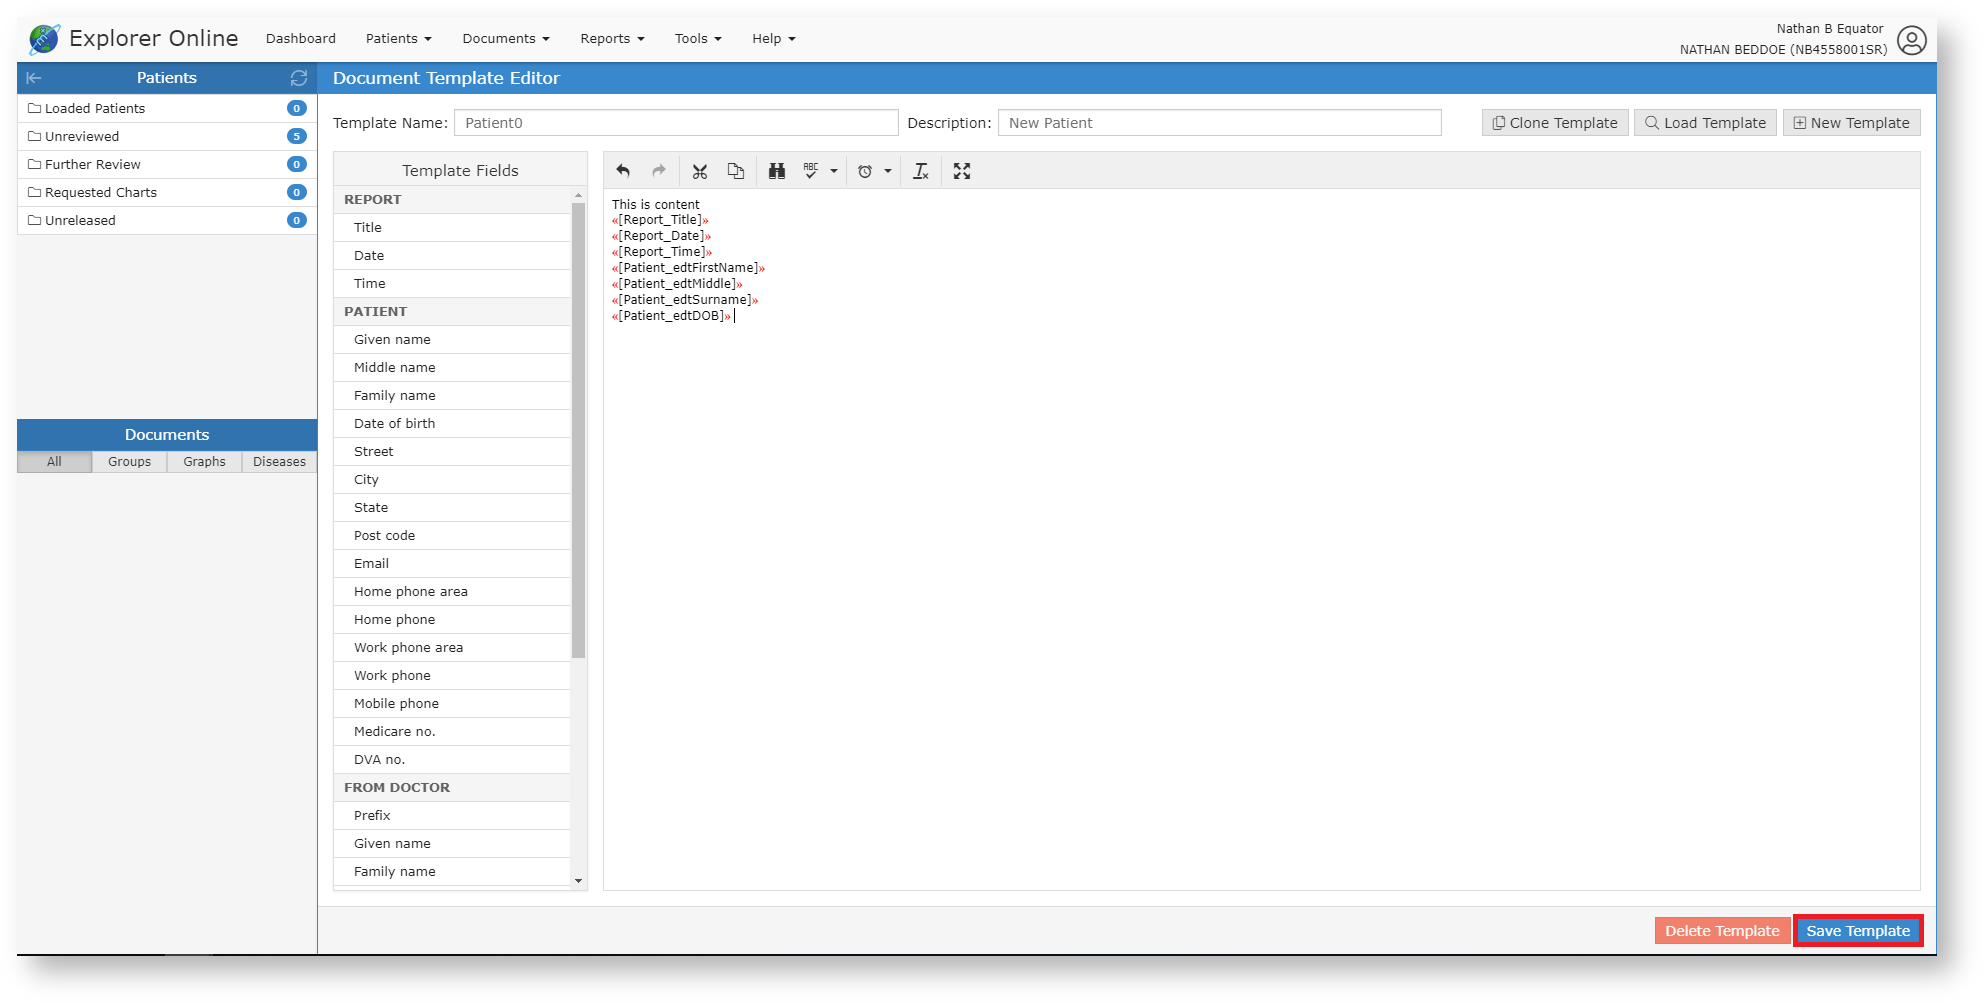
The content is what will automatically be generated into the document when you select a template. You can see on the left of the template editor a "Template Fields", these are special fields, that when you import the template into your document, they will fill out with the details you've included. So if you have selected a patient named "John Doe", then the Given Name template field will be "John" and the Family Name field will be "Doe". You can also write plain text with no template fields if that is what you want.
Submitting a template
Once you have filled out the required fields, you can create the template by clicking the "Save Template" button, highlighted in the below screenshot.
Editing an existing template
To edit an existing template you need to:
Load a template
Select a template from the proceeding screen by clicking on the desired template, and clicking Load in the bottom right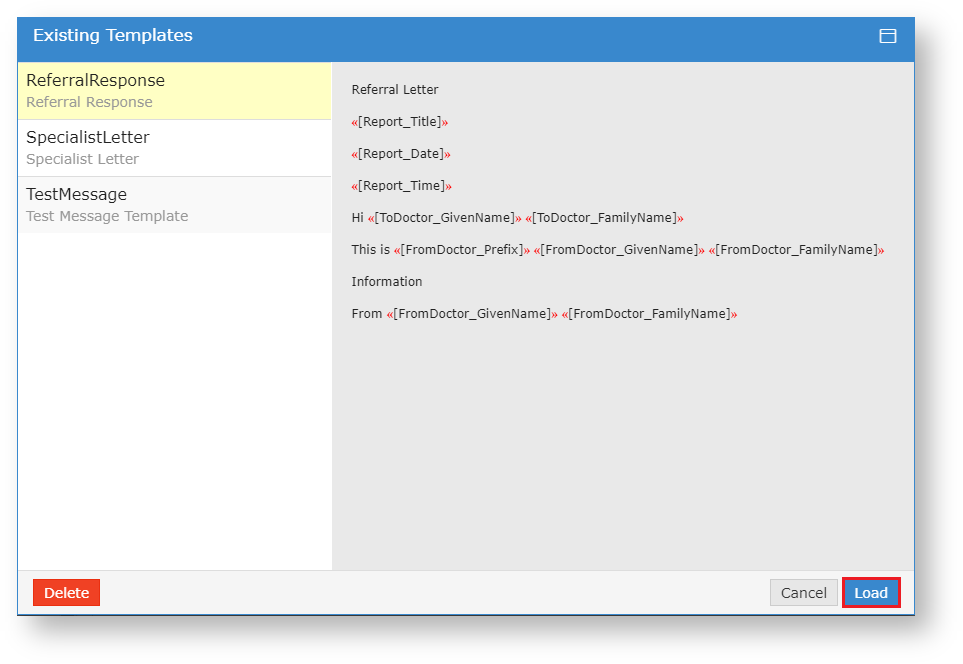
Make any changes that you wish to make, and then click the Save Template button in the bottom right, exactly how you would save a new template.
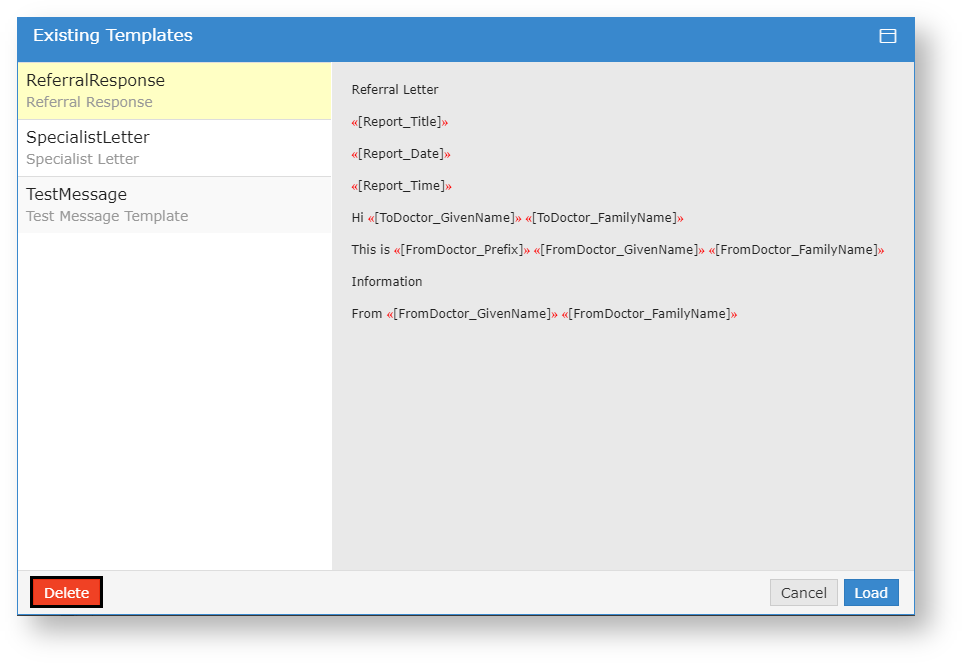
Deleting a template
Click the Load Template button.

Then, select the template you wish to delete, and then click the Delete button in the right hand corner of the new screen.
Activity Report
The Activity Report is allows you to view the transaction history of both incoming and outgoing documents. You can access the Activity Report via the Reports top menu option.

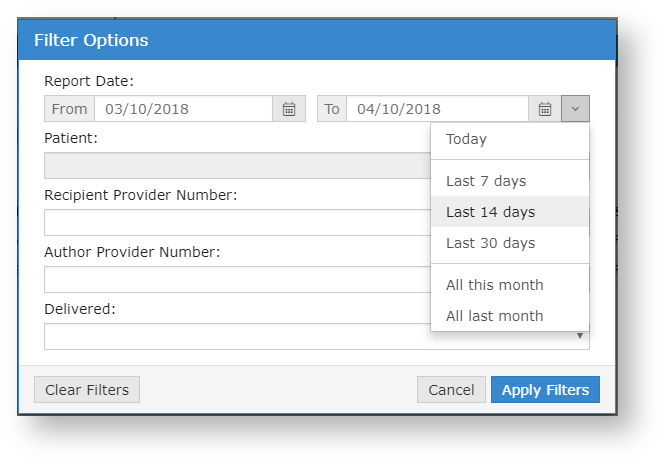
When selecting the Activity Report menu option you will be presented with a window listing the report filtering options available. These will help you narrow the report down to only the documents you're interested in. The filter options will default to showing the last 24 hours of activity. You can leave it at that or you can click on the drop down button next to the end date to select a pre-defined range.
Understanding the report
| Date | The date the document was created. |
|---|---|
| Patient | Patient name. SURNAME, First name (Date of Birth) |
| Recipient | The provider the document was addressed to. |
| Report Title | The document title. |
| Author | The provider that authored the document. |
| To Practice | The server name of the practice that the document was sent to. This is generally the practice name. |
| Status | The status of the document. The most common are;
|
| Delivery Type | The software of the recipient that received the document. |
| Delivered | This is a timestamp for when the document was delivered. It does not necessarily mean that the document has been viewed or reviewed - only that it has been delivered. |
| Reviewed | The document has been marked as reviewed at the receivers end. This column will only be populated if the receiver's Delivery Type is EQUATORDXTRAY. If not then it's best to look at the ACK column for an indication if the document has been acknowledged. |
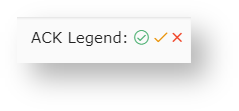
| ACK | This column allows you to know whether or not the document has been acknowledged. To see what each icon in this column means; refer to the ACK Legend that can be found in the top right. Hover your mouse over each icon for a description. |
| View | Clicking the icon in this column will display the document. |
Document actions
You can view a single document by clicking on the view document icon (![]() ) in the View column of the grid. This will open the document in the document viewer modal.
) in the View column of the grid. This will open the document in the document viewer modal.
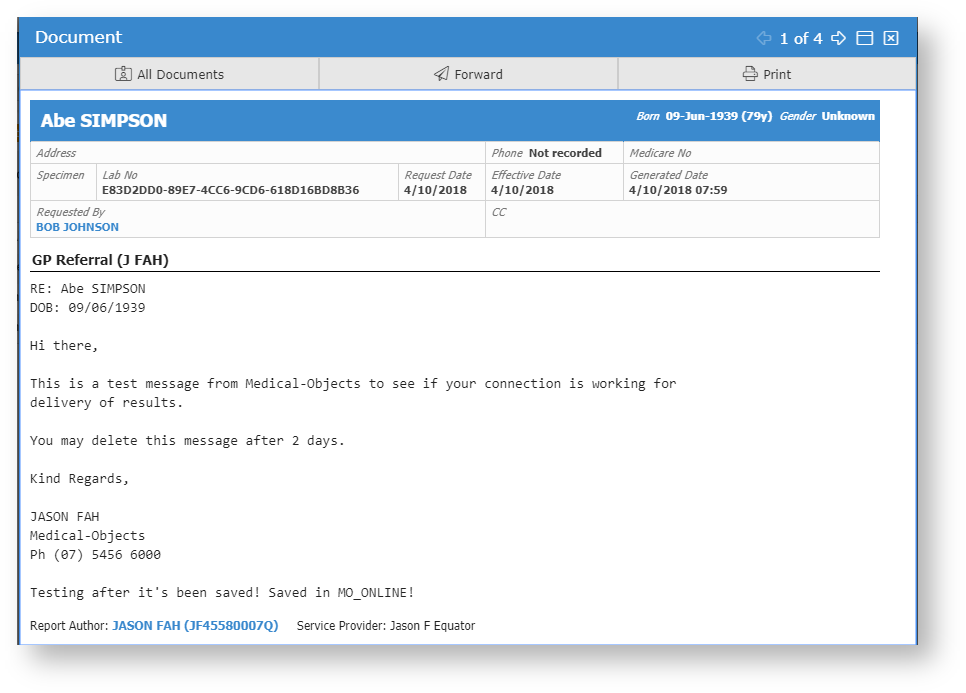
From this modal you can perform various actions on the single document such as print, forward or loading the patient file via the All Documents button. You can also navigate to other documents via the back and forward buttons in the top right.
Bulk Actions
You can select multiple documents in the grid and then perform an action on the selection. Currently the bulk actions available are;
- Printing
- Forwarding
- Exporting to CSV (this exports the transaction details and not the document itself, useful for auditing purposes)