Overview
This guide provides an overview on setting up a basic sending queue within the Medical-Objects Eclipse software.
If you have any questions or require any further information, Please contact the Medical-Objects Helpdesk on (07) 5456 6000.
Setting up a send Queue
- Enter the configuration and go to "Client Logging" Set the Admin e-mail address where you would like notifications of problems to be delivered to.
- Go to “Heartbeat Setup.”
- Select the Active tick box.
- Set interval to 30 minutes.
- Select the “Server to Upload to” from the drop down and choose one of the servers.
- In “Scheduled Tasks” choose “Zip Archive Message Store”.
- Choose the time that you would like to perform this task.
- Set the “File age to Archive (Days)” to 10 days if not less.
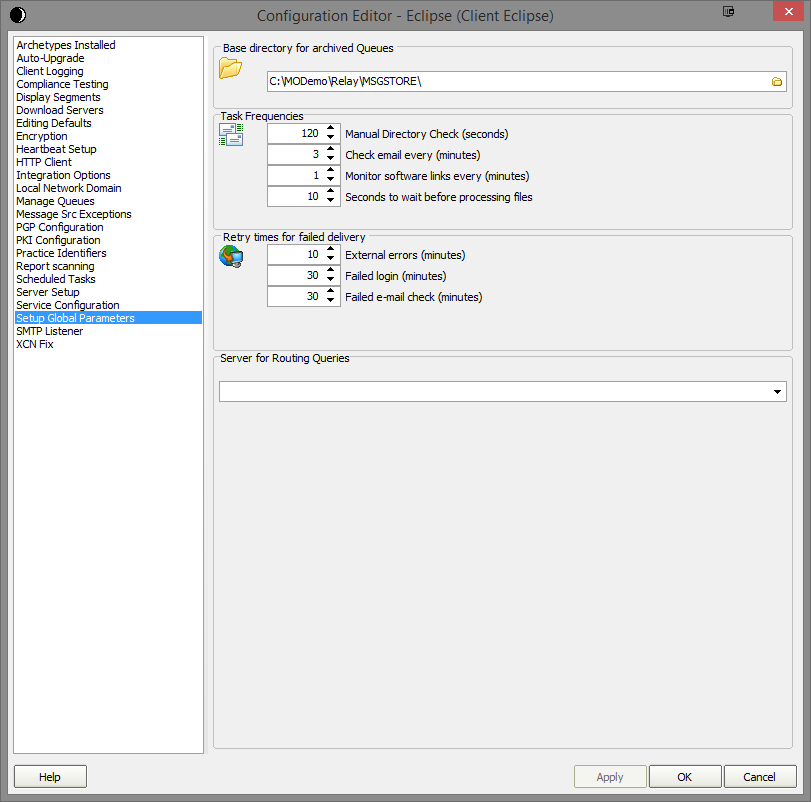
- Choose “Setup Global Parameters”.
- Make sure “Seconds to wait before processing files” is set to at least 3 seconds.
- This is to ensure that the file dumped is no longer being written before it is processed so if it can be set as high at 10 seconds it should decrease issues.
- Choose “Manage Queues”.
- Click the “Add” button.
- Enter a name for the queue.
Enter the folder where the files are to be picked up from.
- Finally click the “Setup” button for the next step.
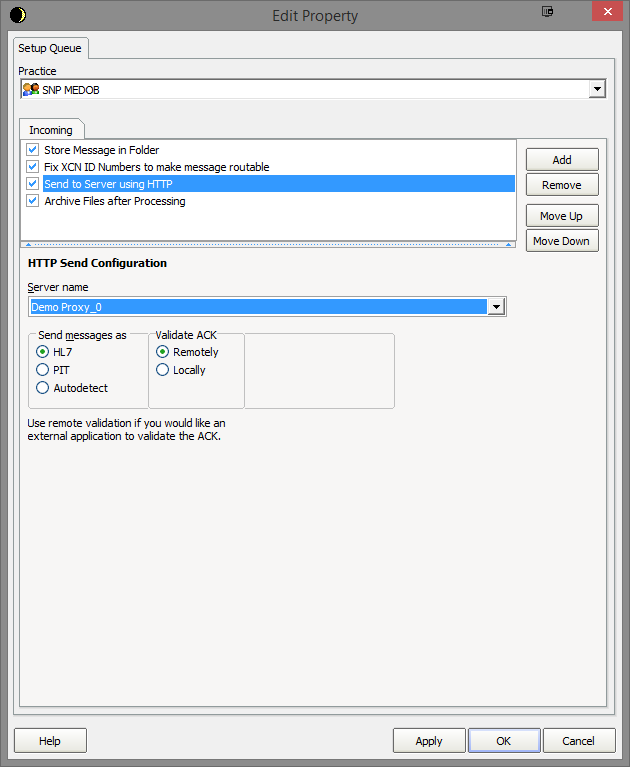
- Click on the “Add“ button.
- Add each of the modifiers as per the screenshot in step 20.
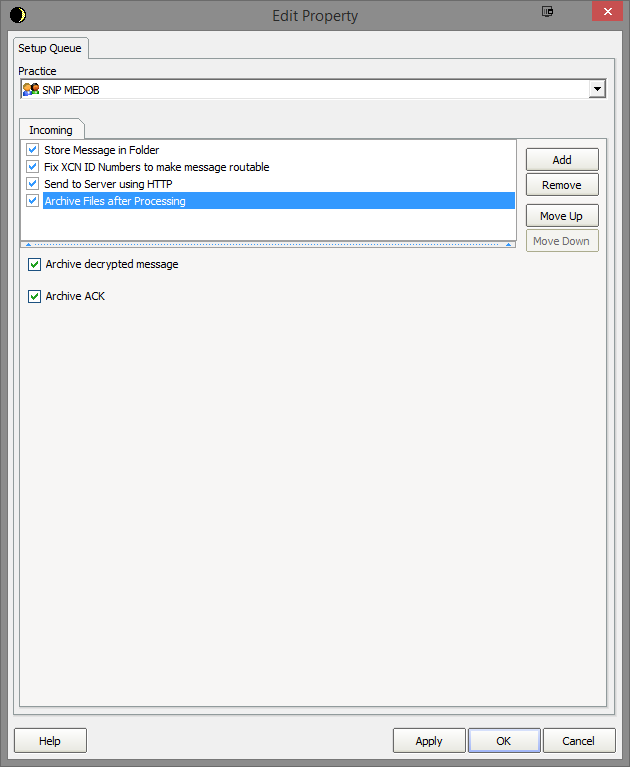
- For the “Store Message in Folder” choose a folder to keep the original file in for situations when we may need to trace any changes to the file from start to finish.
- Make sure the tick boxes are selected as per the screenshot.
- In the “Send to Server using HTTP” modifier set as below. Choose from the “Server name” one of the servers listed in the drop down.
- In “Archive Files after Processing” make selections as per the screenshot below.
Running as a service
- Choose “Service Configuration”.
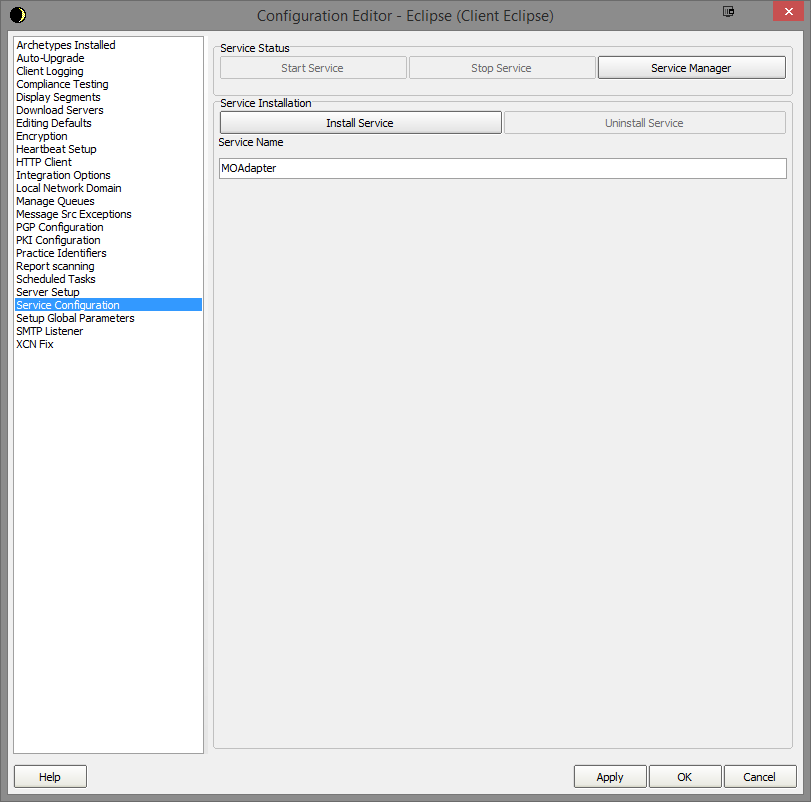
- Before you press Install Service you can set the Service Name. Generally this is set as either MOAdapter or Eclipse.
- When ready select Install Service and it should install into your services.
- Exit the configuration and shutdown the eclipse and you can start up the service.