- Created by Andrea M, last modified by Michelle Flatt on Feb 24, 2017
You are viewing an old version of this page. View the current version.
Compare with Current View Page History
« Previous Version 9 Next »
Overview
This guide provides instruction on configuring both Medical-Objects Capricorn and ZedMed software to import electronic results.
If you require any assistance with the installation or configuration, or if you have any questions, please contact the Medical-Objects Helpdesk on (07) 5456 6000.
If you have not Installed the Medical-Objects Download client, Please see the guide for Installing Capricorn on Windows.
Configuring Capricorn Software
Accessing the Capricorn Configuration Window
- To launch the HL7 Tray application, Go to Start Menu, All Programs, Medical-Objects and select the Medical-Objects Capricorn. Alternatively, You can go to C:\MO\Capricorn and run the Capricorn.exe.
- The following icon will appear in the tray. Double click on it to bring up the log window.

- When the log window is displayed, Click on the Configuration icon highlighted below, or select Utility and select Configuration.

Capricorn Configuration Settings
- Click on Integration Options.
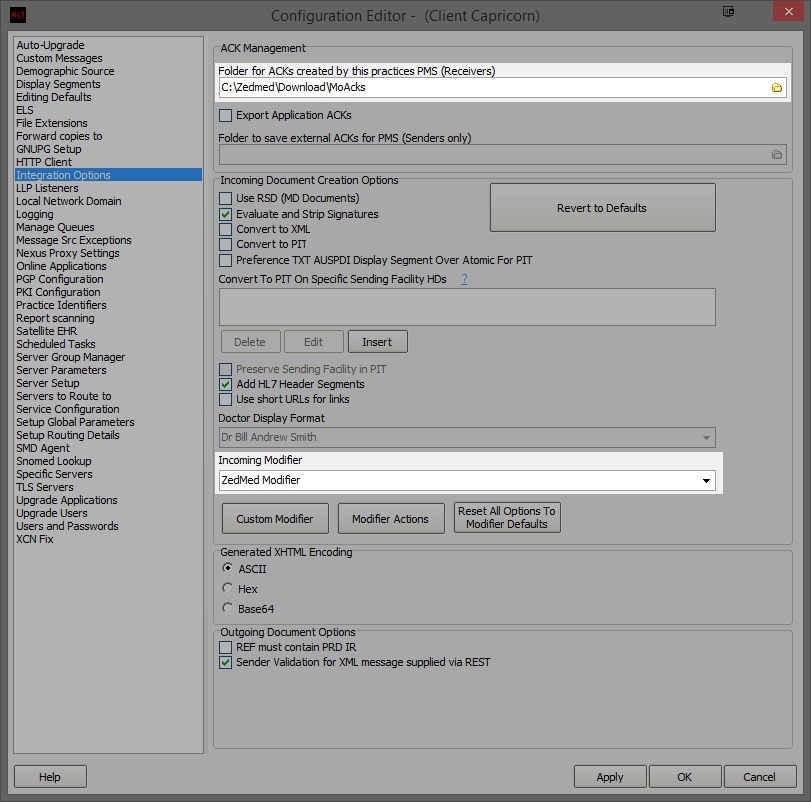
Set the ACK Management path to the local Import folder on the server or the network path on a workstation, that points to the server import folder.
For example:
Newer Versions of ZedMed(Capricorn installed on the Server) --> C:\Zedmed\Download\MoAcks Or (Capricorn installed on the Workstation) --> \\server\Zedmed\Download\MoAcks
Older Versions of ZedMed(Capricorn installed on the Server) --> C:\Patients\Download\MoAcks Or (Capricorn installed on the Workstation) --> \\Server\Patients\Download\MoAcks
- Select Server Parameters from the left panel.
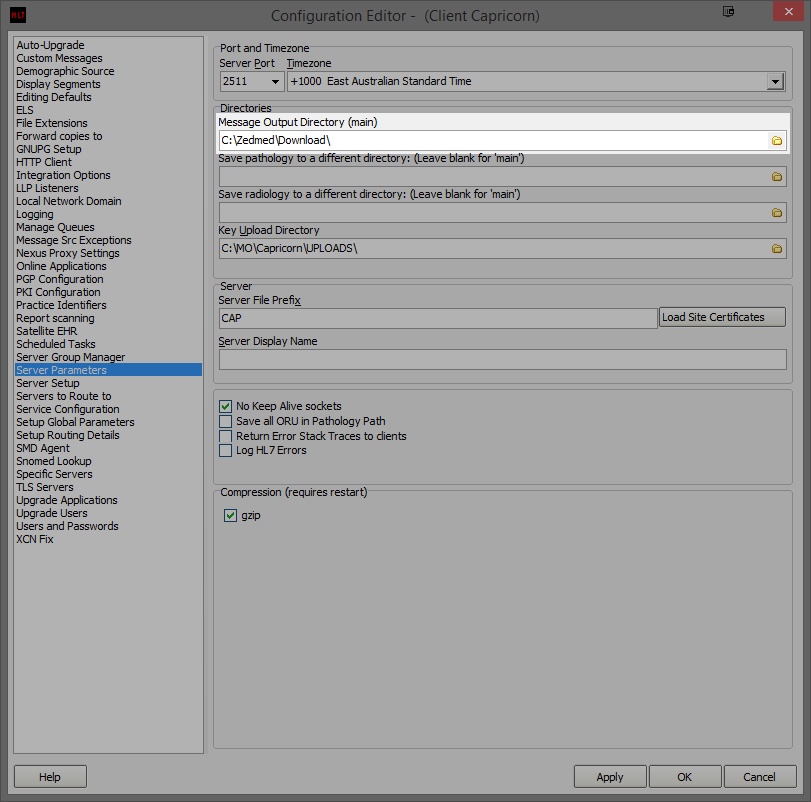
Under the Message Output Directory (main) set the results import path.
The path can be different depending on where the Capricorn is installed.
For example:
Newer Versions of ZedMed(Capricorn installed on the Server) --> C:\Zedmed\Download\ Or (Capricorn installed on the Workstation) --> \\server\Zedmed\Download\
Older Versions of ZedMed(Capricorn installed on the Server) --> C:\Patients\Download\ Or (Capricorn installed on the Workstation) --> \\Server\Patients\Download\
- The configuration is complete. Click Apply and OK.
Configuring Zedmed
- Open Zedmed, and Click on the Reception tab. Then Click the button titled Clinical Records.
- Open Zedmed and go to Tools > Global Options.
- Select the Communications tab, and select Messaging Provider tab.
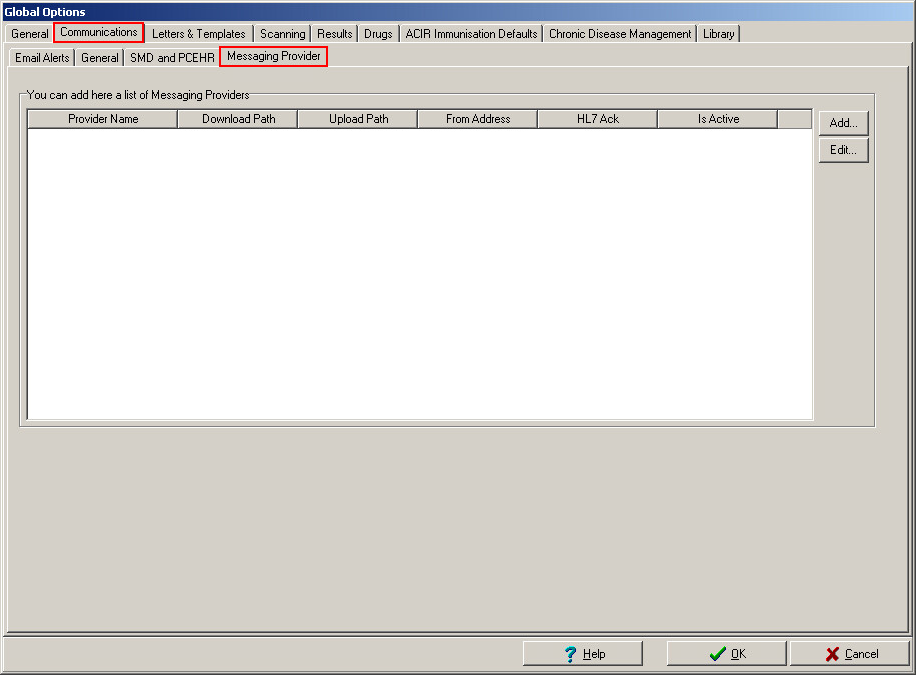
- Click the Add button.
- Enter the Provider name Medical-Objects.
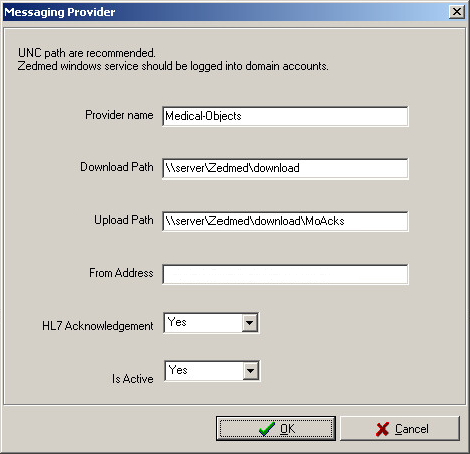
Set the download path to the Message Output Directory path set earlier, for example
\\server\Zedmed\Download\
If possible, Use a UNC path.
Set the upload path to the ACK management path set earlier. For example:
\\Server\Patients\Download\MoAcks
- Make sure HL7 Acknowledgement and Is Active are set to Yes.
ZedMed Extensions Check
- Open Zedmed and go to Tools > Global Options.
- Select the Communications tab, and the General tab.
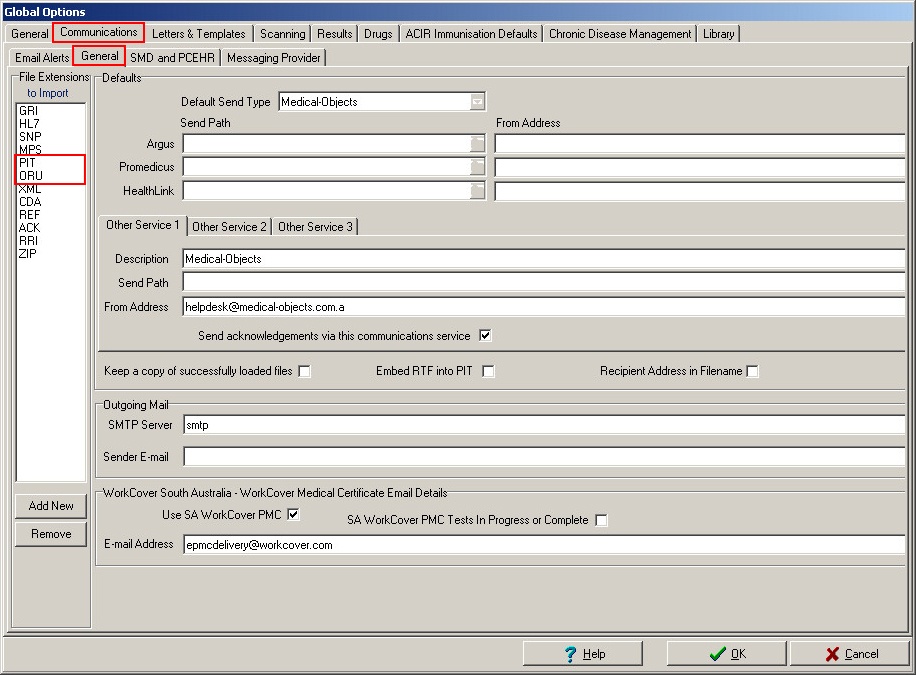
- Make sure that ORU and PIT are in the extension list on the left panel.
Importing Results in Zedmed
- Open Zedmed, and Click on the Reception tab. Then Click the button titled Clinical Records.
- From the top menu select Results > Import Laboratory Results (CTRL+F6)
- Once imported then hit the Results Inbox button.
If results don't import, check the settings below.
- No labels