Overview
Medical-Objects Explorer Online is a web‑based solution designed for allied health practitioners that makes creating and managing clinical correspondence a breeze. At the click of a button you can seamlessly send and receive results from your personal desktop, laptop or tablet. You can also send PDF documents to recipients in seconds.
Explorer Online is an efficient practice management system useful for physiotherapists. Explorer Online can be used to send out custom patient questionnaires or self-assessments, record clinical consult notes, complete patient assessments, send doctor letters and receive confidential patient files.
This article will cover the basic functionality of Medical-Objects Explorer Online for physiotherapists. If you have any questions or require any further information, please contact the Helpdesk on (07) 5456 6000.
Requirements
Explorer Online was designed to run on desktops, laptops and modern tablets running Windows, MacOS or Linux. Mobile phones are not currently supported.
Please take note of the browser requirements below.
Supported Browsers
- Microsoft Internet Explorer 11
- Microsoft Edge
- Chrome
- FireFox
- Opera
- Safari 8+
Logging in and Out
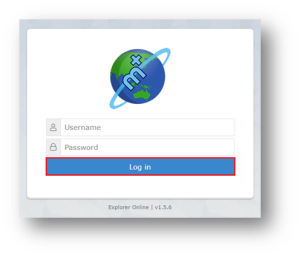
When first loading Explorer Online you will be presented with a login screen. Simply enter in your username and password and click Log In to proceed.
After entering in your username and password Select Provider.
Note: This is only available if you have multiple provider numbers.
A list will appear with Provider’s name and provider number associated with the corresponding location.

Once logged in, the User Menu will display the server you’ve logged into and also which provider you selected at login.
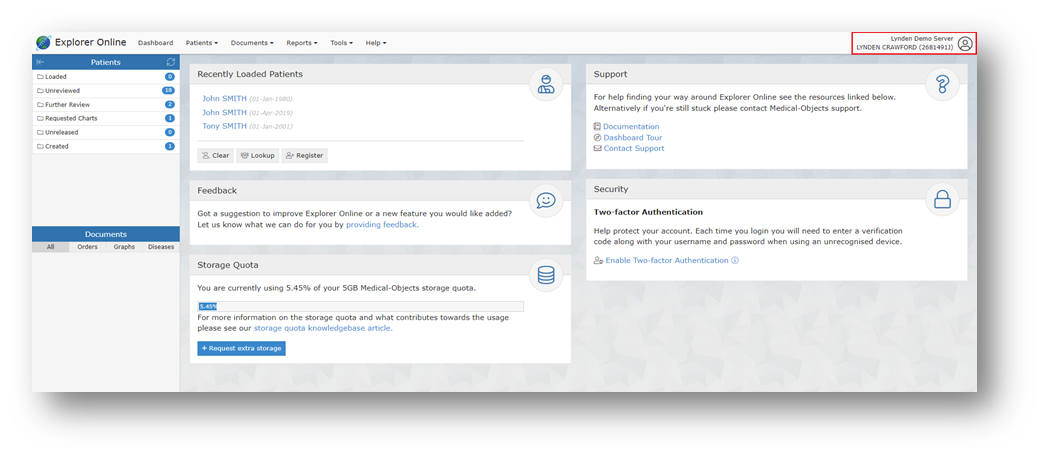
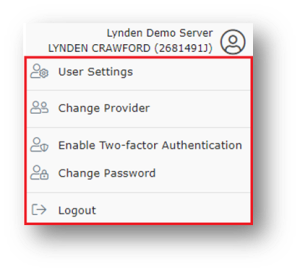
When you click on the User Menu a drop down will appear with menu options related to your user account. You can edit User Settings, Change Provider, Enable Two-factor Authentication, Change Password and Logout.
Note: you will be automatically logged out after 10 minutes if inactivity. You can change this via the User Settings option in the User Menu.
Email Notifications
Tip! Please contact us to enable this feature on your account.
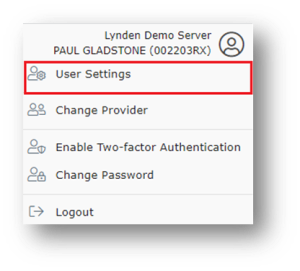
- Click User Settings from the User Menu if you would like to enable email notifications.
- Next, click Document Notifications and enter the email address that you want to receive the notifications to.
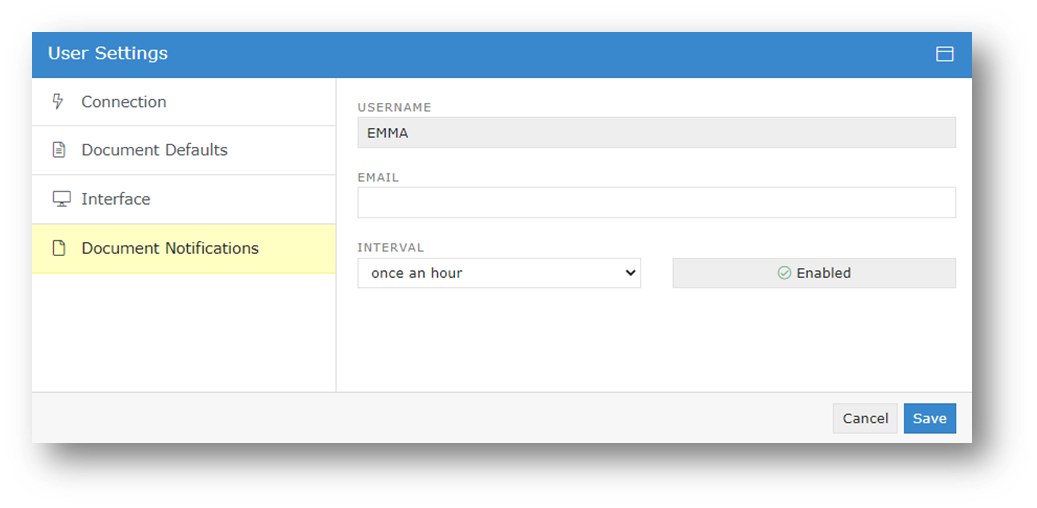
- Set up the Interval of how often you want to receive email notifications - it's recommended once an hour or every 4 hours - and select Save.
Dashboard Layout
The Dashboard is the default page that will appear once you have logged into Explorer Online. The Dashboard is split into three sections: Navigation Menu, Sidebar and the main content area.
Tip! The dashboard includes the option to complete a tour found under the help tab.
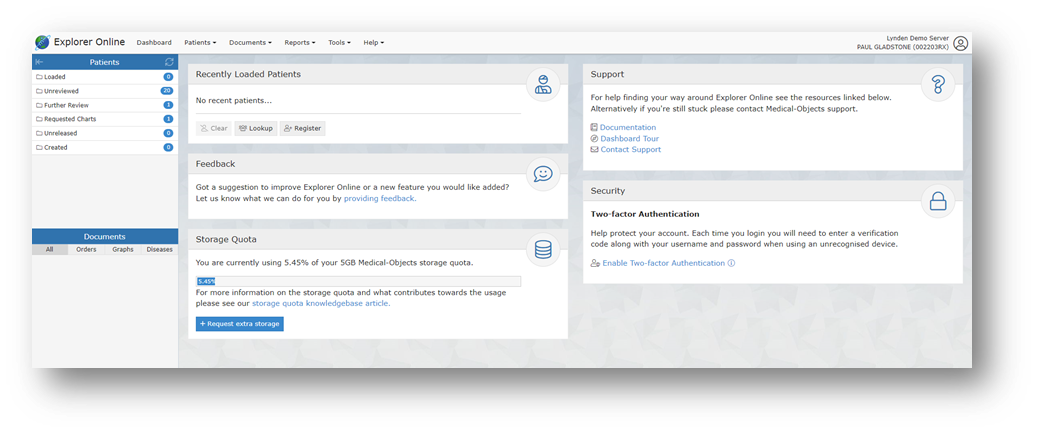
Navigation Menu
This is the main Navigation Menu. The menu is dynamically built up based on what features your server has enabled and what permissions your user account has. If a menu item is missing you may need to call the Helpdesk (07 5456 6000) to correct your user permissions or enable a server feature.

Sidebar
The Sidebar is a feature that allows you to access and manage your patient documents. The Sidebar is split into two sections: Patients and Documents.
If you're using Explorer Online on a smaller screen you have the option to collapse the sidebar by clicking the collapse icon (![]() ) found on the left side of the Patients header. You can then expand the Sidebar again by clicking the expand icon (
) found on the left side of the Patients header. You can then expand the Sidebar again by clicking the expand icon (![]() ).
).
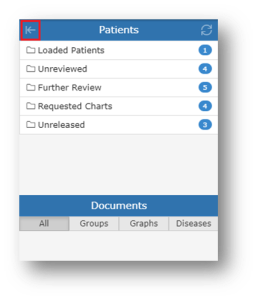
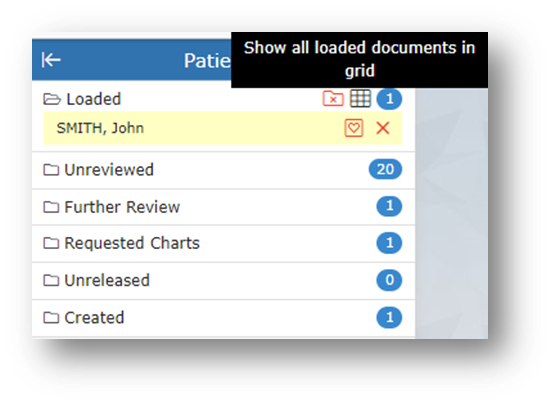
Patients
The Patients section of the Sidebar consists of individual folders which contains patient documents. The folders will list each unique patient that has a document for that folder. The count to the right is the number of patients in the folder and not the number of combined documents.
Hovering over a folder will reveal a grid icon (![]() ). This button will load all the documents in that folder into a grid. From there you can then perform bulk actions on the documents such as printing or forwarding to another provider.
). This button will load all the documents in that folder into a grid. From there you can then perform bulk actions on the documents such as printing or forwarding to another provider.
To refresh the contents of the folders simply click the refresh button (![]() ) in the title bar.
) in the title bar.
Loaded Patients | Contains any patients you've done a lookup on or retrieved all documents for. You can remove a patient from this list by clicking the remove icon ( If you want to clear the folder and remove all patients you can click on the clear icon ( |
Unreviewed | Contains patients that have unreviewed documents. Selecting documents from this folder will give you the option to mark the document as reviewed. |
Further Review | Contains patient documents that have been parked. A document can be parked by clicking the Park document action button.
Documents in this folder can only be accessed by the provider who made the original Park request. To remove a document from this folder, click the Unpark document action button.
|
Requested Charts | Contains patient documents with the requested chart status. A document can be moved to the Requested Charts folder by clicking the Request Chart document action button.
Any user in your practice’s Explorer Online software, who has the granted permissions to view results, can access documents in this folder. For more information on setting user permissions, see our Explorer Online Admin Guide (hyperlink) or please contact the Helpdesk on (07) 5456 6000. Practices can decide how to use this feature in their own workflows. For example, a physiotheraist can use this option when they receive a referral and then clicks Request Chart so that admin staff can be ready with the patients’ information upon booking in an appointment. Upon completion of the workflow with that document, staff can then select Cancel Chart document action button to remove it from the Requested Charts folder.
|
Unreleased
| Contains patient documents that have not yet been released. Documents in this folder can either be released or deleted.
An unreleased document will have the following red text in the document title to indicate that it has not yet been released.
Unreleased documents are created by ticking the For Approval Before Delivered option when sending a document. |
Created | Contains a recent list of documents that you have created, this includes both progress notes and documents that you have sent. You can clear this folder by hovering over it and clicking on the Clear Folder button ( |
Documents
The Documents section will list all the documents for the selected patient that correspond to the folder the patient is in. For example, if you select a patient in the Unreviewed folder, all unreviewed documents for that patient will be listed.
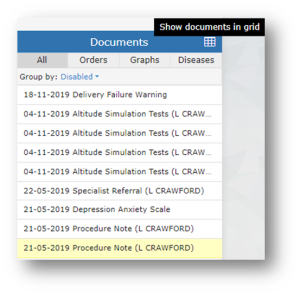
Hovering over the Documents section will reveal a grid icon (![]() ). This button will load all the documents listed into a grid. From there you can then perform bulk actions on the documents such as printing or forwarding to another provider.
). This button will load all the documents listed into a grid. From there you can then perform bulk actions on the documents such as printing or forwarding to another provider.
Abnormal results will show as red in the documents list.
Managing Patients
Registering a Patient
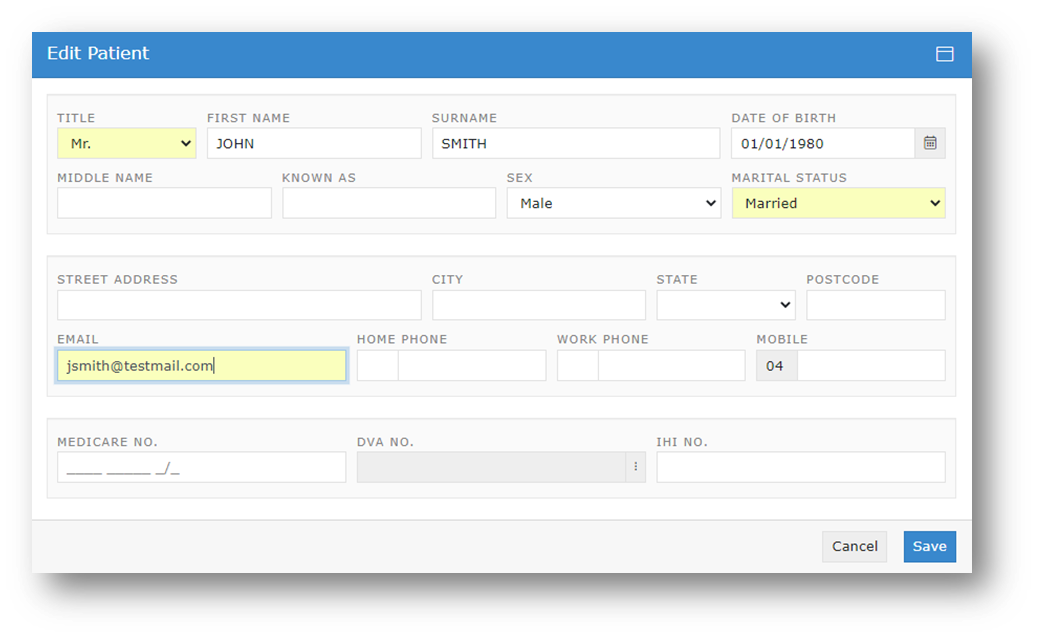
To register a patient, select the Patients button in the top navigation and then click Register Patient on the dropdown.

Once clicked, a window will pop up with text fields to input patient information, as seen in the screenshot below.
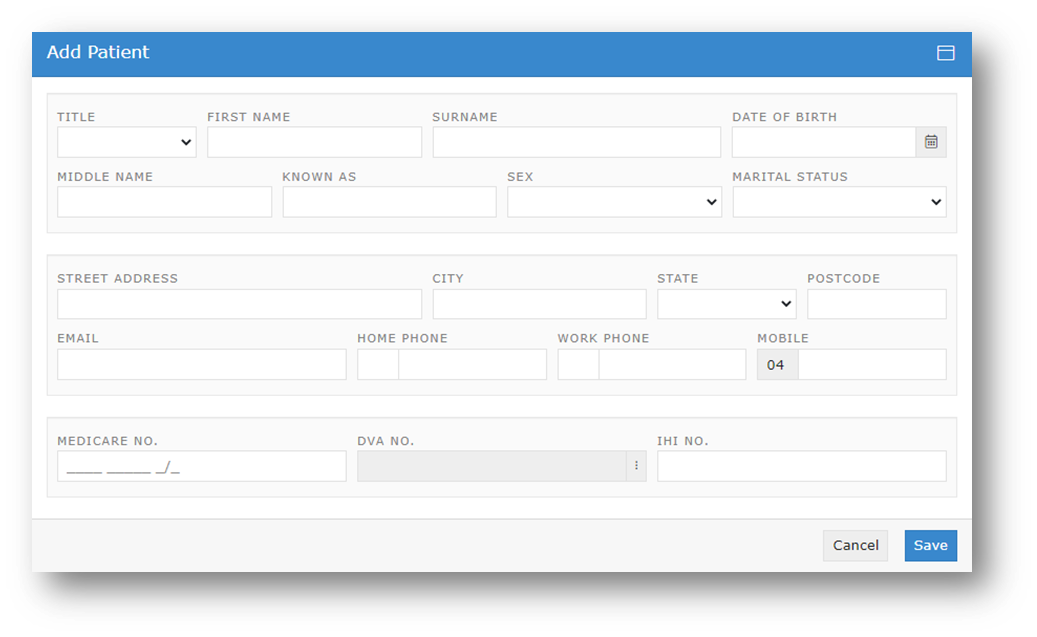
The required fields for registering a patient are Surname, First Name, and Date of Birth. While they are the only required fields, it's suggested that you fill as many of them out as possible, so you have as much information on documents as possible.
Editing a Patient
To edit a patient, go to the Patients dropdown in the top navigation bar, and then click Edit Patient Details.

This will take you to the Patient Lookup window. The patient lookup window is used to search for current patients that your practice has previously created with Explorer Online. You have three different options in which to search for, their name, ID or lab number. You can change these on the dropdown to the right of the search field. You can then type a search term into the text field, press the Search button and if all is well, you will see your patient.
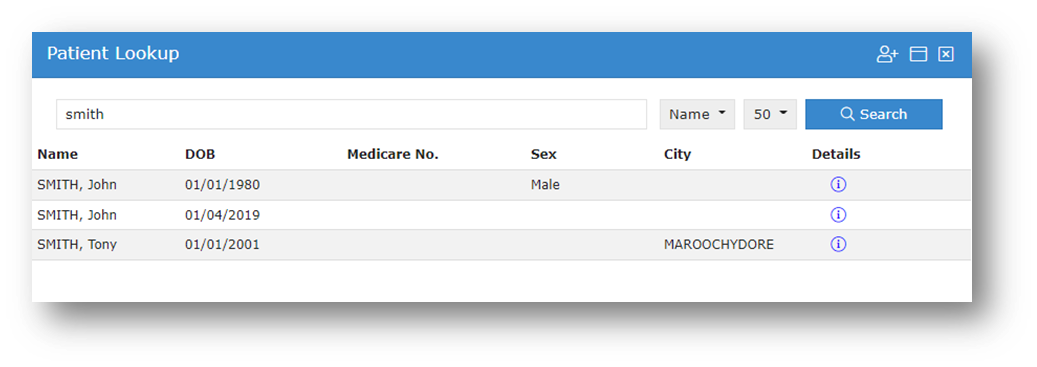
Clicking on the information icon (![]() ) will bring up the client's details. An example of the layout of the client detail's is shown below.
) will bring up the client's details. An example of the layout of the client detail's is shown below.
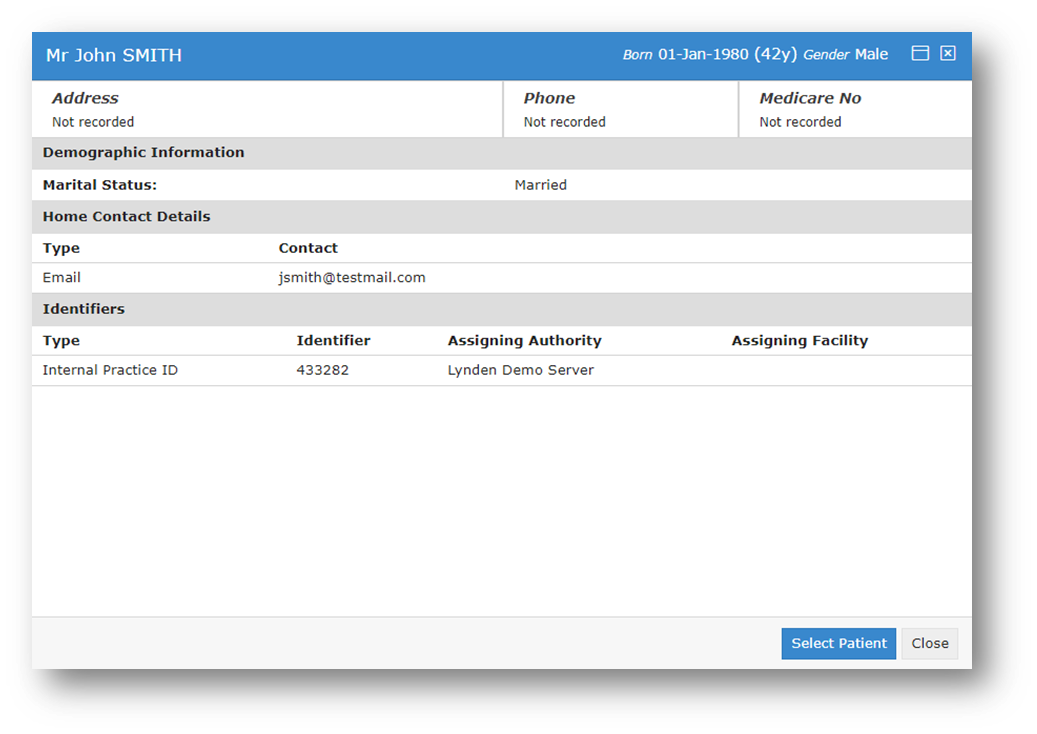
Once you have found your patient, you can then select the patient you wish to view, and then you will see the edit screen. Fill out the fields that you wish to change or add, and then click the Save button.
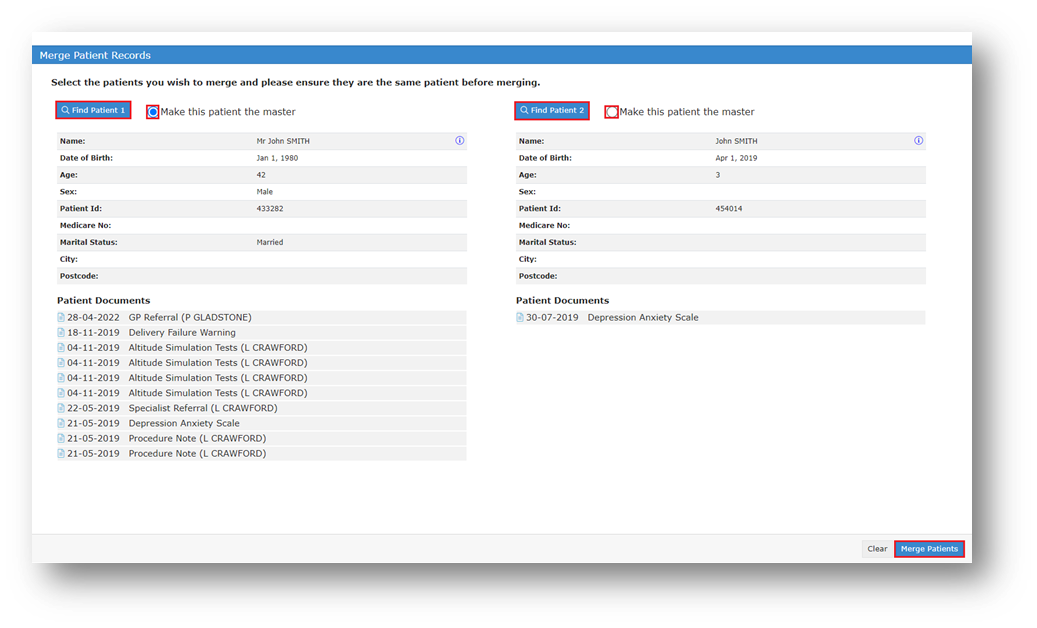
Merging Patient Records
To merge patients, open the Patients tab in the Navigation Menu then select Merge Patient Records.
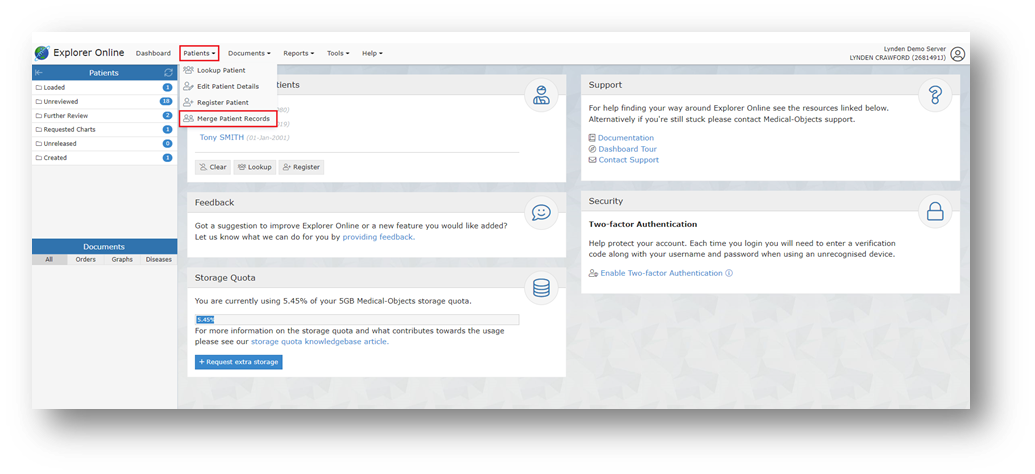
Click the Find Patient 1 and search via the Patient Lookup. Ensure the correct patient is chosen and then follow the same steps for Find Patient 2. Before merging, make sure their details are the same. Choose which patient file is going to be the master by selecting the corresponding circle.
Viewing Documents
To view a document in a patients’ file, in the sidebar ensure the patient and document are highlighted.
Tip! Pressing the space bar while viewing a document will scroll the document and then move to the next in the list.
Document Actions
The actions are found below the Navigation Menu.
Cumulative Results | Allows you to compare the patient’s scores after they have submitted the same survey multiple times. Click the total check box on the left-hand side to graph the results over time. |
Park | Adds the document to the Further Review sidebar folder. |
Unpark | Removes the document from the Further Review sidebar folder. |
Request Chart | Adds the document to the Requested Charts sidebar folder. |
Cancel Chart | Removes the document from the Requested Charts sidebar folder. |
Create Response | Brings up the Send Document form with the patient, ordering provider and copies to fields pre-populated from the document. |
History | Loads the transaction history of the document. |
Audit report | This button shows the selected documents audit log. |
Edit | Editing the document allows the addressing details, document details, and parts of the written document to be altered. |
Forward | Found under the More button, it allows you to forward the document to another provider. |
Found under the More button, it allows you to print the document. | |
Release | This button is only visible for unreleased documents. It will release the document and send it to the addressed provider/s. |
Delete | This button is only visible for unreleased documents. It will delete the unreleased document. |
Mark as Reviewed | This button is only visible when viewing a document from within the Unreviewed sidebar folder. It will mark the document as reviewed. |
All Documents | This button will show up when viewing a document from any sidebar folder except the Loaded Patients folder. When clicked it will load all the documents for the patient of the currently selected document. |
Viewing Documents in Grid
To list documents in a grid allowing for bulk actions you can simply click on the grid icon (![]() ) in the sidebar from either the documents section or when hovering over each folder.
) in the sidebar from either the documents section or when hovering over each folder.
Tip!
- You can hide or show columns via the grid menu (
 ) which can be accessed by clicking the far button on the grid.
 - You can drag to re-order columns. The position of columns will be remembered.
- You can reset the grid layout by choosing Reset View from the grid menu.
- You can filter the documents in the grid by clicking the Add filter
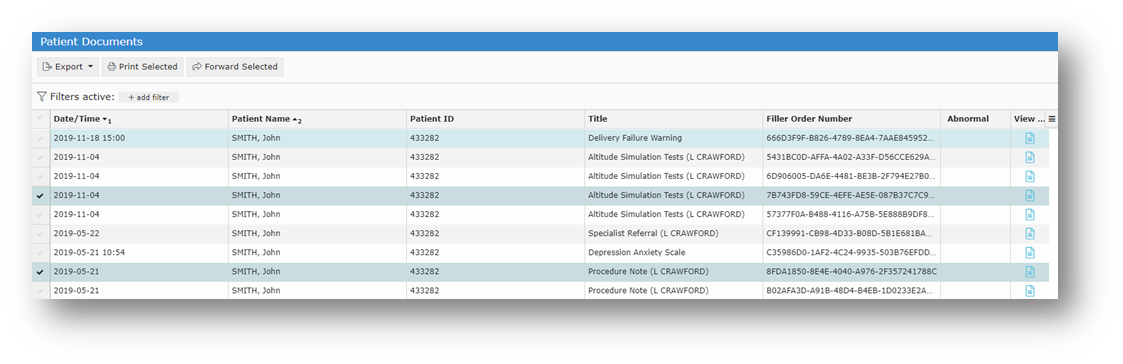
Bulk Actions
You can select multiple documents in the grid and then perform an action on the selection. Currently the bulk actions available are:
- Exporting to CSV (this exports the transaction details and not the document itself, useful for auditing purposes)
- Printing (this can be sent to a printer or saved as a single PDF)
- Forwarding (sends document/s to chosen provider)
Making Documents as Reviewed
Documents that appear in your Unreviewed sidebar folder will need reviewing so that the sender of the document receives an acknowledgement.
Marking a document as reviewed can be done one of two ways. Both methods will only be accessible if you're viewing the document from within the Unreviewed sidebar folder.
- Clicking on the Mark as reviewed document action button.
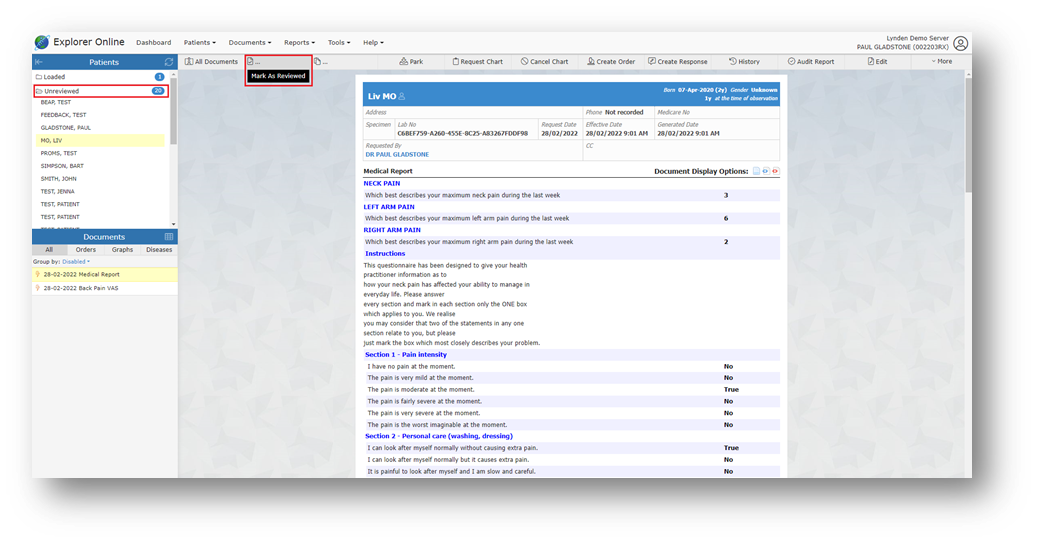
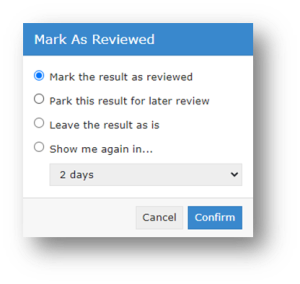
- Navigating to the next document in the Unreviewed folder. A pop-up window will appear and this will prompt you with a few options.
Document Actions
Found on the Navigation Menu the Documents tab is spit into 3 different sections: Send; Create; and Manage.
Examples of how documents can be sent or received include:
- sending letters to the patient’s doctor after care plan appointments
- sending/receiving reports or progress updates to/from any other health professionals the patient is involved with (E.g. their paediatrician, psychologist, GP, occupational therapist etc.)
- sending/receiving patient questionnaires or self-assessments to/from the client
- sending/receiving any other type of document, PDF or image file
Tip! A clinician is required to be setup with Medical Objects to be able to receive incoming documentation. Being setup to receive with Medical Objects is quick, simple and also free – completed by either filling out an online form or calling the Sales team. The setup time takes about 10 minutes.
Creating documents in Explorer Online is useful for physiotherapists to write progress notes, use patient assessments and send out custom patient questionnaires.
Using the template editor is quick and easy to design commonly used documents like doctor letters, initial assessments, DVA reports and review progress notes.
Provider Lookup
The Provider Lookup feature allows you to easily search details and check if a provider is routable (setup to receive sent results) before you send a document.
- To access the Provider Lookup feature, click on the Tools tab, then click Provider Lookup.
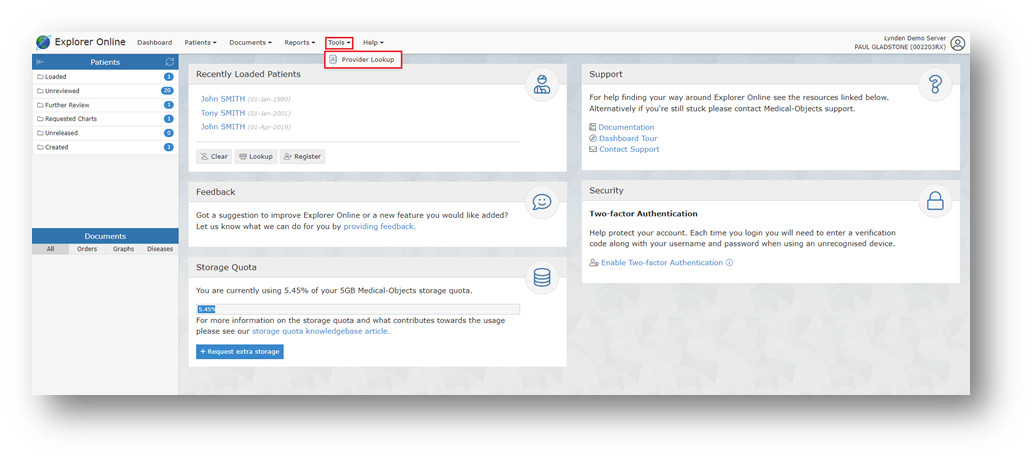
- Enter the details of the provider in the search box, enter the surname first if you are searching by the Name search type. Press the Searchbutton or hit the enter key to load results.