| Info | ||
|---|---|---|
| ||
If you're looking for the full user guide please see this page. |
Overview
This article will cover the basic functionality of Medical-Objects Explorer Online when running in Results Online mode. If you have any questions or require any further information, please contact the Helpdesk on (07) 5456 6000.
| Multiexcerpt include | ||||
|---|---|---|---|---|
|
| Multiexcerpt include | ||||
|---|---|---|---|---|
|
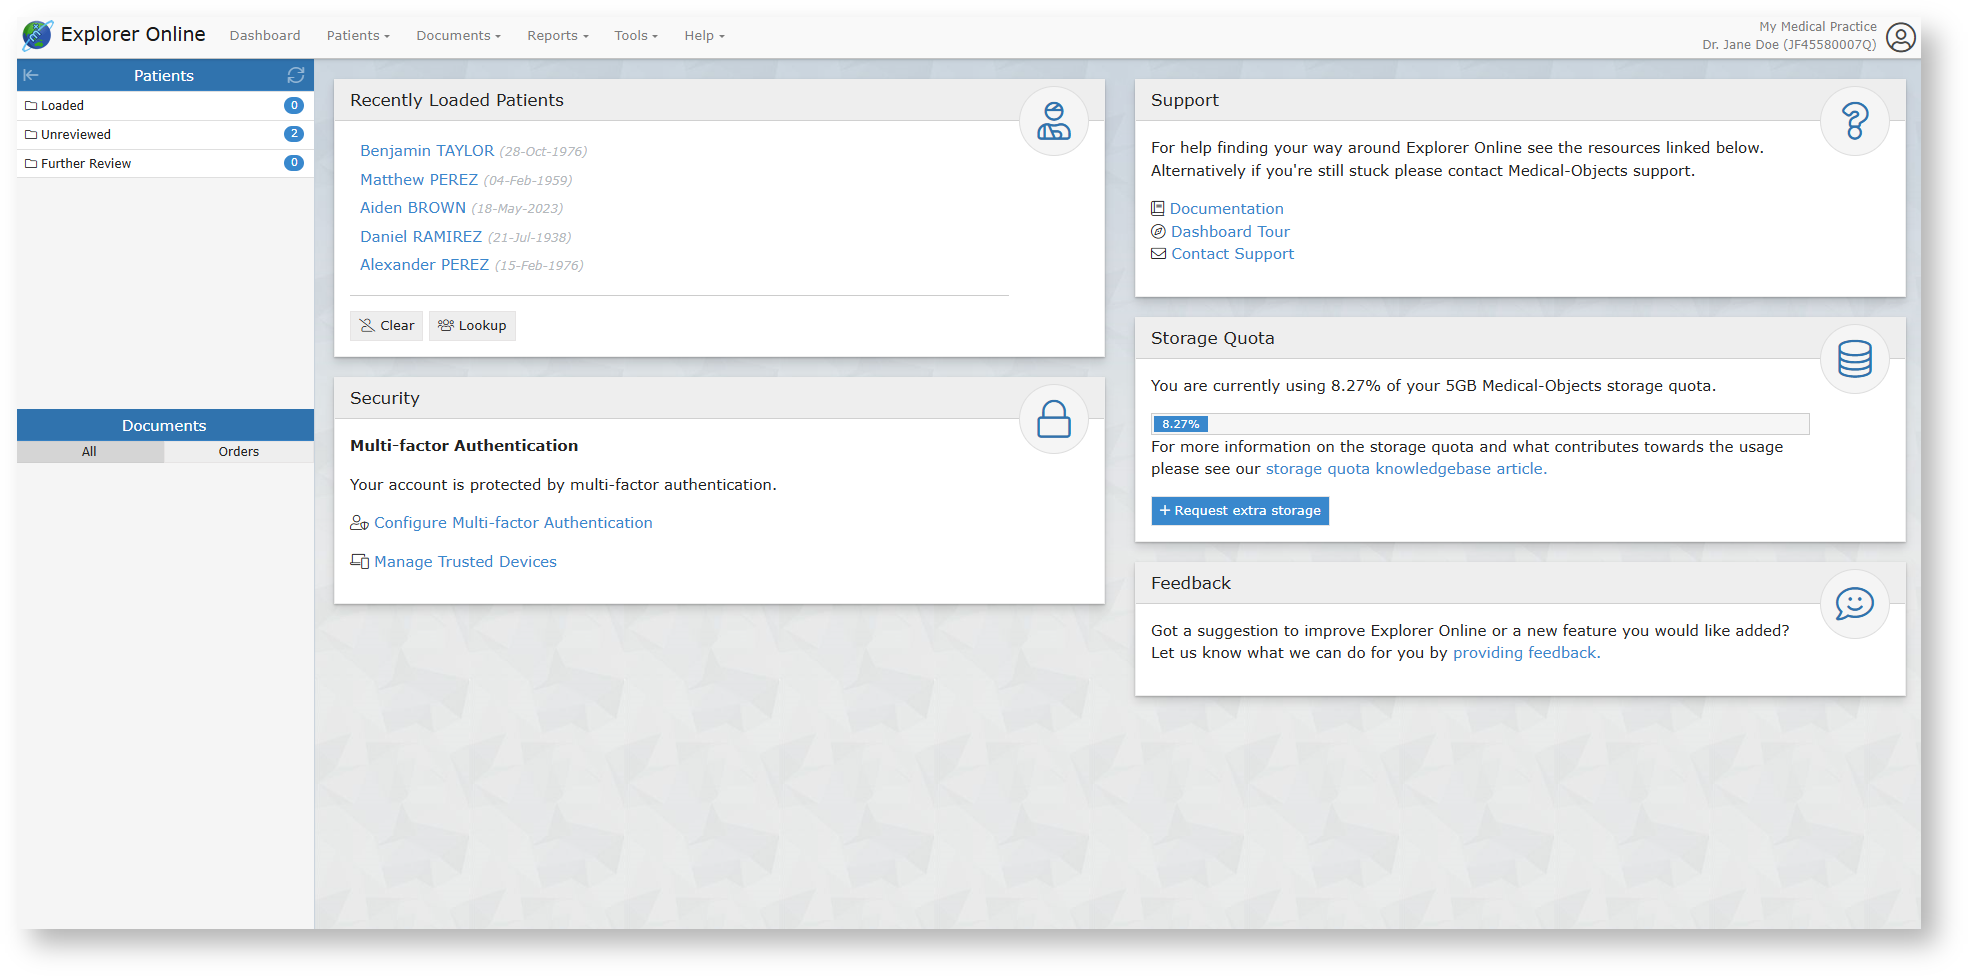
Dashboard Layout
The Dashboard is the default page that will appear once you have logged into Explorer Online. The Dashboard is split into three sections: Navigation Menu, Sidebar and the main content area.
| Multiexcerpt include | ||||
|---|---|---|---|---|
|
Sidebar
The Sidebar is a feature that allows you to access and manage your patient documents. The Sidebar is split into two sections: Patients and Documents.
If you're using Explorer Online on a smaller screen you have the option to collapse the sidebar by clicking the collapse icon ![]() found on the left side of the Patients header. You can then expand the Sidebar again by clicking the
found on the left side of the Patients header. You can then expand the Sidebar again by clicking the ![]() icon.
icon.
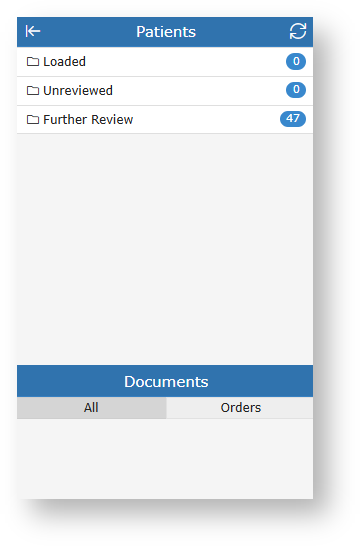
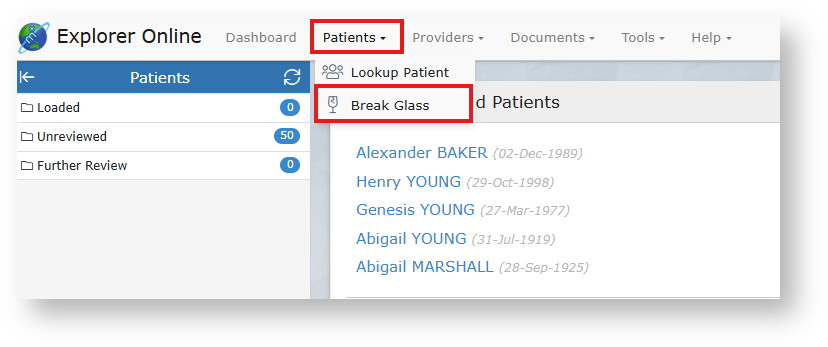
Patients
The Patients section of the Sidebar consists of individual folders which contains patient documents. The folders will list each unique patient that has a document for that folder. The count to the right is the amount of patients in the folder and not the amount of combined documents.
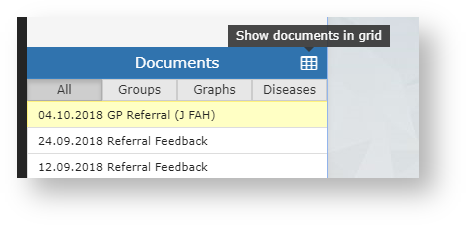
Hovering over a folder will reveal a grid icon (![]() ). This button will load all the documents in that folder into a grid. From there you can then perform bulk actions on the documents such as printing or forwarding to another provider.
). This button will load all the documents in that folder into a grid. From there you can then perform bulk actions on the documents such as printing or forwarding to another provider.
To refresh the contents of the folders simply click the refresh button (![]() ) in the title bar.
) in the title bar.
| Loaded Patients | Contains any patients you've done a lookup on or retrieved all documents for. You can remove a patient from this list by clicking the remove icon ( If you want to clear the folder and remove all patients you can click on the clear icon ( |
|---|---|
| Unreviewed | Contains patients that have unreviewed documents. Selecting documents from this folder will give you the option to mark the document as reviewed. A Max of 50 unreviewed documents will appear in the list. To see new results you must mark results as reviewed once they have been actioned. |
| Further Review | Contains patient documents that have been parked. A document can be parked by clicking the 'Park' document action button.
Documents in this folder can only be accessed by the provider who made the original 'Park' request. To remove a document from this folder click the 'Unpark' document action button.
|

Documents
The Documents section will list all the documents for the selected patient that correspond to the folder the patient is in. For example if you select a patient in the Unreviewed folder, all unreviewed documents for that patient will be listed.
Hovering over the Documents section will reveal a grid icon (![]() ). This button will load all the documents listed into a grid. From there you can then perform bulk actions on the documents such as printing or forwarding to another provider.
). This button will load all the documents listed into a grid. From there you can then perform bulk actions on the documents such as printing or forwarding to another provider.
Abnormal results will show as red in the documents list.
Viewing Documents

Tips
- Pressing the space bar while viewing a document will scroll the document and then move to the next in the list.
Document Actions
| Park | Adds the document to the Further Review sidebar folder. |
|---|---|
| Unpark | Removes the document from the Further Review sidebar folder. |
| Create Response | Brings up the Send Document form with the patient, ordering provider and copies to fields pre-populated from the document. |
| History | Loads the transaction history of the document. |
| Forward | Allows you to forward the document to another provider. |
| Allows you to print the document. | |
| Mark as Reviewed | This button is only visible when viewing a document from within the Unreviewed sidebar folder. It will mark the document as reviewed. |
| All Documents | This button will show up when viewing a document from any sidebar folder except the Loaded Patients folder. When clicked it will load all the documents for the patient of the currently selected document. |
Viewing documents in grid
To list documents in a grid allowing for bulk actions you can simply click on the grid icon (![]() ) in the sidebar from either the documents section or when hovering over each folder.
) in the sidebar from either the documents section or when hovering over each folder.

Tips
- You can hide or show columns via the grid menu (
 ) which can be accessed by clicking the far button on the grid.
 - You can drag to re-order columns. The position of columns will be remembered.
- You can reset the grid layout by choosing Reset View from the grid menu.
- You can filter the documents in the grid by clicking the Add filter button.

Bulk Actions
You can select multiple documents in the grid and then perform an action on the selection. Currently the bulk actions available are:
- Printing (This can be sent to a printer or saved as a single PDF)
- Forwarding
- Exporting to CSV (this exports the transaction details and not the document itself, useful for auditing purposes)
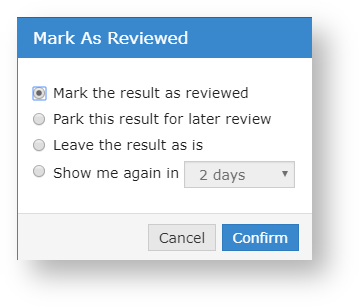
Marking documents as reviewed
Documents that appear in your Unreviewed sidebar folder will need reviewing so that the sender of the document receives an acknowledgement.
Marking a document as reviewed can be done one of two ways. Both methods will only be accessible if you're viewing the document from within the Unreviewed sidebar folder.
- Clicking on the Mark as reviewed document action button.
- Navigating to the next document in the Unreviewed folder. This will prompt you with a few options.
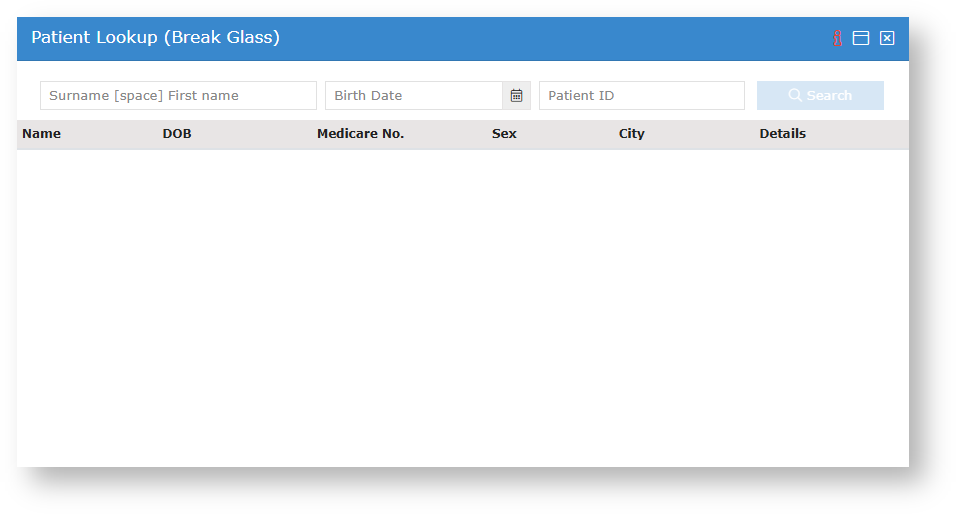
- You will now see a grid with the patients results available to break glass on. Press the check mark icon (
 ) at the beginning of each row for the documents you wish to break glass on.
 - Once you have selected all the required documents press the Access Results button (
 ), the patient and their results you just accessed will be available in the Loaded folder of the sidebar.
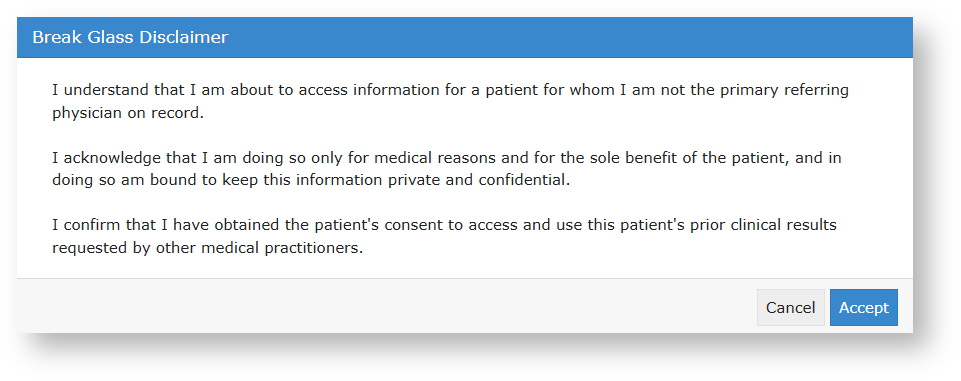
- Clicking the break glass icon (
 ) next to patient in the loaded folder of the sidebar. Once disclaimer has been accepted:
- You will now see a grid with the patients results available to break glass on. Press the check mark icon () at the beginning of each row for the documents you wish to break glass on.
- Once you have selected all the required documents press the Access Results button (), the patient and their results you just accessed will be available in the Loaded folder of the sidebar.
- You will now see a grid with the patients results available to break glass on. Press the check mark icon (
| Multiexcerpt include | ||||
|---|---|---|---|---|
|
| Table of Contents | ||||
|---|---|---|---|---|
|