Full user guide?
If you're looking for the full user guide please see this page.
Overview
This article will cover the basic functionality of Medical-Objects Explorer Online when running in Results Online mode. If you have any questions or require any further information, please contact the Helpdesk on (07) 5456 6000.
Explorer Online was designed to run on desktops, laptops and modern tablets running Windows, MacOS or Linux. Mobile phones are not currently supported. Please take note of the browser requirements below.Requirements
Supported Browsers
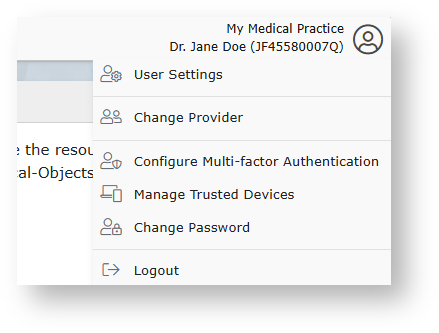
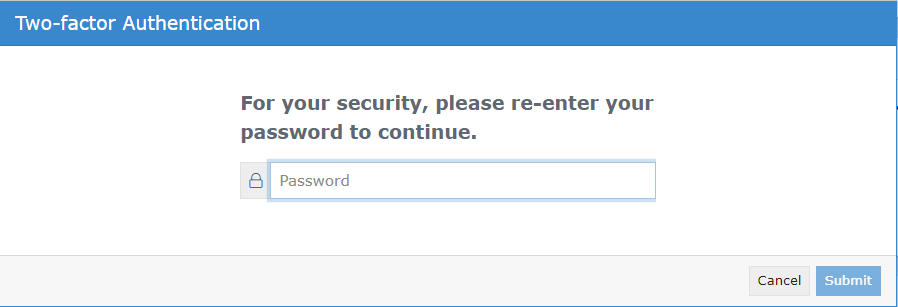
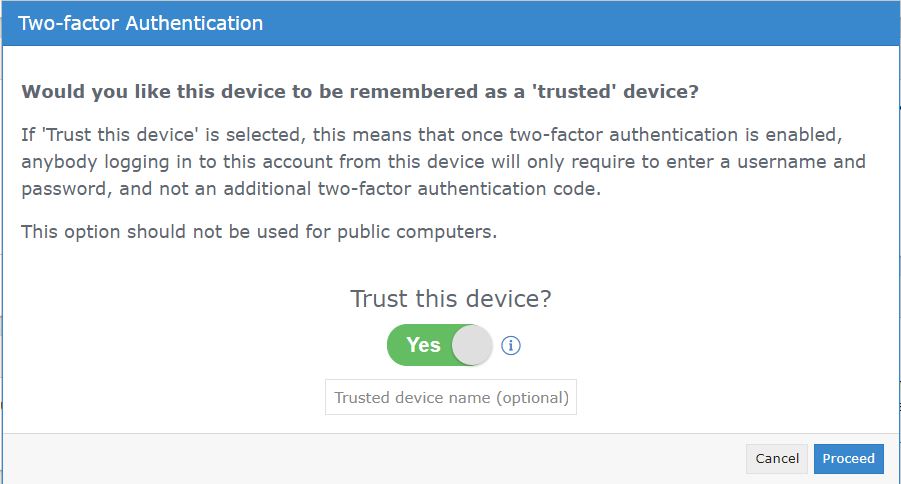
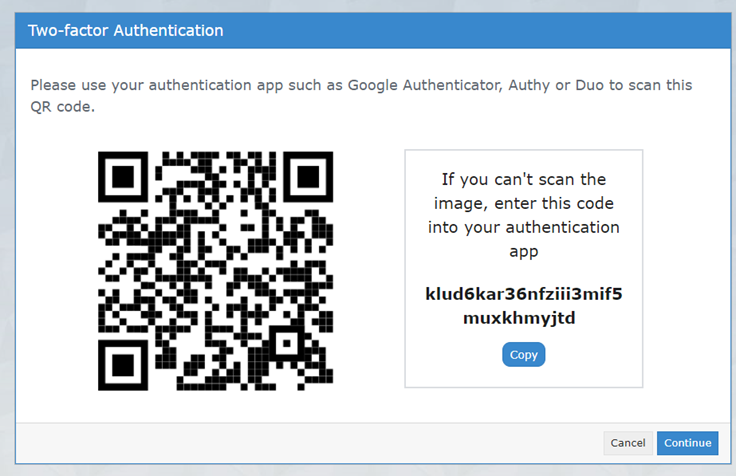
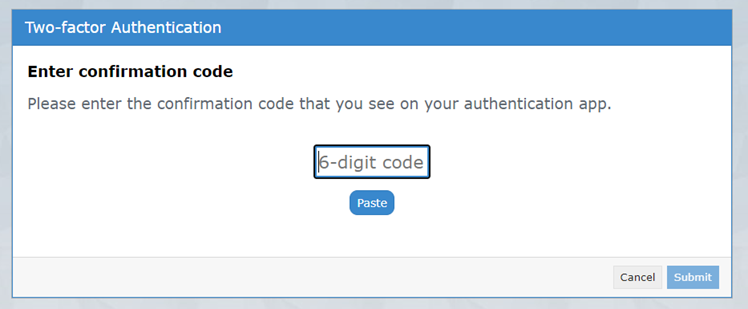
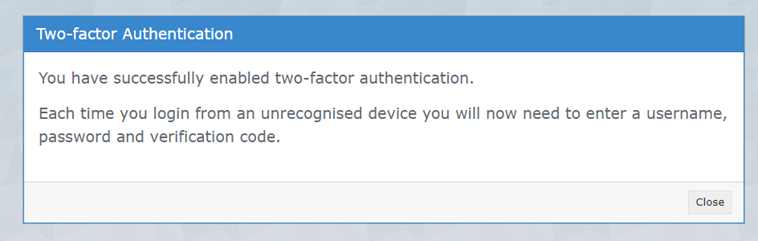
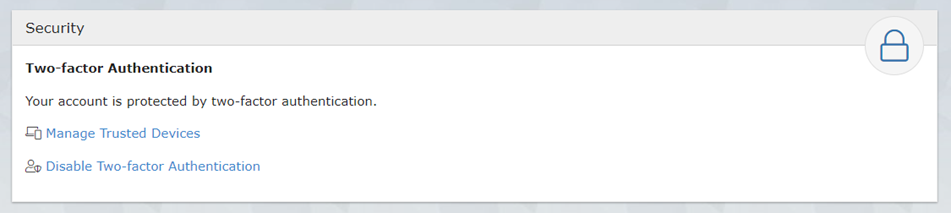
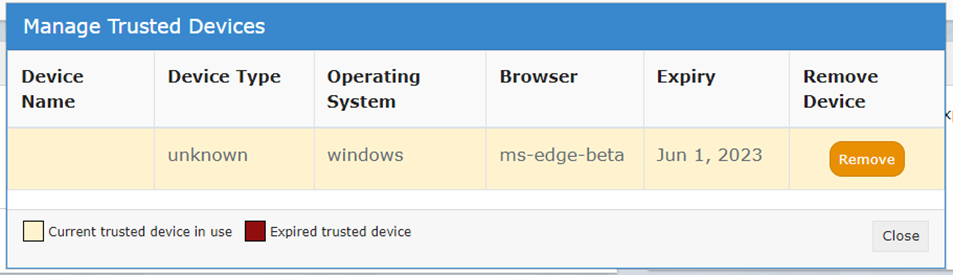
When first loading Explorer Online you will be presented with a login screen. Simply enter in your username and password and click login to proceed. Once logged in you can Logout again or Change Provider by simply clicking on the User Menu in the top right hand corner of the screen. Tip! You will be automatically logged out after 10 minutes of inactivity. You can change this via the User Settings option in the User Menu. Two-factor authentication is a security feature that helps protect your account in addition to your password. With two-factor authentication, a special login code together with your username and password will need to be entered each time someone tries to access your account from a computer or device that isn't recognised. In order to generate the special login codes, you will need to install a free app which supports the Time-based One-time Password Algorithm (TOTP) such as Google Authenticator, Authy and Microsoft Authenticator. There are many others, and some of these apps also support generating codes from desktop computers. To enable two-factor authentication can be enabled through the following steps. 1. Once you have logged in, Two-Factor Authentication can be enabled by clicking 'Enable Two-factor Authentication' on the 'Security' section in the Dashboard. 2. It will prompt you for your password 3. Decide whether you would like to set your device as a trusted device (this will allow you to skip these Two-Factor steps for 30 days on the selected device). Simply use the toggle button below “Trust this device” to select your choice, then select “Proceed”. 4. Open your Two-Factor Authentication app and scan the QR code provided (or enter the optional code), then click “Continue”. 5. Enter the code your app provided you, then select “Submit”. 6. Your Two-Factor Authentication is now setup – Click “Close”. 1. Locate the “Security” section on your Medical Objects dashboard, and select “Manage Trusted Devices”. 2. A list of trusted devices should display. Simply click “Remove” to delete a trusted device. Please note: Trusted devices will allow you to skip the Two-Factor steps for 30 days - once the 30 days expires they will show as a “Expired Trusted Device”. This means the next time you log into the portal on this device you will be prompted to enter the code you receive from your Two-Factor Authentication app. What is two-factor authentication? Two-factor authentication is a security feature that helps protect your account in addition to your password. With two-factor authentication, a special login code together with your username and password will need to be entered each time someone tries to access your account from a computer or device we don't recognise. What do I need to be able to use it? In order to generate the special login codes, you will need to install an app which supports the Time-based One-time Password Algorithm (TOTP) such as Google Authenticator, Authy, Microsoft Authenticator or Duo. There are many others, and some of these apps also support generating codes from desktop computers. Do I always need to enter a code when logging in? During login, you can choose not to use two-factor authentication again on that specific device by setting it as a ‘trusted device’. If you select this option, that device will only ask for your username and password when logging in for the next 30 days. You will still be protected, because when you or anyone else tries to sign in to your account from an unrecognised device, two-factor authentication will be required. Browser third party cookies need to be enabled for Explorer Online and two-factor authentication to operate correctly. They are usually enabled by default. You should not choose to trust a public device. How do I enable two-factor authentication? To enable two-factor authentication, you will need to use your app to scan a QR code generated by Explorer Online (or type in the code if you cannot scan it). Your app will then generate a confirmation code which you need to enter when prompted by Explorer Online. Your account will now be two-factor authentication enabled, and you will need to generate a code with your app whenever prompted by Explorer Online during login. Can this be made mandatory for everyone at the organisation? Two-factor authentication can be made mandatory for all users. This will force each account on login to enable two-factor authentication (if it is not already enabled). Please contact our helpdesk (helpdesk@medicalobjects.com) if you would like this enabled. How to reset two-factor authentication? If you have lost your device or app which was used to enable two-factor authentication, email helpdesk@medicalobjects.com for assistance.Logging in and out
Setting up Two-Factor Authentication

Managing Trusted Devices
2FA F.A.Q
Dashboard Layout
The Dashboard is the default page that will appear once you have logged into Explorer Online. The Dashboard is split into three sections: Navigation Menu, Sidebar and the main content area.
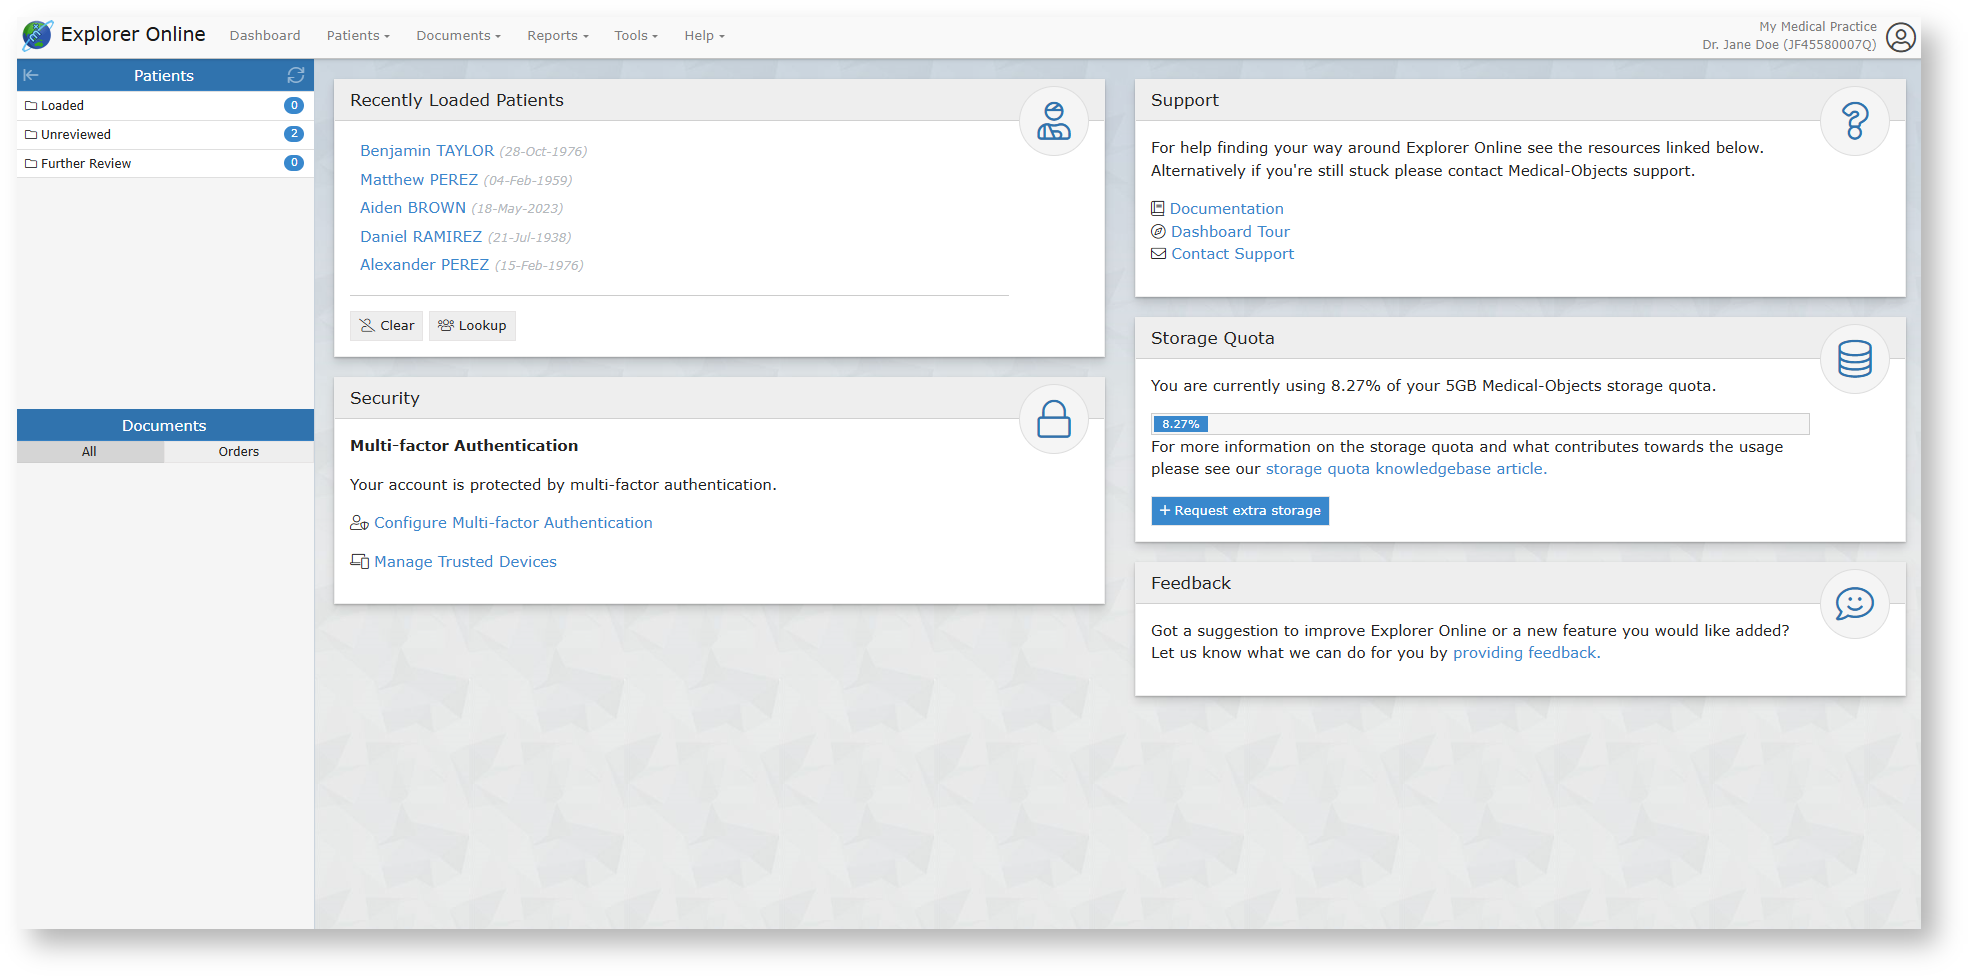
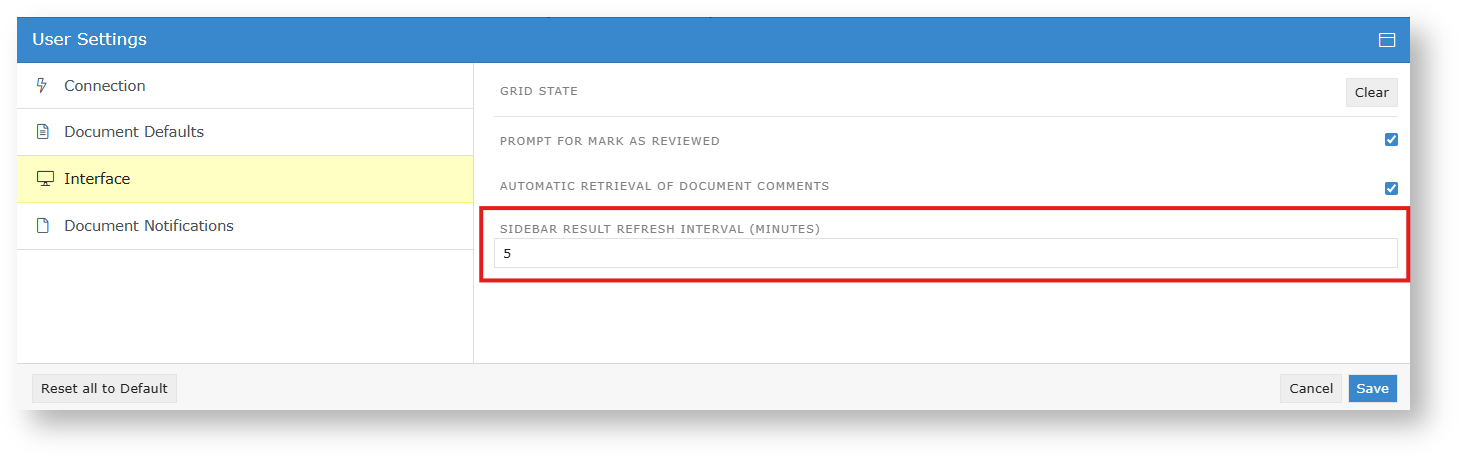
This is the main navigation menu. The menu is dynamically built up based on what features your server has enabled and what permissions your user account has. If a menu item is missing you may need to call the Helpdesk to correct your user permissions or enable a server feature. The User Menu is the menu in the top right-hand corner. This will display the server you've logged into and also which provider you selected at login. When you click on the User Menu a drop down will appear with menu options related to your user account. Warning Please contact us to enable this feature on your account. To ensure you are always up to date with the latest unreviewed results, Explorer Online will continuously poll for new results (every 5 minutes by default). This setting can be changed be changed by:Navigation Menu

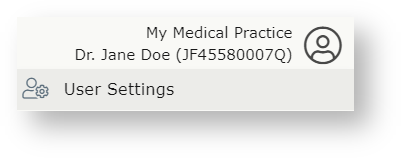
User Menu
Email Notifications
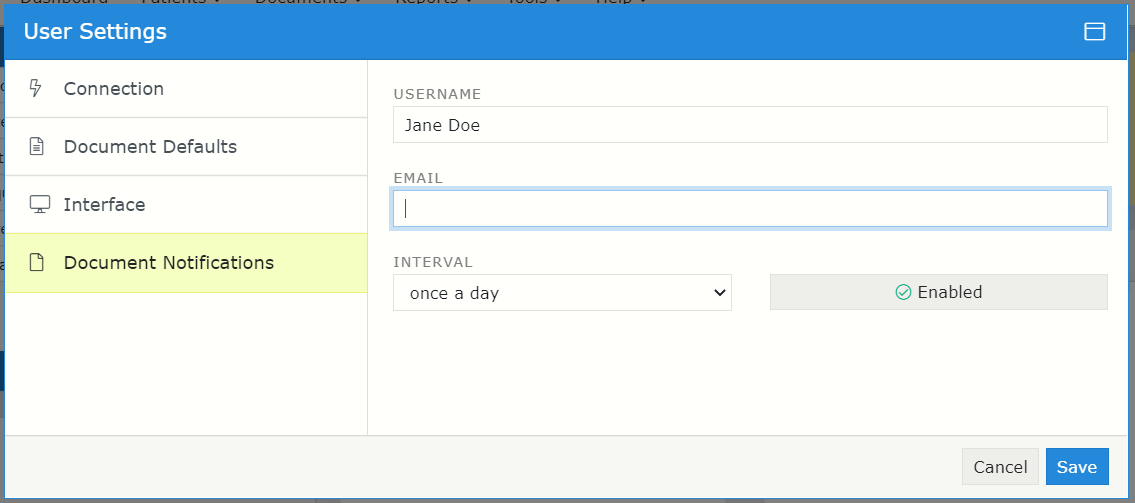
Automatic Loading of new unreviewed results
Sidebar
The Sidebar is a feature that allows you to access and manage your patient documents. The Sidebar is split into two sections: Patients and Documents.
If you're using Explorer Online on a smaller screen you have the option to collapse the sidebar by clicking the collapse icon ![]() found on the left side of the Patients header. You can then expand the Sidebar again by clicking the
found on the left side of the Patients header. You can then expand the Sidebar again by clicking the ![]() icon.
icon.
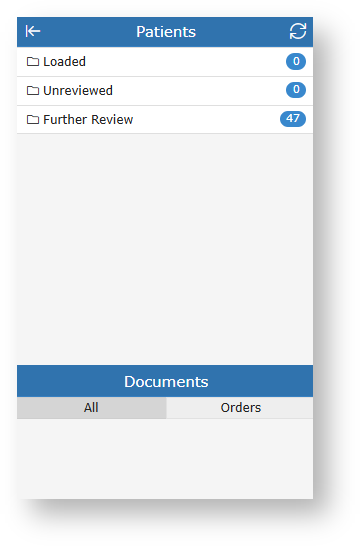
Patients
The Patients section of the Sidebar consists of individual folders which contains patient documents. The folders will list each unique patient that has a document for that folder. The count to the right is the amount of patients in the folder and not the amount of combined documents.
Hovering over a folder will reveal a grid icon (![]() ). This button will load all the documents in that folder into a grid. From there you can then perform bulk actions on the documents such as printing or forwarding to another provider.
). This button will load all the documents in that folder into a grid. From there you can then perform bulk actions on the documents such as printing or forwarding to another provider.
To refresh the contents of the folders simply click the refresh button (![]() ) in the title bar.
) in the title bar.
| Loaded Patients | Contains any patients you've done a lookup on or retrieved all documents for. You can remove a patient from this list by clicking the remove icon ( If you want to clear the folder and remove all patients you can click on the clear icon ( |
|---|---|
| Unreviewed | Contains patients that have unreviewed documents. Selecting documents from this folder will give you the option to mark the document as reviewed. A Max of 50 unreviewed documents will appear in the list initially. To load more results, scroll down on the table and the next 50 unreviewed documents will be added. You can scroll until 10,000 documents have been loaded. If you are still unable to find the result you are looking for, add filters by clicking the add filter button ( |
| Further Review | Contains patient documents that have been parked. A document can be parked by clicking the 'Park' document action button.
Documents in this folder can only be accessed by the provider who made the original 'Park' request. To remove a document from this folder click the 'Unpark' document action button.
|

Documents
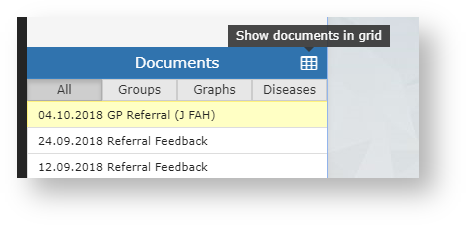
The Documents section will list all the documents for the selected patient that correspond to the folder the patient is in. For example if you select a patient in the Unreviewed folder, all unreviewed documents for that patient will be listed.
Hovering over the Documents section will reveal a grid icon (![]() ). This button will load all the documents listed into a grid. From there you can then perform bulk actions on the documents such as printing or forwarding to another provider.
). This button will load all the documents listed into a grid. From there you can then perform bulk actions on the documents such as printing or forwarding to another provider.
Abnormal results will show as red in the documents list.
Viewing Documents

Tips
- Pressing the space bar while viewing a document will scroll the document and then move to the next in the list.
Document Actions
| Park | Adds the document to the Further Review sidebar folder. |
|---|---|
| Unpark | Removes the document from the Further Review sidebar folder. |
| History | Loads the transaction history of the document. |
| Allows you to print the document. | |
| Mark as Reviewed | This button is only visible when viewing a document from within the Unreviewed sidebar folder. It will mark the document as reviewed. |
| All Documents | This button will show up when viewing a document from any sidebar folder except the Loaded Patients folder. When clicked it will load all the documents for the patient of the currently selected document. |
Viewing documents in grid
To list documents in a grid allowing for bulk actions you can simply click on the grid icon (![]() ) in the sidebar from either the documents section or when hovering over each folder.
) in the sidebar from either the documents section or when hovering over each folder.

Tips
- You can hide or show columns via the grid menu (
 ) which can be accessed by clicking the far button on the grid.
 - You can drag to re-order columns. The position of columns will be remembered.
- You can reset the grid layout by choosing Reset View from the grid menu.
- You can filter the documents in the grid by clicking the Add filter button.

Bulk Actions
You can select multiple documents in the grid and then perform an action on the selection. Currently the bulk actions available are:
- Printing (This can be sent to a printer or saved as a single PDF)
- Forwarding
- Exporting to CSV (this exports the transaction details and not the document itself, useful for auditing purposes)
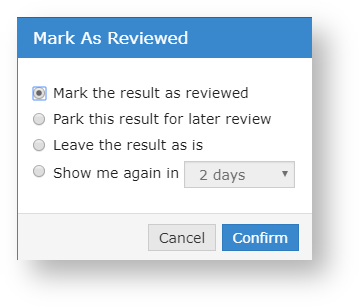
Marking documents as reviewed
Documents that appear in your Unreviewed sidebar folder will need reviewing so that the sender of the document receives an acknowledgement.
Marking a document as reviewed can be done one of two ways. Both methods will only be accessible if you're viewing the document from within the Unreviewed sidebar folder.
- Clicking on the Mark as reviewed document action button.
- Navigating to the next document in the Unreviewed folder. This will prompt you with a few options.
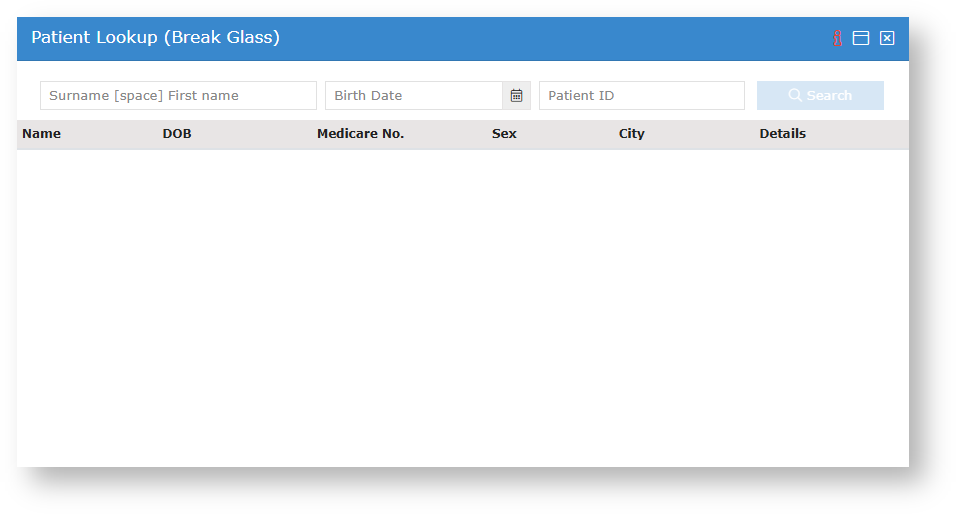
- You will now see a grid with the patients results available to break glass on. Press the check mark icon (
 ) at the beginning of each row for the documents you wish to break glass on.
 - Once you have selected all the required documents press the Access Results button (
 ), the patient and their results you just accessed will be available in the Loaded folder of the sidebar.
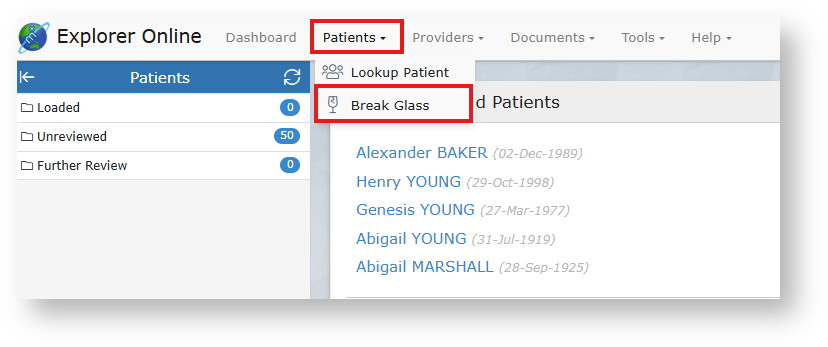
- Clicking the break glass icon (
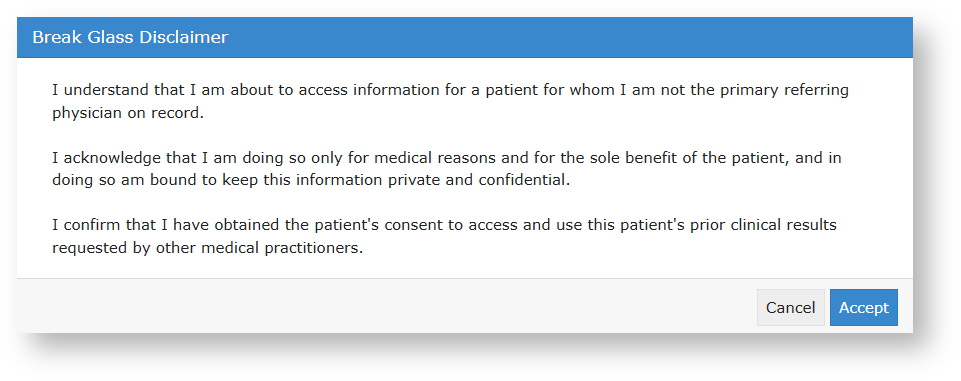
 ) next to patient in the loaded folder of the sidebar. Once disclaimer has been accepted:
- You will now see a grid with the patients results available to break glass on. Press the check mark icon () at the beginning of each row for the documents you wish to break glass on.
- Once you have selected all the required documents press the Access Results button (), the patient and their results you just accessed will be available in the Loaded folder of the sidebar.
- You will now see a grid with the patients results available to break glass on. Press the check mark icon (
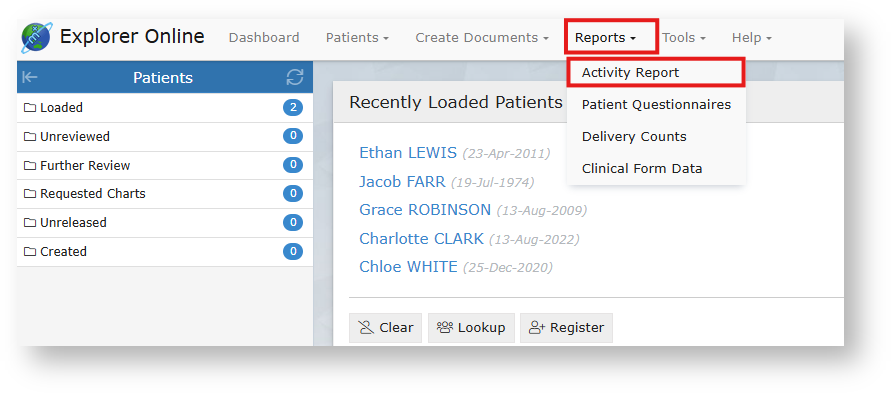
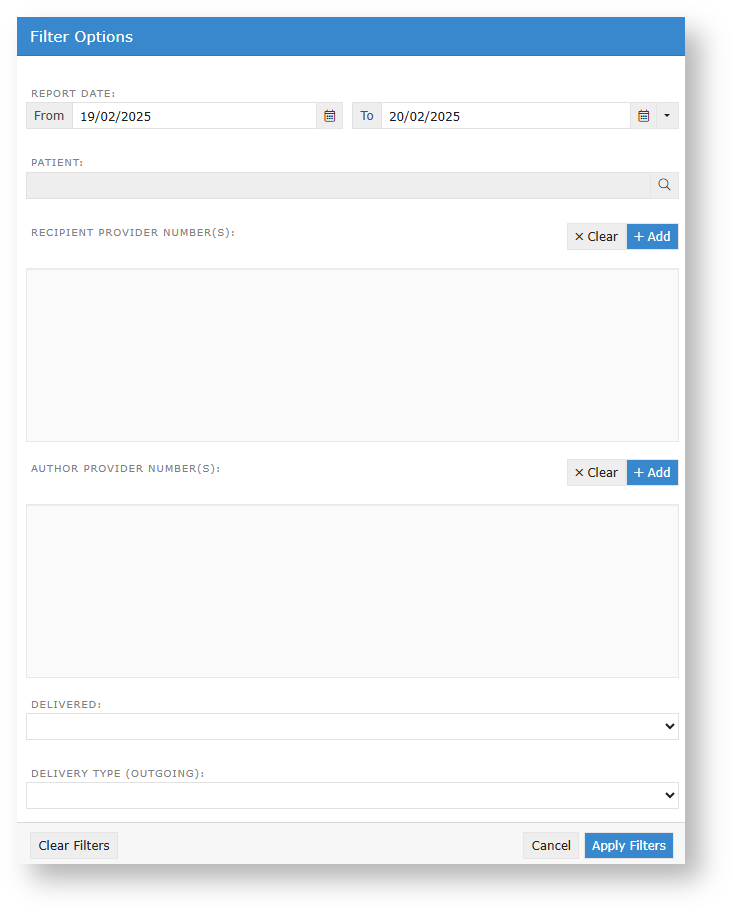
The Activity Report allows you to view the transaction history of both incoming and outgoing documents. You can access the Activity Report via the Reports top menu option. When selecting the Activity Report menu option you will be presented with a window listing the report filtering options available. These will help you narrow the report down to only the documents you're interested in. By default, the filter options will show the current daily activity. You can leave it at that or you can click on the drop down button next to the end date to select a pre-defined range. Tips The status of the document. The most common are; This is a timestamp for when the document was delivered. It does not necessarily mean that the document has been viewed or reviewed - only that it has been delivered. If this field is blank then the document has not been delivered. This column allows you to know whether or not the document has been acknowledged. To see what each icon in this column means; refer to the ACK Legend that can be found in the top right. Hover your mouse over each icon for a description. You can view a single document by clicking on the view document icon ( From this window you can perform various actions on the single document such as print, forward or loading the patient file via the All Documents button. You can also navigate to other documents via the back ( You can select multiple documents in the grid and then perform an action on the selection. Currently the bulk actions available are;Activity Report
![]() ) which can be accessed by clicking the far button on the grid.
) which can be accessed by clicking the far button on the grid.Understanding the report
Date The date the document was created. Patient Patient name. SURNAME, First name (Date of Birth) Recipient The provider the document was addressed to. Report Title The document title. Author The provider that authored the document. To Practice The server name of the practice that the document was sent to. This is generally the practice name. Status Delivery Type The software of the recipient that received the document. Delivered Reviewed The document has been marked as reviewed at the receiver's end. This column will only be populated if the receiver's Delivery Type is EQUATORDXTRAY. If not then it's best to look at the ACK column for an indication if the document has been acknowledged. ACK 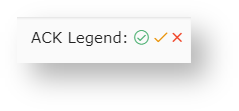
View Clicking the icon in this column will display the document. Viewing documents in the report
![]() ) in the View column of the grid. This will open the document in the document viewer window.
) in the View column of the grid. This will open the document in the document viewer window.
![]() ) and forward (
) and forward (![]() ) buttons in the top right or the left and right arrows of your keyboard. The blue highlighted row in the background indicates the document currently being viewed.
) buttons in the top right or the left and right arrows of your keyboard. The blue highlighted row in the background indicates the document currently being viewed.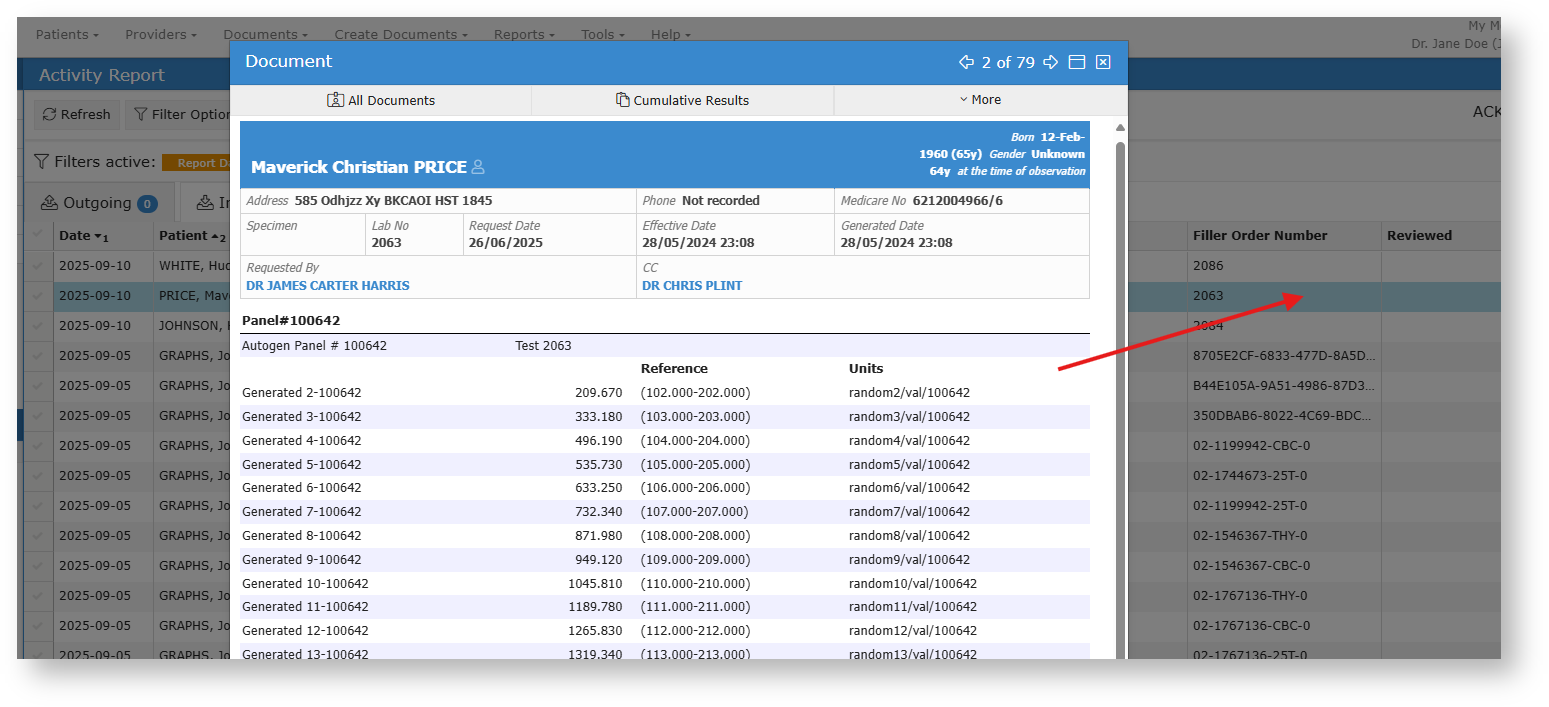
Bulk Actions