Overview
This article will cover how to create and use the Medical-Objects PROMs feature in a waiting room scenario. If you have any questions or require any further information, please contact the Helpdesk on (07) 5456 6000.
Requirements
PROMs is a premium add-on feature that is accessed directly from the Explorer Online web-based portal. This is designed to run on desktops, laptops and modern tablets running Windows, MacOS or Linux. Mobile phones are not currently supported.
Creating a Questionnaire
| If you require additional patient questionnaires to be digitised or added, please contact the Sales team here |
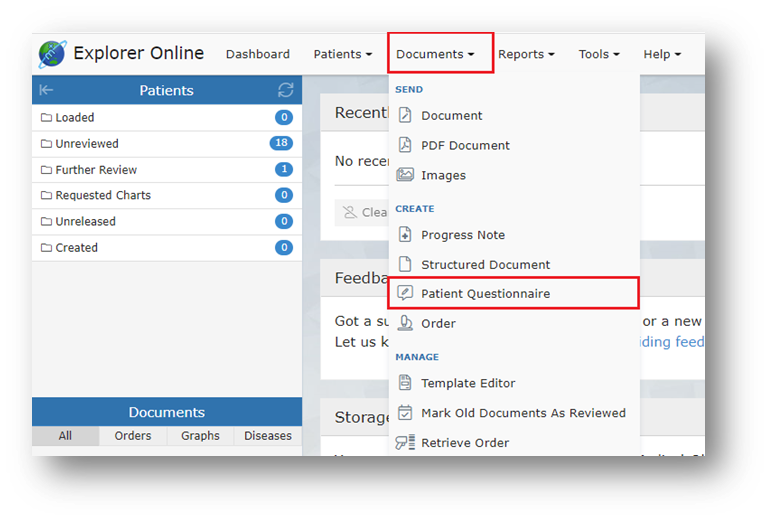
To create a PROMs questionnaire.
- Click the Documents → Patient Questionnaire (under Create) in the navigation bar at the top.
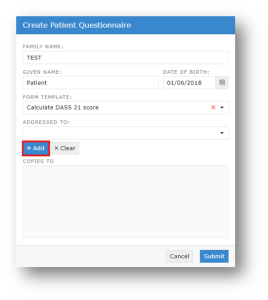
- Fill in the form details. Add the patient’s family name, given name and date of birth.
- Choose the form template that you wish to use.
- Select which provider the completed form will be sent to and press the Add button if you would like to send copies to additional providers.
Accessing a Questionnaire
Once you click Submit, a QR Code and link option will appear.
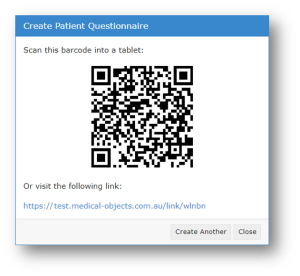
Using the QR Barcode
You can use the barcode option to transfer the form to another device, such as a tablet.
Open the device’s Camera app or QR code reader and hold it over the barcode. Then, tap the notification to open the questionnaire. Next, hand the form to the patient to complete.
Using the Link
Clicking the Link will open the form in a new tab. You may also manually copy the link to be able to send it using alternate methods (e.g. via Email).
Please note that clicking on the link will bring you directly to the Patient Questionnaire. Only select the link option if you or another staff member wish to complete the form for your patient.
Completing the Questionnaire
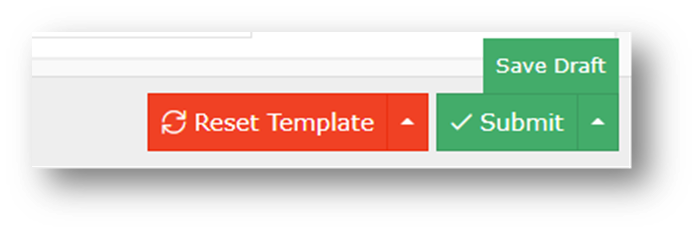
The patient can answer the questions by typing into the required fields/selecting the required check boxes. There is also an option to:
- Reset the form
- Save it as a draft
- Submit it
Once completed and submitted, the form automatically determines where the patient lies on the scale and an instant PROMs report is created. This report is then sent directly to Explorer Online or delivered to your compatible practice software.
Viewing Completed Questionnaire
To view the delivered PROMs report in Explorer Online, load the patient in the sidebar.
If the patient is not loaded in the sidebar, perform a patient lookup. (For more information on how to lookup patients, please click here to view the Explorer Online User Guide)
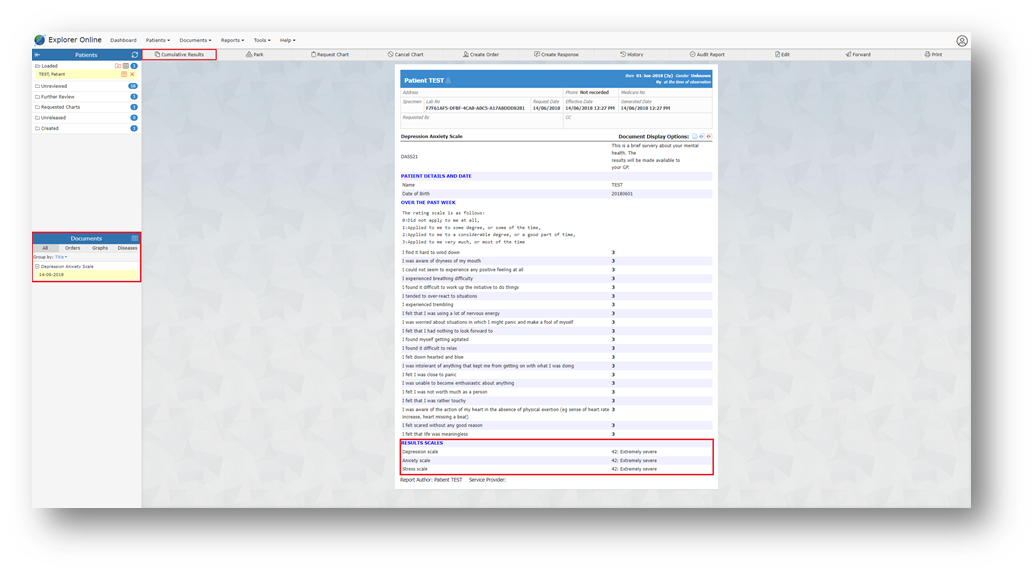
Once the patient is loaded, select their questionnaire report from the Document section of the sidebar.
Here, you can view the report details, the patient’s responses, and the result of the total score.
Alternatively, if you are using compatible practice software the completed PROMs report can also be viewed there.
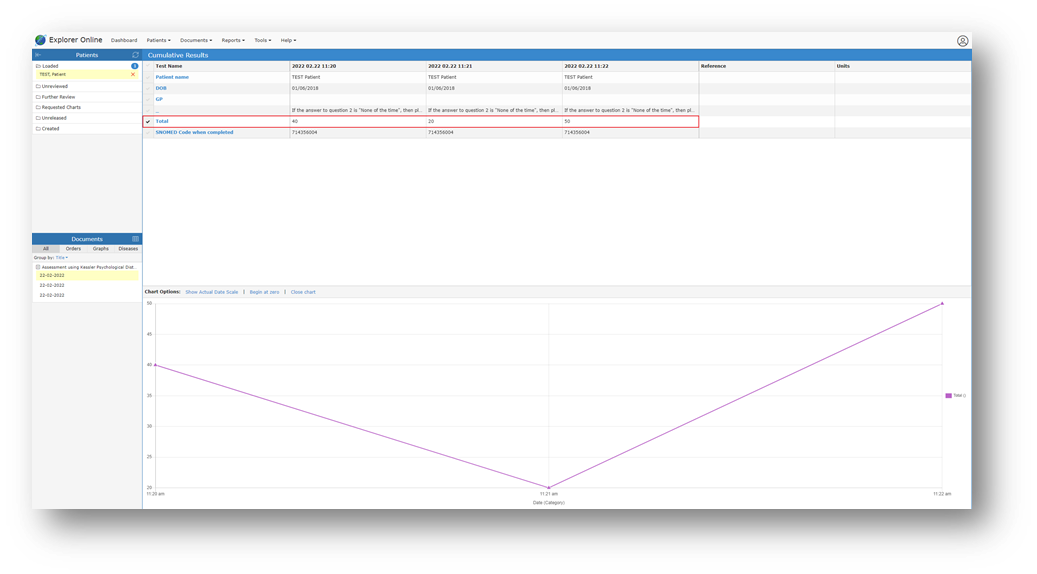
Cumulative Results
The Cumulative Results tab is another feature of Explorer Online that you can access when viewing report details. This feature allows you to compare the patient’s total scores (numerical data only) after they have submitted the same survey multiple times.
If you would like to preview a document in the results area:
- Click on the date the survey was completed.
- Tick the Total checkbox or the specific Test Name to graph the changes in the patient’s condition over time.
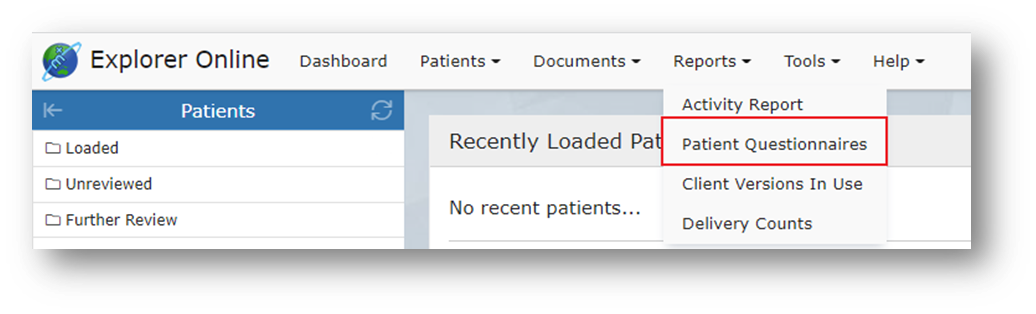
History of Created PROMs
To view the history of created PROMs, see if they have been completed or access the QR Code and link again;
- Select Patient Questionnaires from the Reports
- Choose from the following filter options
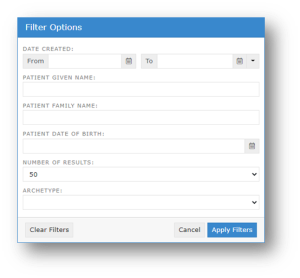
- The number of results and the patient details.
- Choose from the date created range
- Select the form type
- Once you are finished, hit the Apply Filters button.
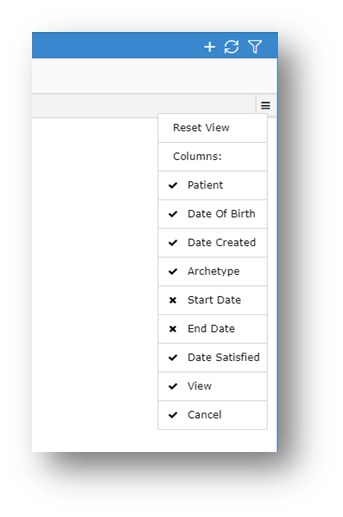
Click the plus button to create a new PROMs questionnaire.
Select the refresh button to update results and click the filters button to edit the filter options.

You can also sort, hide, show or reset columns via the grid menu. Additionally, forms can be sorted into columns and ordered by Patient, Date of Birth, Date Created, Archetype, and Date Satisfied.
Understanding the Report
| Patient | Patient name. SURNAME, First name |
| Date of Birth | Patient’s Date of Birth |
| Date Created | The date the document was created |
| Archetype | The title of the Patient Questionnaire that was created |
| Date Satisfied | The date the Questionnaire was completed |
| View | View the QR code and link of Questionnaire |
| Cancel | Can cancel the request to complete the Questionnaire |
| Click the top of each column to sort by ascending or descending values. |