Overview
This guide provides a brief overview on how to add and edit doctors and providers from within the Medical-Objects Explorer (Meridian).
If you require any assistance with the installation or configuration, or if you have any questions, please contact the Medical-Objects Helpdesk on (07) 5456 6000.
Adding a Doctor
This step will only add a provider to your own local database. If you wish to add a provider from your practice to the Medical Objects system, please send us an Add Doctor request using This Form.
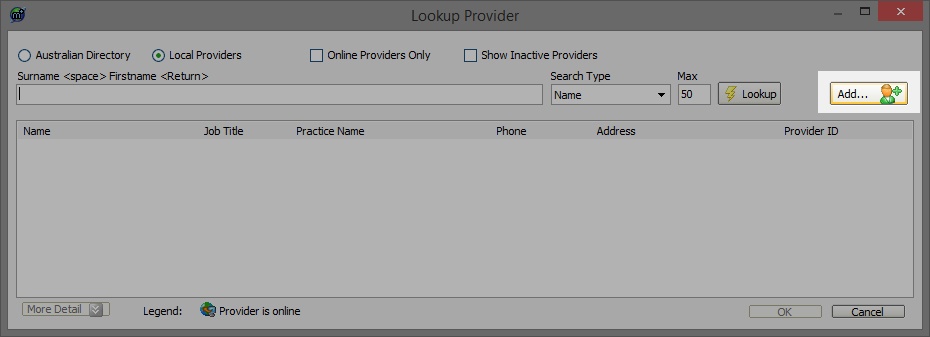
- To add a Doctor to the Explorer database, select Lookup Provider from the Providers Menu.

- Click the Add button on the right hand side of the screen to add a Doctor:
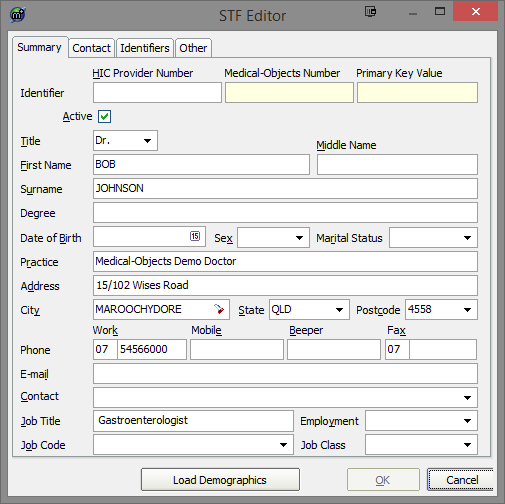
- Enter the Doctor's (or Provider's) Details:
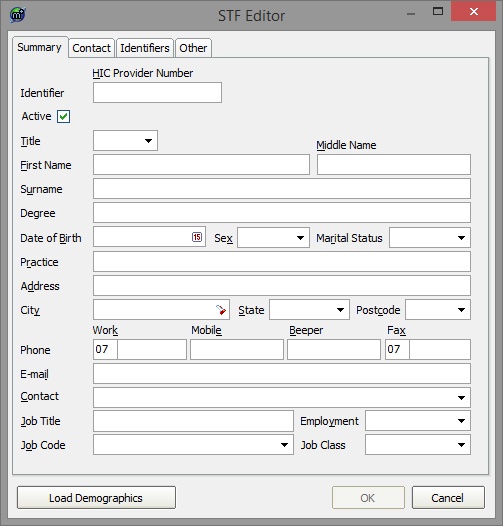
- Click OK to save the results.
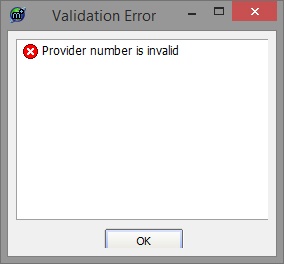
- The Provider Number is validated by Explorer using an algorithm. If an invalid Provider Number is entered, a Validation Error Window will be displayed. Double check the Provider Number to ensure all of the characters have been entered correctly.
Editing Provider details
The Provider is the only person who can change their details and will need a PKI Token to do so.
There are 2 ways of editing your own details:.
- Click on the Providers menu in the toolbar. In the Menu there is an option for Edit My Profile. This will ONLY be functional when your PKI is plugged into the USB port on your computer.
- Edit by using the Lookup Provider access.
Note:
For instructions on how to Lookup a Doctor using Explorer, Please see the Looking up a Doctor or Provider guide.
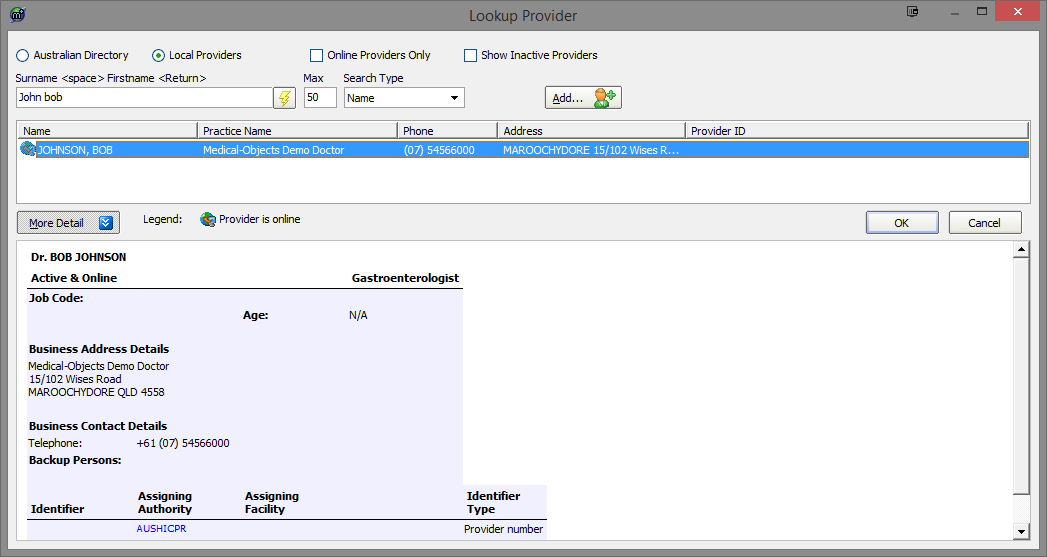
- Click the Doctor's Name to select and view the Doctor's Details.
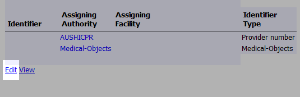
Click the Edit button at the bottom left hand side of the Doctor's Information to change the Doctor's Details.
Note:
Please note that the currently logged on PGP Key user will need sufficient rights within the system for this button be displayed.
- Click OK to save the changes.