MMEx HL7 documents can be directly imported into MedTech32.
The MMEx Client will automatically download message attachments to configurable directories on your server where they can be easily imported into MedTech32.
The following simple steps will configure MedTech32 for importation of MMEx’s HL7 Documents.
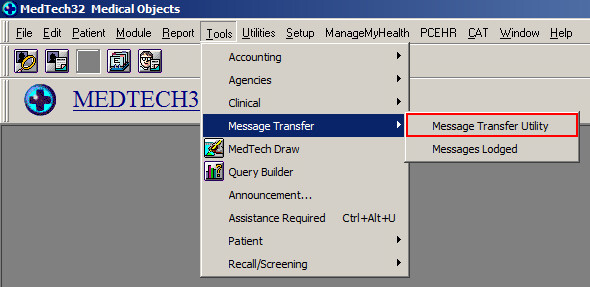
Log into MedTech32. From the Main Menu Toolbar, select the Tools Menu and then click on the Message Transfer option, and finally select the Message Transfer Utility option.
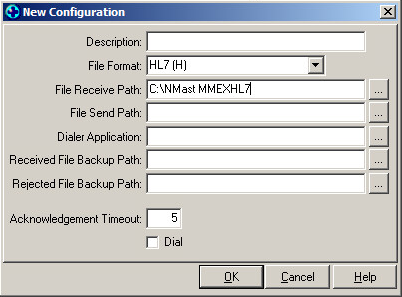
The Message Transfer Utility Screen will then ask you what type of message you wish to import. Select the HL7 option and then in the file path, using the browse facility, direct MedTech32 to the location of your MMEx HL7 files. If you have forgotten where you have stored your HL7 messages, you can find their location by checking the MMEx Client.
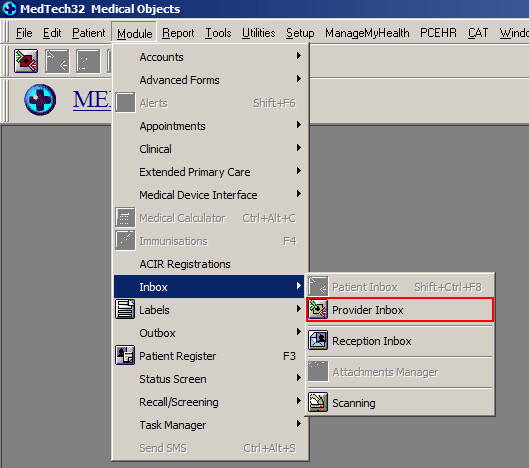
You can access HL7 messages in MedTech32 via the Module Menu in the top tool bar, and selecting the Inbox option, followed by the Provider Inbox option. This action will open up the provider Inbox, and will also activate the Provider Inbox Menu in the top toolbar (which is generally not visible).
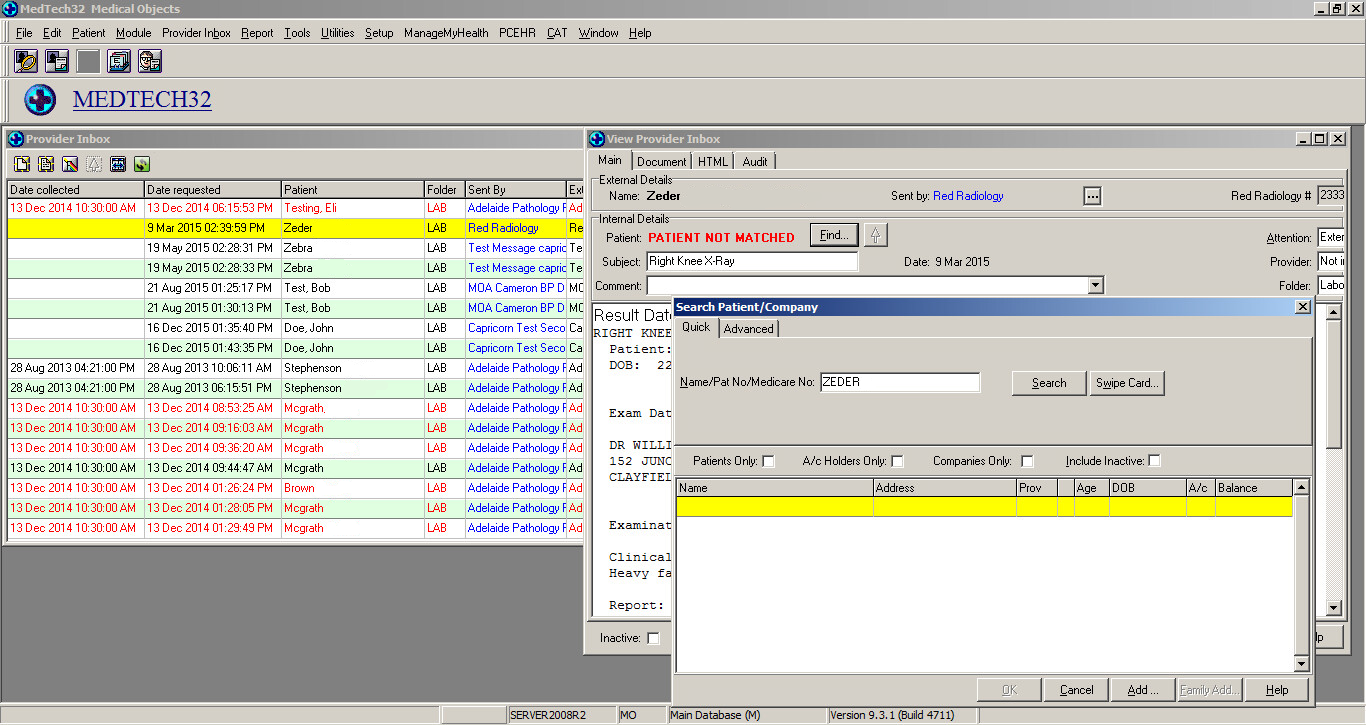
To associate an MMEx HL7 message with a patient’s record in MedTech32, double click on the imported message to open it. The View Provider Inbox box will then appear on the screen. The name of the patient referred to in the MMEx message will be visible, and you can use the Find button to match the letter to your patient’s record.
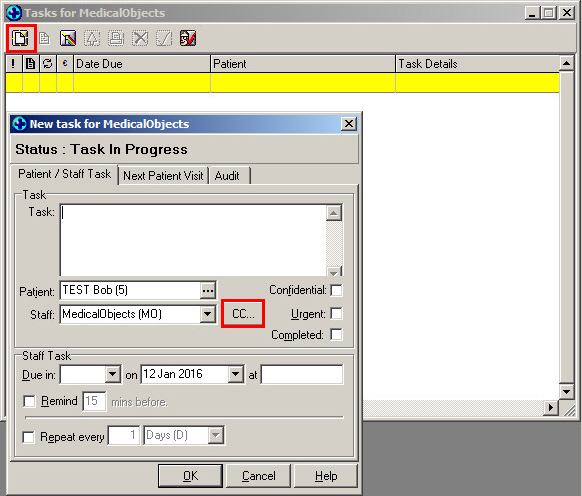
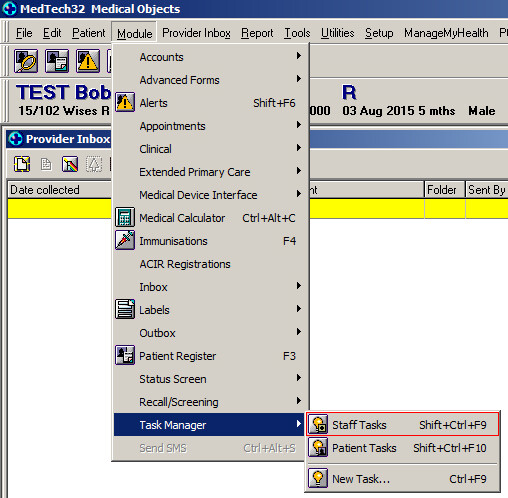
Tasks can be assigned to the imported documents in MedTech32. To add a task, go to the Module Menu, select the Task Manager Option, and then select the Staff Tasks list.
The Tasks Box will then appear. To create a new task, click on the New Task icon on the left hand corner of the Tasks Box. The New Task Box will then appear and can be filled in accordingly. If the Practice Manager wishes to keep track of the tasks created, they can CC themselves in to all tasks.
