The following window will appear:
Click on Save
Installation and Configuration of Capricorn Software
Download the latest Capricorn from the following link.http://download.medical-objects.com.au/
The link on the download page looks like the following
The following Save As window will appear. Save the Capricorn-Setup.exe in the directory C:\MO
Once you have clicked Save, the following download screens will appear
After it has been downloaded, click Run.
| Note |
|---|
The Token or Serial Key can be emailed to you. If you do not already have a token, Please contact the Medical-Objects help desk on (07) 5456 6000. |
From the email, copy the token and click the Paste Token link.
Click I Agree.
The PGP Key Generation Window will then appear.
Enter pgp in lowercase into both fields. Then click Next.
The following window will appear.
At this window you can just type anything to make the blue bar move to 100%, then click Next.
The following window will appear.
Click Finish.
Configuring Medical-Objects Capricorn
Double click the HL7 tray icon.The Log window is displayed.
Once you have clicked Run, the installation process starts.
Click Next.
Click Next.
Click Install.
The following window will appear.
The Setup wizard is now complete.
Registration Process
Once the setup is complete you will need to enter the Token or Serial key provided by the Medical-Objects help desk.
you have not Installed the Medical-Objects Download client, Please see the guide for Installing Capricorn on Windows.
Configuring Capricorn Software
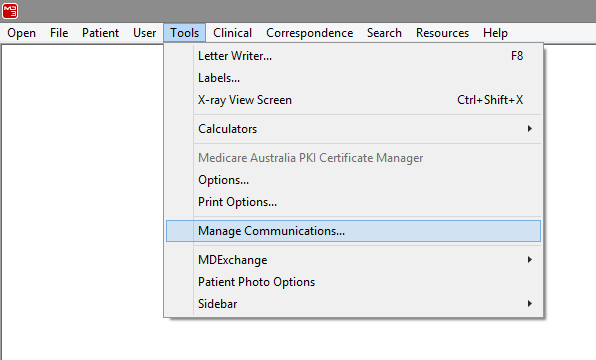
Accessing the Capricorn Configuration Window
| Info | ||
|---|---|---|
| ||
In some cases, the Capricorn may be configured as a service. See this guide for instructions on how to launch the Capricorn if it is set up as a service. |
| Excerpt Include | ||||||
|---|---|---|---|---|---|---|
|
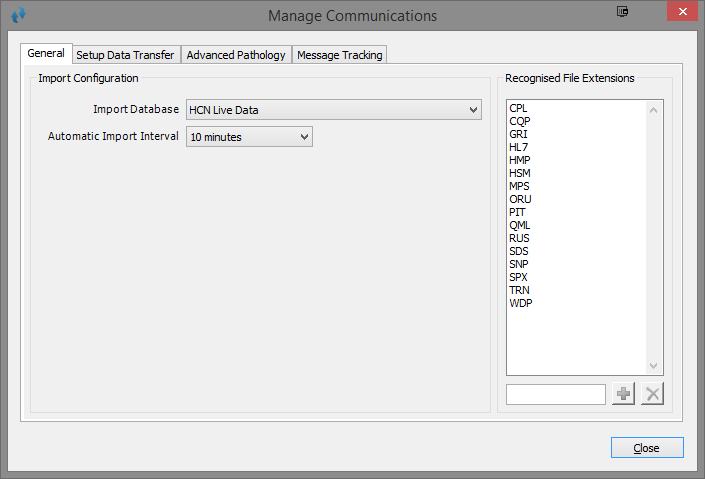
Capricorn Configuration Settings
- Click on Ack Management.
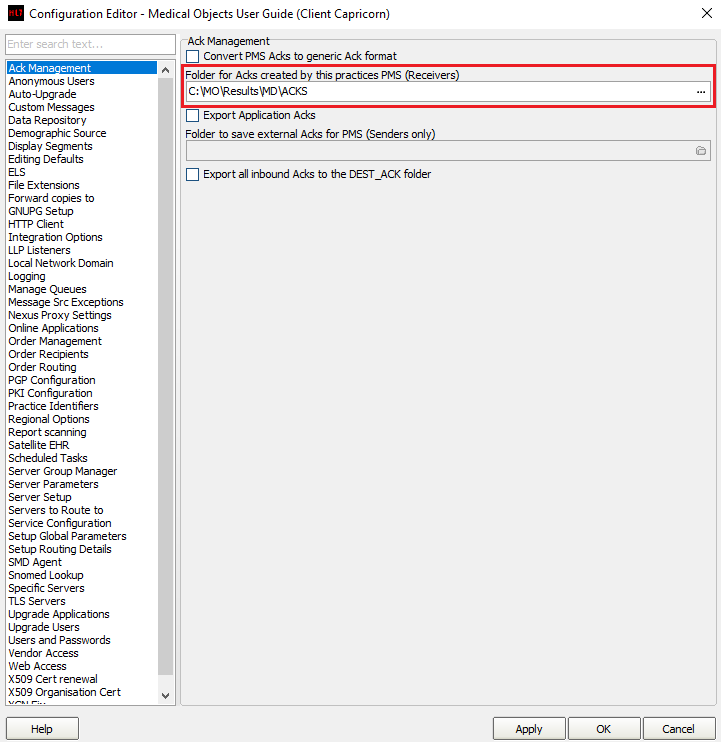
Info title Note: If the folder does not exist, you must create it.
Please make sure the Results folder has the Modify, Read and Write permissions, AND is shared over the Network.- Click on Integration Options.
3.1 Check that the Incoming Modifier is set to MD3 Results - Change MSH ID.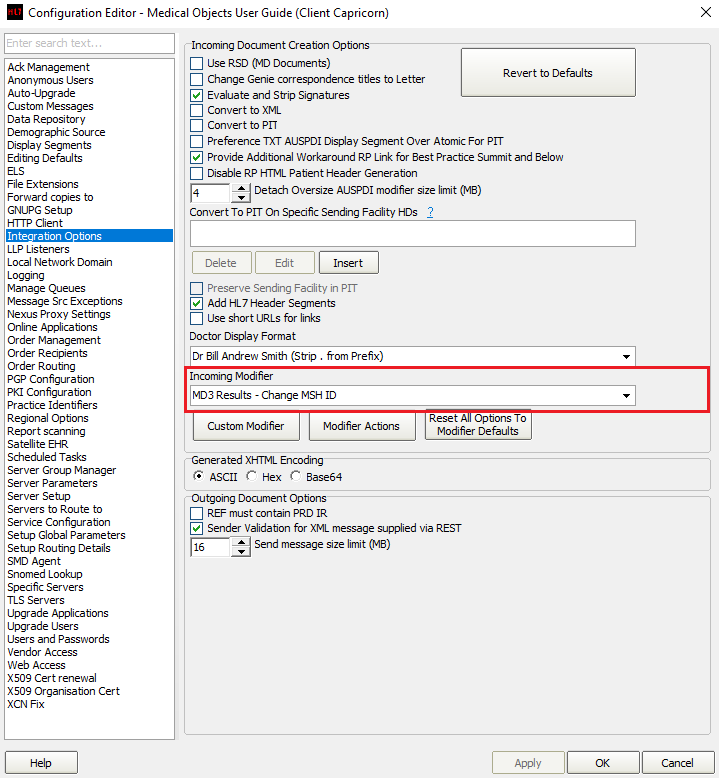
- Select Server Parameters from the left panel.
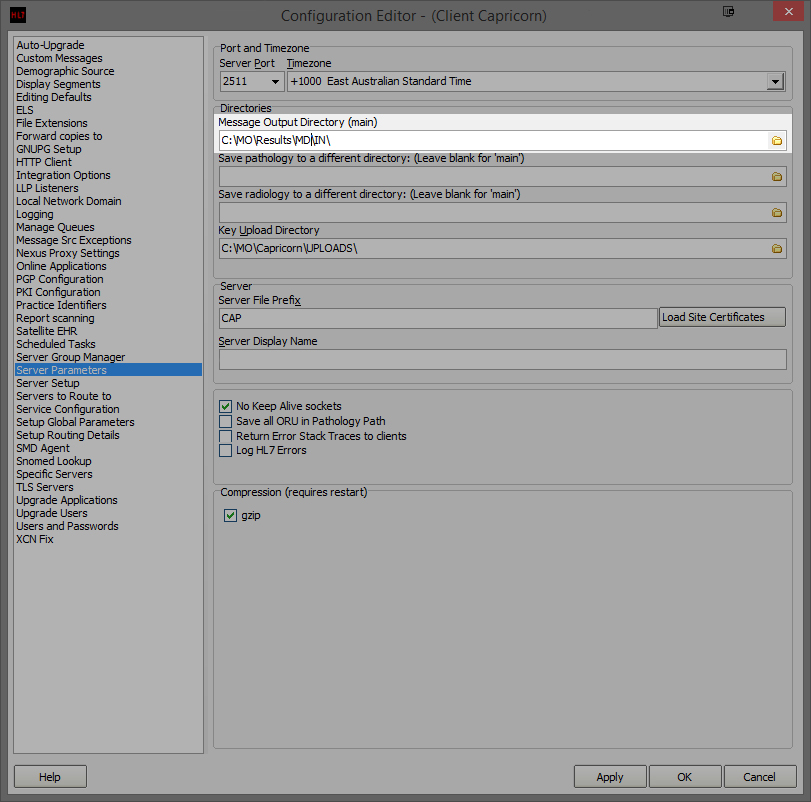

- The following window will appear.
- Select
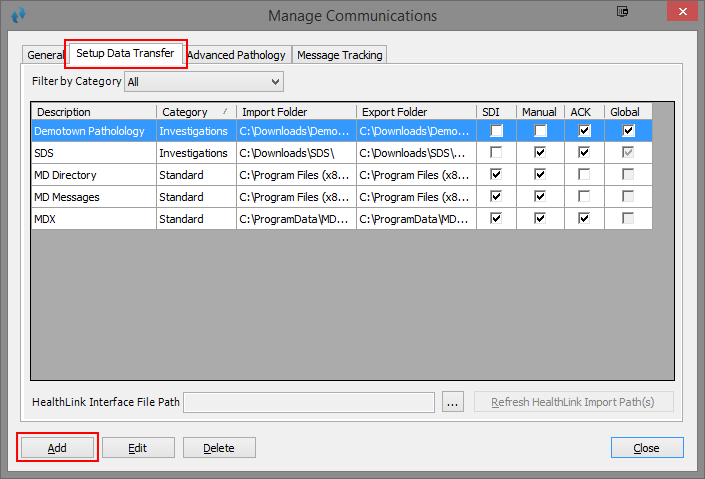
Click
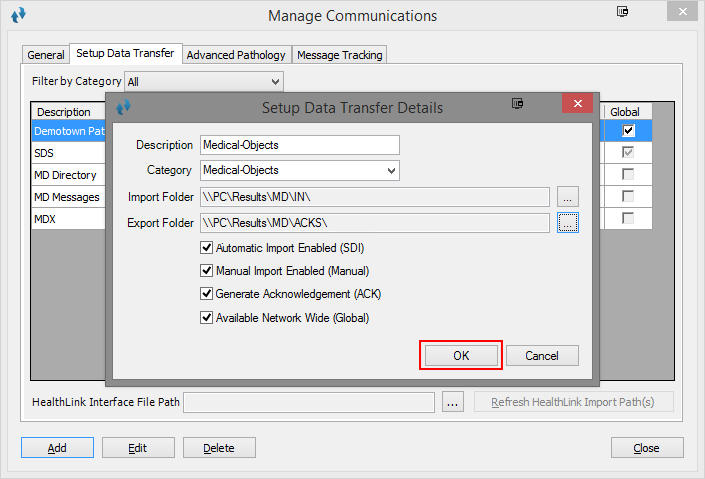
Folder: Use a UNC path of the folder shared earlier - For example \\Mo Folder: Use a UNC path of the folder shared earlier - For example \\MO Please on
on OK.

Once you click on close you will be prompted to save your work. Please click on Save.
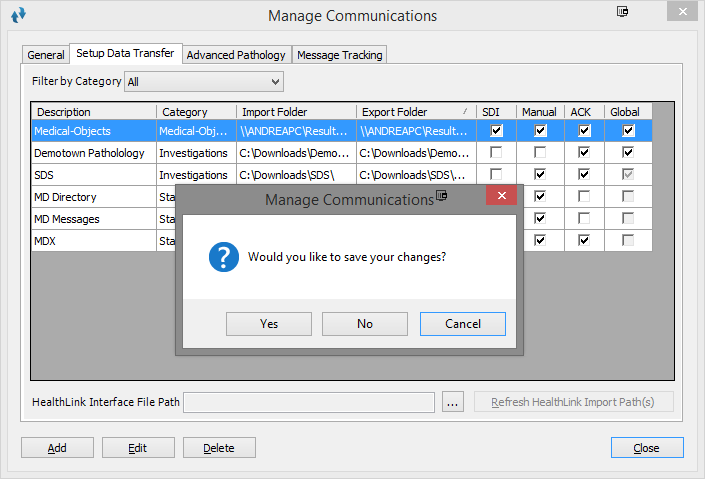
The configuration is now complete for Medical Director.
| Table of Contents | ||||
|---|---|---|---|---|
|