Overview
Communicare normally has a server at the practice with a share path. You will need to contact Communicare IT Support in order to obtain the path for Medical-Objects to deliver the results.
This guide provides a basic overview of configuring the Medical-Objects Download client (Capricorn) to drop off results for Communicare.
If you require any assistance with the installation or configuration, or if you have any questions, please contact the Medical-Objects Helpdesk on (07) 5456 6000.
If you have not Installed the Medical-Objects Download client, Please see the guide for Installing Capricorn on Windows.
| Panel |
|---|
Communicare IT support: (08) |
08
6212 6900 |
| Warning | ||
|---|---|---|
| ||
Supplying messages as PIT has been reported as having issues. The integration has been revised with Communicare and you may need an update of your configuration. Please contact Medical Objects if you have any questions or concerns. |
Configure the Capricorn software
Accessing the Capricorn Configuration Window
| Excerpt Include | ||||||
|---|---|---|---|---|---|---|
|
Capricorn Configuration Settings
- Click on Ack Management.
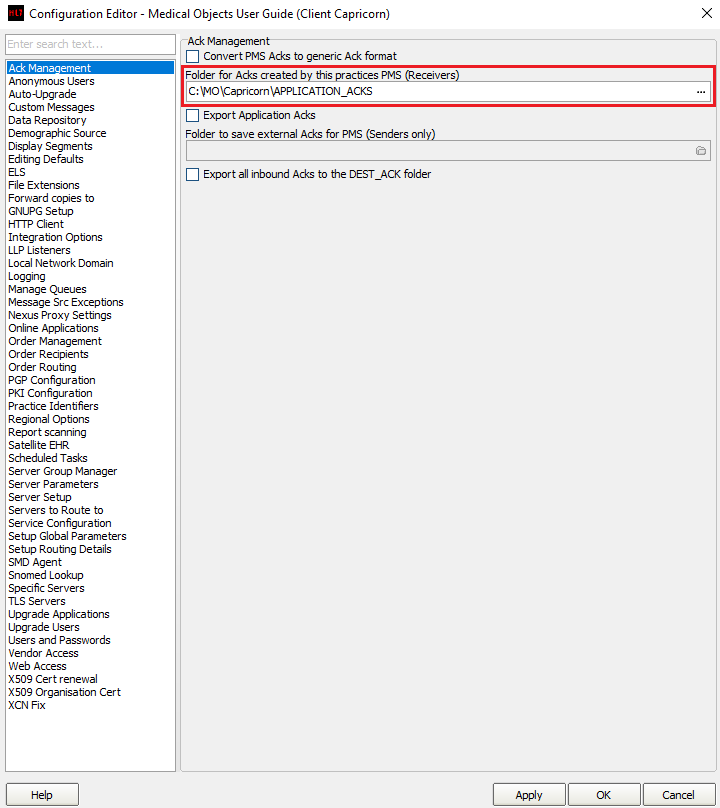
Set the ACKManagement Path to the following path:
No Format C:\MO\Capricorn\APPLICATION_ACKSClick on Integration Options.
3.1 Check that the Incoming Modifier is set to Communicare Modifier.
Warning PLEASE NOTE: Convert to PIT should NOT be ticked if you have Communicare 20.2 or higher. 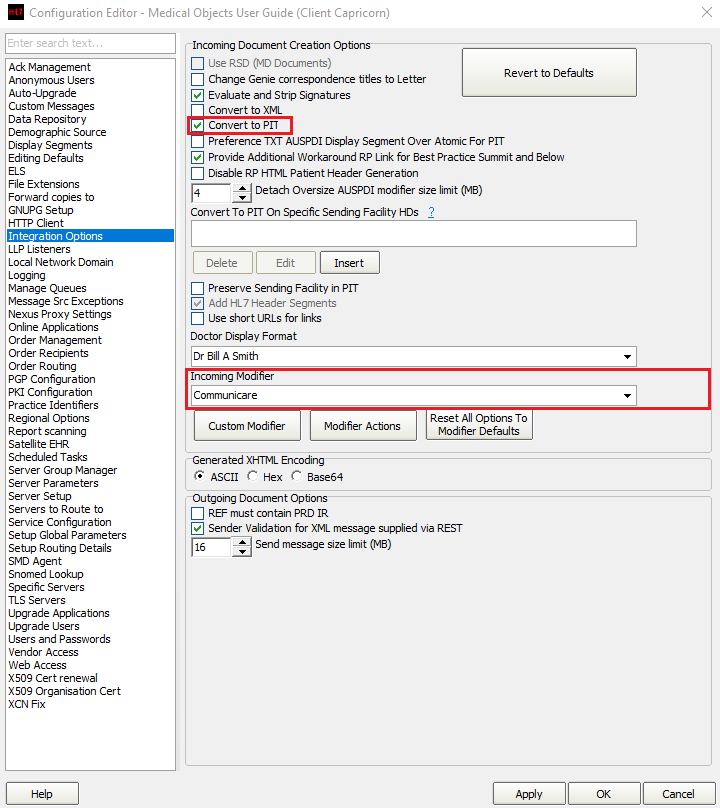
4. Select Server Parameters from the left panel.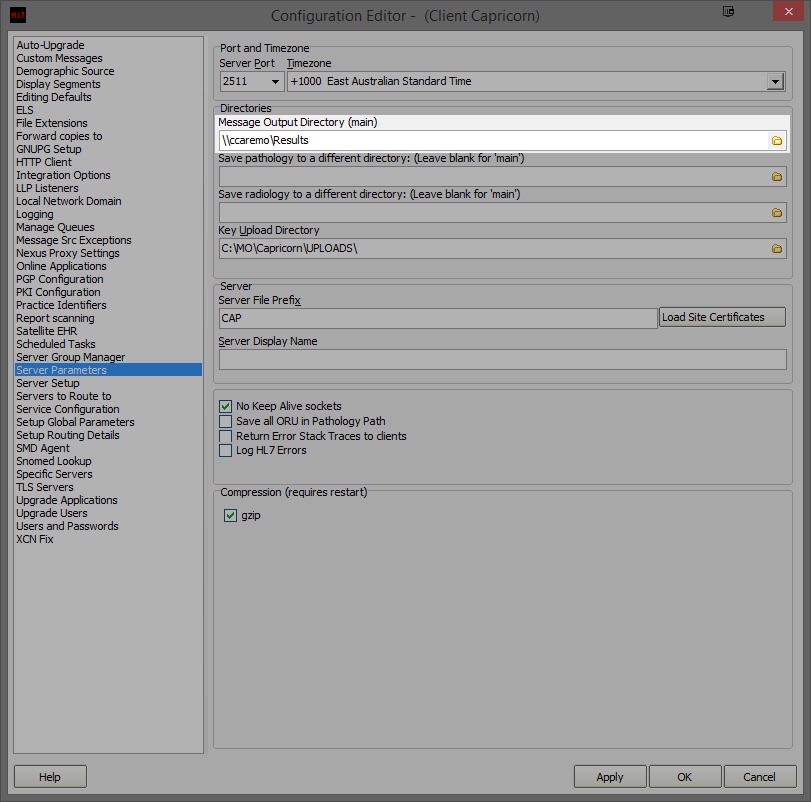
5. Here you can set the Message Output Directory (main). This will be a shared file path on the server machine that has been set up by Communicare. For this example, We will use the following path.
No Format \\ccaremo\Results
6. The configuration is complete. Click Apply and OK.
| Table of Contents | ||||
|---|---|---|---|---|
|