Overview
This guide is an indepth guide on how to generate a certificate using the Client Cert Request Util available HERE.
| Notewarning | ||
|---|---|---|
| ||
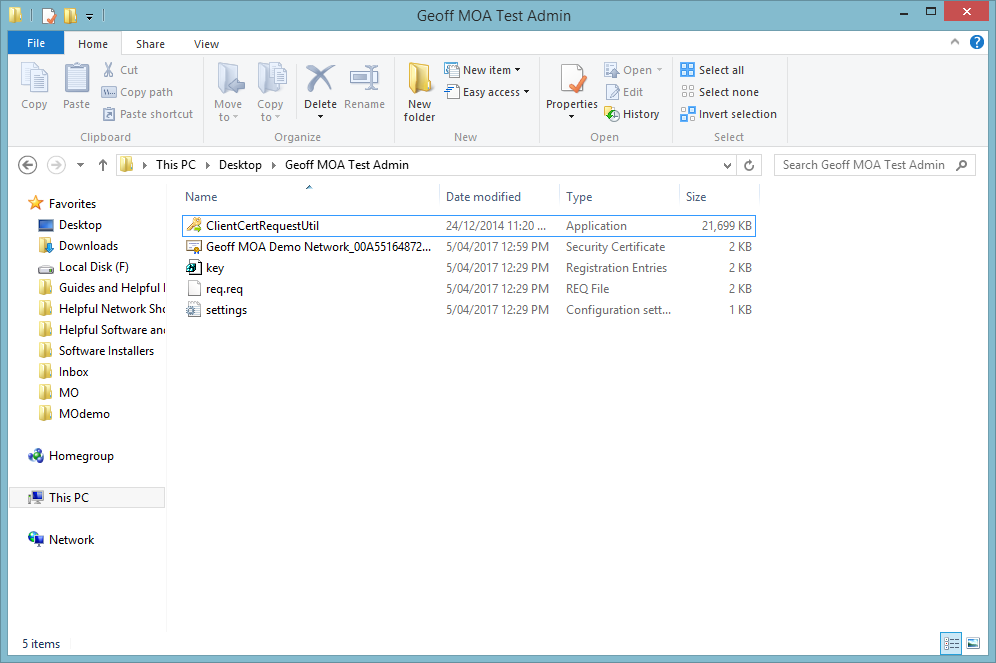
Keep the Client Cert Request Util in a centralised folder without moving between generating the REQ and KEY files, and then returning the Partial Certificate. Failure to do so will mean you will not be able to complete your certificate. Keeping in a single folder on the desktop or in documents will make things easier to keep track of. |
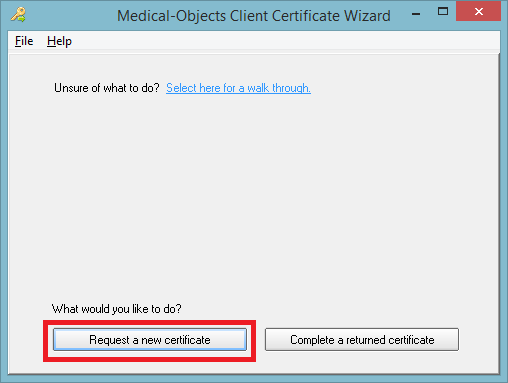
Request a new certificate
- Run the Request Util program and then select Request a new certificate.
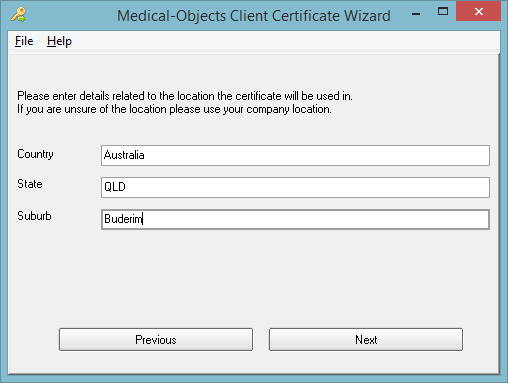
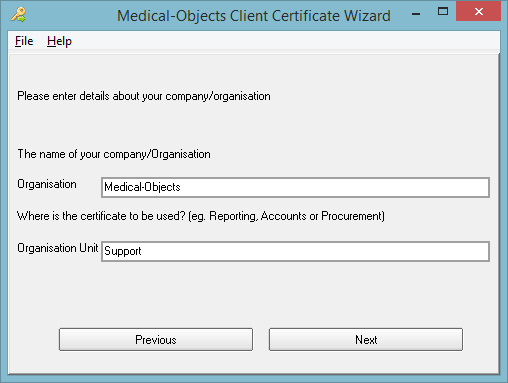
Fill out the fields required with the relevant information, and continue clicking next.
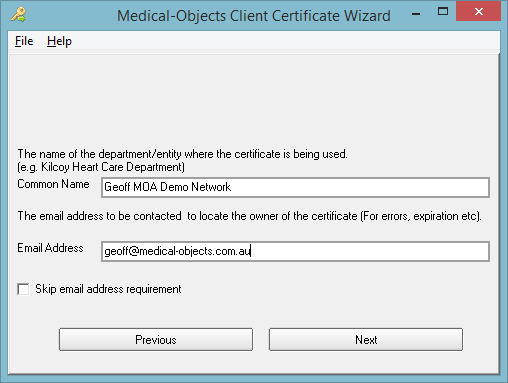
Note title Common Name The Common Name field will be what shows up in the Certificate Selection screen in the browser. Can either be shared as a generic user for the practice or company, or can be specified as a certain user.
- Click Generate Request, and then click on Save Request and choose a location to save the Request File (.req).
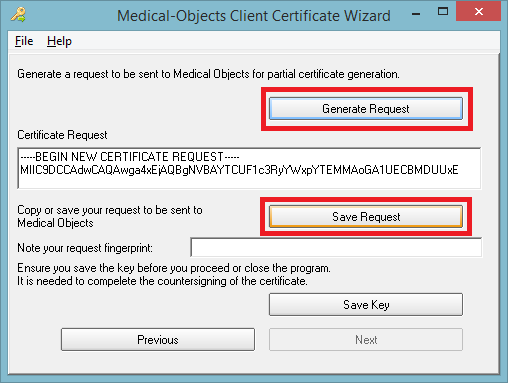
Click Save Key and choose a location to save the Key File (.key). Select a passphrase that will unlock the key upon returning the partial certificate (not the final password for login).Anchor Key File Password Key File Password 
- The saved Request file will need to supplied to the Medical Objects staff member you have been in contact with so they can supply you the certificate for the next step.
Warning title WARNING Never send your key file to anyone. Your certificate would be considered compromised and no longer suitable to secure connections. Please contact Medical Objects if this is the case to have your certificate reissued.
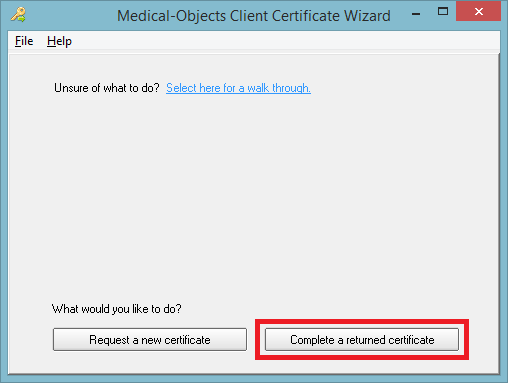
Complete a returned certificate
- Download and move the returned partial certificate.cer file into the original directory that you ran the RequestUtil.exe from as previewed below:
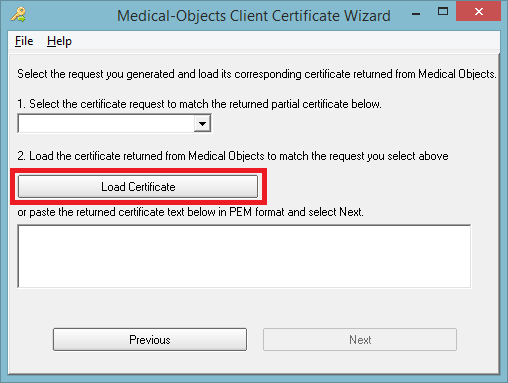
- Run the Request Util program and then select Complete a returned certificate.
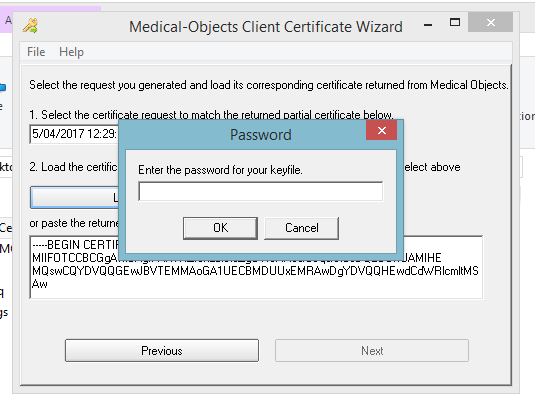
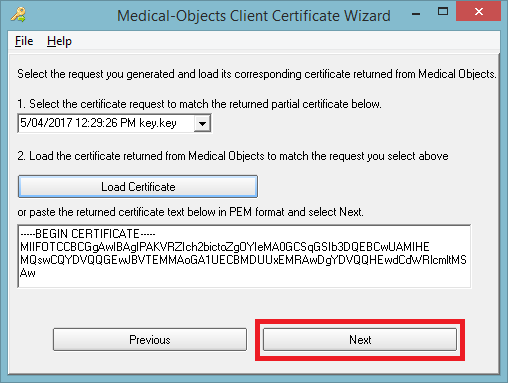
- Select the corresponding Key file that correctly matches to the returned partial certificate.
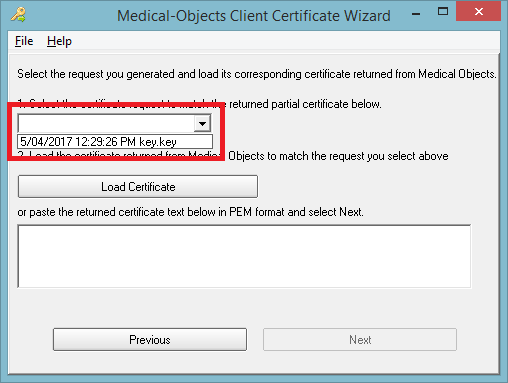
- Click on Load Certificate and open the returned partial certificate file.

- Enter the password of the Key file that you set earlier in Step 4 of Request a new certificate.
- Click Next.
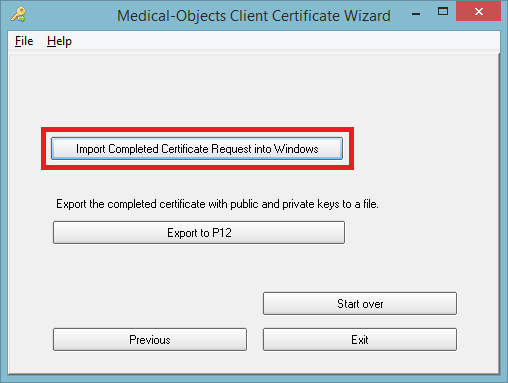
- From here you can either import the certificate from within the wizard, or export the full certificate and import it once saved as a file.
Import Completed Certificate Request into Windows
| Warning | ||
|---|---|---|
| ||
This step is only required if you are using the certificate in Windows on the machine you are on and want to be prompted(This is a safer option) when the certificate is used. Subsection "Export to P12" is recommended instead if you have an automated system that can't supply a password to log into the certificate. |
- Select Import Completed Certificate Request into Windows.
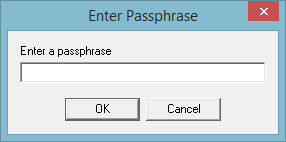
- Click Set Security Level.
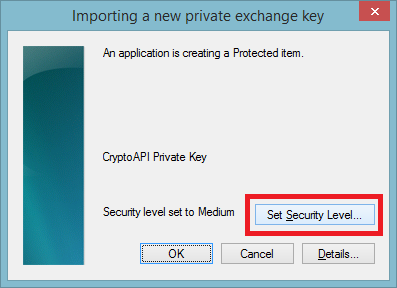
- Change to High, and click Next.

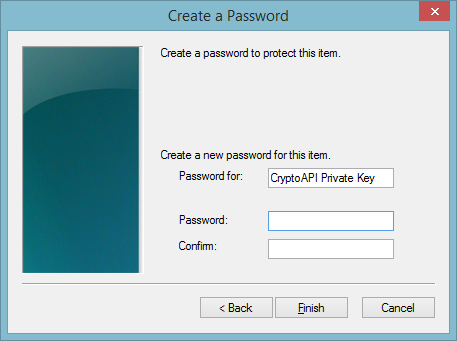
- You will then be required to set a password that will be utilised when using the certificate to login. Once configured, click finish.
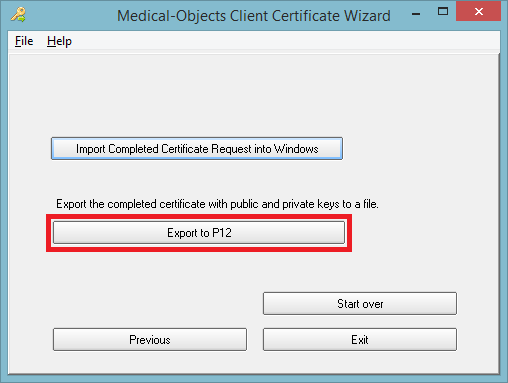
Export to P12
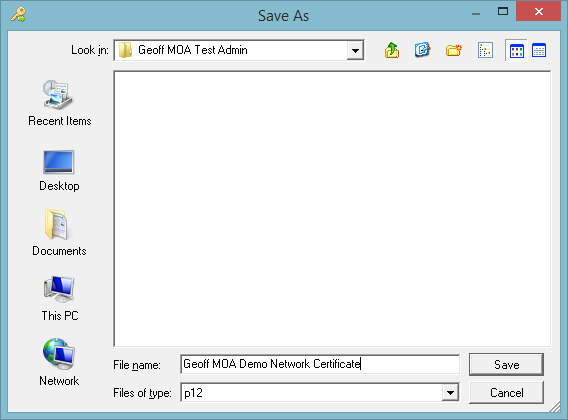
- Select Export to P12, and choose a location to save the file, such as the folder you have been working in, and set a password that will unlock the certificate (not the final password).
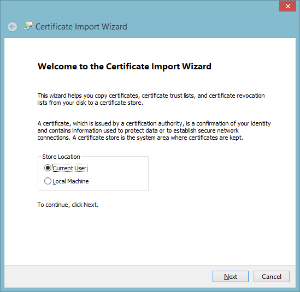
- Double click the saved certificate, which should now start the Certificate Import Wizard (depending on Windows version). Keep Current User selected and click next.
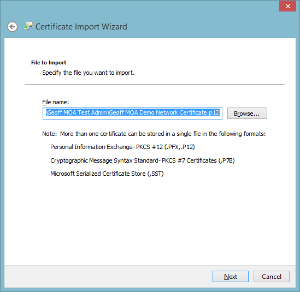
- Leave file name as is, and click next.
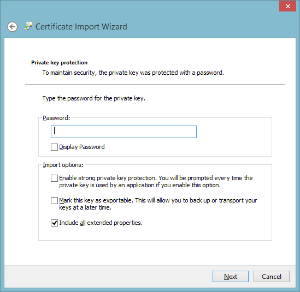
- Type in the password used earlier in Step 1. Also would be recommended to tick Enable strong private key protection(Do not do this if you have an automated system that can't supply a password to login to the certificate).
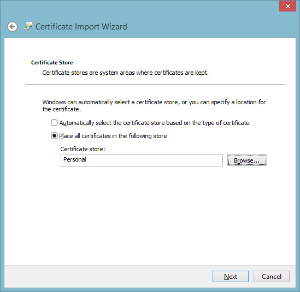
- Select Place all certificates in the following store, and choose Personal. Click Next.
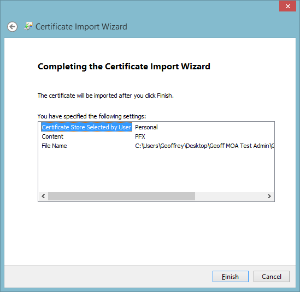
- Click Finish on the next screen to complete the wizard.
- Click Set Security Level.
- Change to High, and click Next.
- You will then be required to set a password that will be utilised when using the certificate to login. Once configured, click finish.
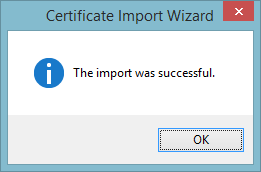
- The final The import was successful prompt should appear.
| Table of Contents | ||||
|---|---|---|---|---|
|