Overview
This guide provides instruction on configuring both Medical-Objects Capricorn and MedTech Evolution to import electronic results.
If you require any assistance with the installation or configuration, or if you have any questions, please contact the Medical-Objects Helpdesk on (07) 5456 6000.
If you have not Installed the Medical-Objects Download client, Please see the guide for Installing Capricorn on Windows.
Configuring Capricorn Software
Accessing the Capricorn Configuration Window
| Info | ||
|---|---|---|
| ||
In some cases, the Capricorn may be configured as a service. See this guide for instructions on how to launch the Capricorn if it is set up as a service. |
| Excerpt Include | ||||||
|---|---|---|---|---|---|---|
|
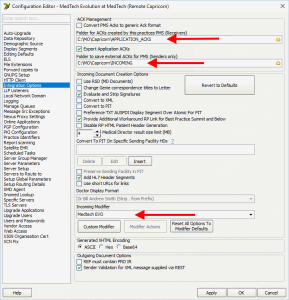
Capricorn Configuration Settings
- Click on the Integration Options field on the left hand side Ack Management.
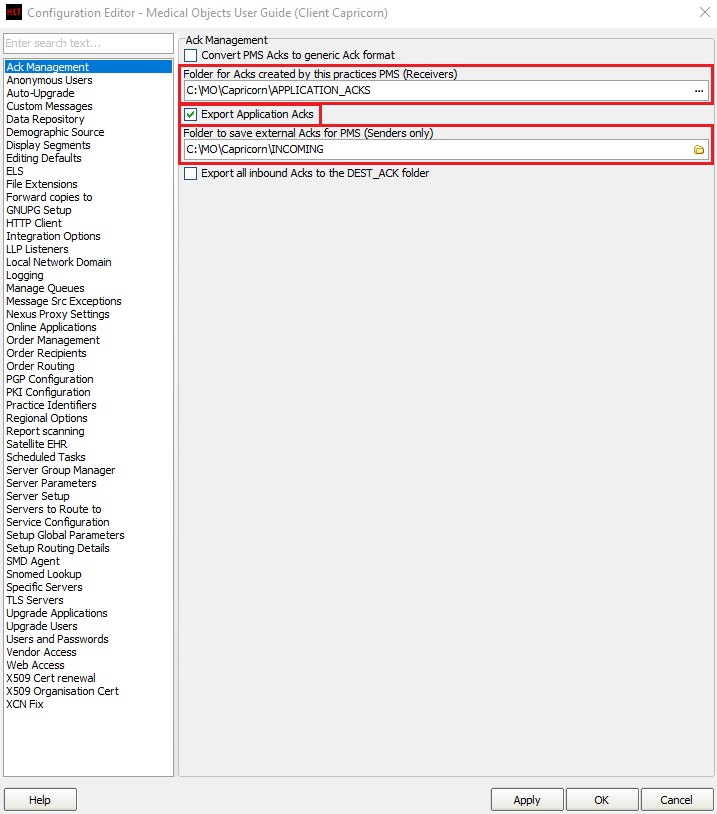
Set the ACK Management paths to the local import folder on the server or the network path on a workstation that points to the server import folder, for example:
No Format Folder for ACKs created by this practices PMS (Receivers) (Capricorn installed on the server) --> C:\MO\Capricorn\APPLICATION_ACKS Tick Export Application ACKs Folder to save external ACKs for PMS (Senders only) (Capricorn installed on the server) --> C:\MO\Capricorn\INCOMING Note: A Capricorn installed on a Workstation will require a shared pathspath.
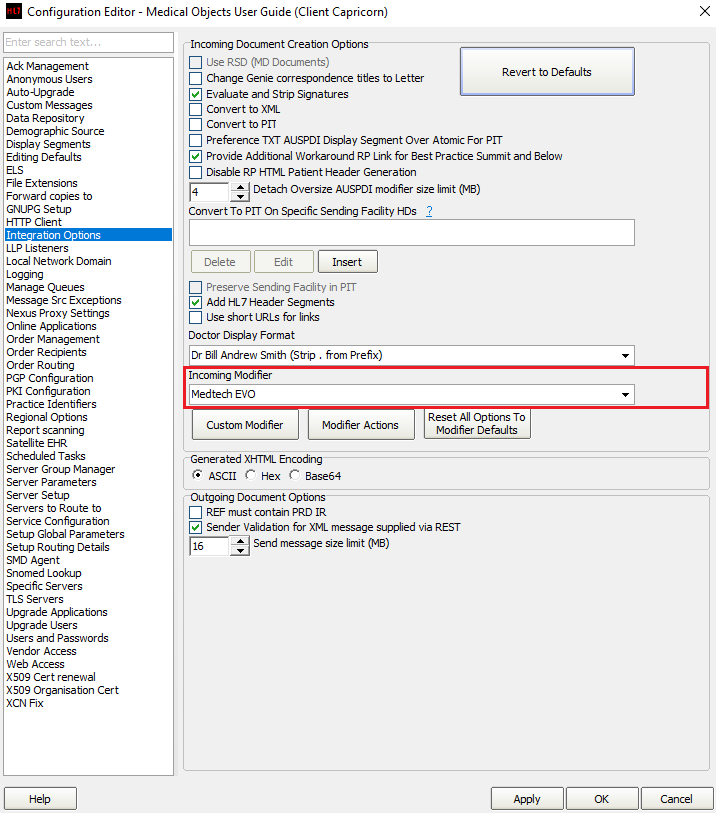
- Click on Integration Options.
Set 3.1 Check that the Incoming Modifier is set to Medech Medtech EVO.
- Next, click on Server Parameters in the left hand side panel.
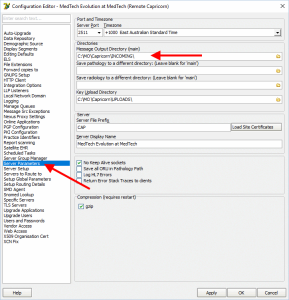
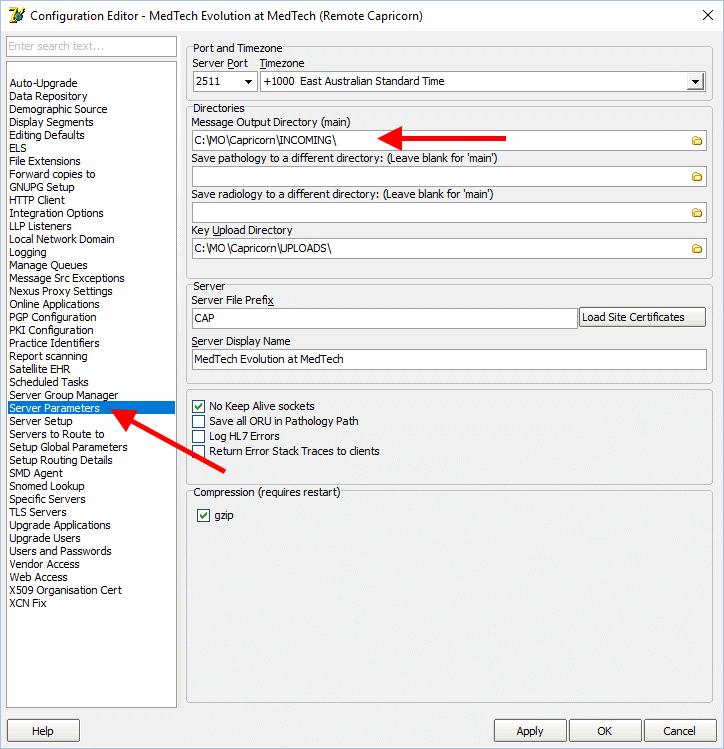
- Then, select Report Scanning field on the left hand side and ensure that Images Only is selected so images are detached.

- Tick Detach RTF Display Segments (Default)
Untick Detach PDF Display Segments
Untick Detach HTML Display Segments
Tick Convert MDM to ORU with a PDF segment for MDM incompatible PMSs (Default)
- Click Apply / OK. Capricorn configuration is complete.
MedTech Configuration
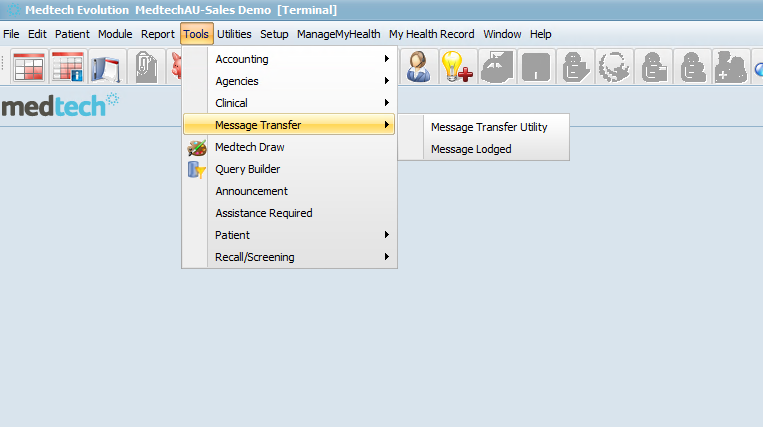
- Open the MedTech32 software. In the toolbar, select Tools > Message Transfer > Message Transfer Utility.
- Select the Add New Configuration button highlighted below.
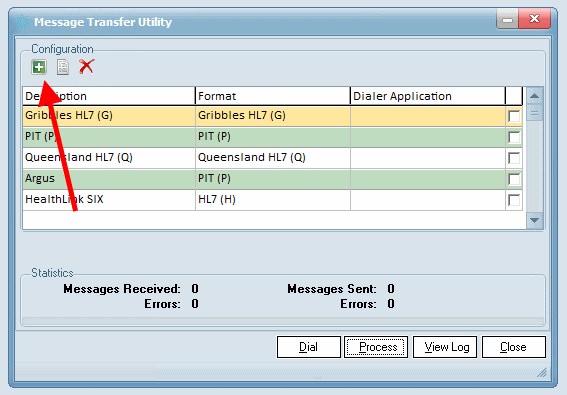
- This will open the New Configuration window. In the Description field, type Medical Objects. make sure that the File Format is set to HL7(H).
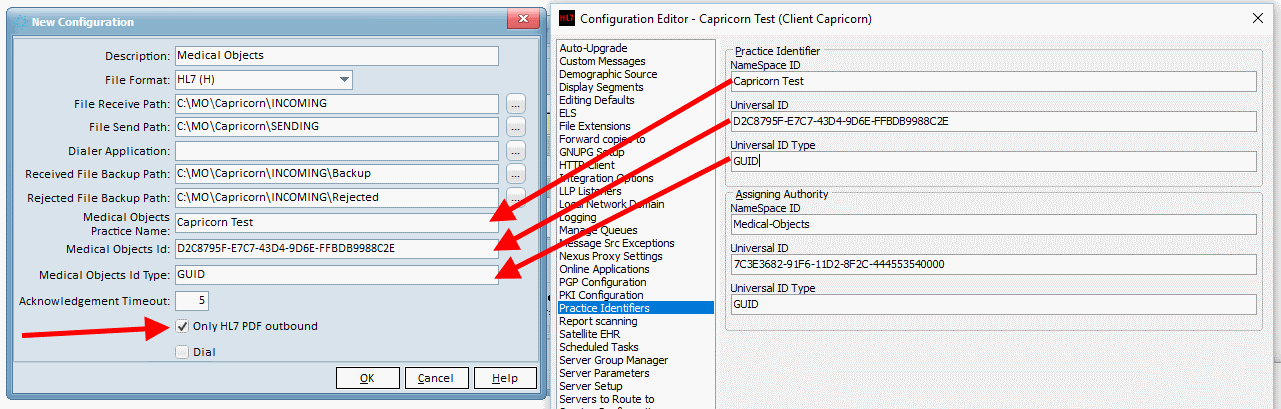
Excerpt Warning title Important! Tick "Only HL7 PDF outbound" (MedTech Evo Version 10.4.5 with a hotfix or 10.4.6 is required ) You will also want to configure the file paths to the correct folder:
No Format File Receive Path: --> C:\MO\Capricorn\INCOMING File Send Path: --> C:\MO\Capricorn\SENDING Received File backup Path --> C:\MO\Capricorn\INCOMING\Backup Rejected File Backup Path --> C:\MO\Capricorn\INCOMING\Rejected Medical Objects Practice Name = Capricorn Configuration --> Practice Identifiers --> Practice Identifier --> NameSpace ID Medical Objects Id = Capricorn Configuration --> Practice Identifiers --> Practice Identifier --> Universal ID Medical Objects Id Type = Capricorn Configuration --> Practice Identifiers --> Practice Identifier --> Universal ID Type Note: A Capricorn installed on a Workstation will require a shared path.
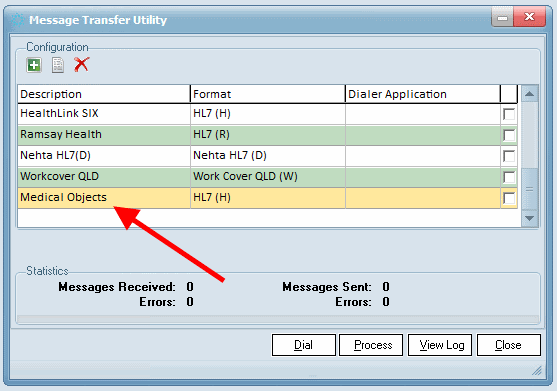
You should see Medical-Objects in the Message Transfer Utility List. Click the Process button to import.
| Info | ||
|---|---|---|
| ||
MedTech support will need to configure the automatic interval of results. Contact them to ensure this has been done. |
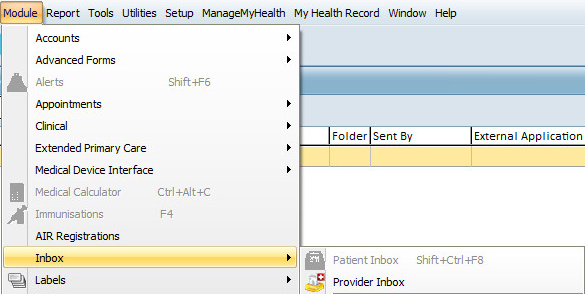
Viewing Imported Results
Module → Inbox → Provider Inbox
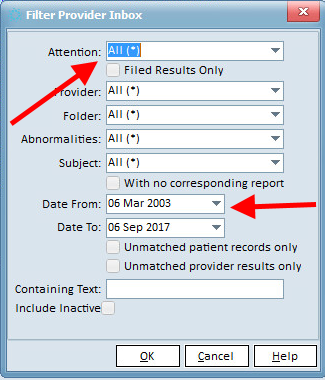
Choose the Filter button and set the date range and Attention field (it may be best to set this to "All(*)").

| Table of Contents | ||||
|---|---|---|---|---|
|