Overview:
This guide provides instruction on configuring Medical-Objects Capricorn to import electronic results into Promadis Software.
If you require any assistance with the installation or configuration, or if you have any questions, please contact the Medical-Objects Helpdesk on (07) 5456 6000.
If you have not Installed the Medical-Objects Download client, Please see the guide for Installing Capricorn on Windows.
Configuring Capricorn Software
Accessing the Capricorn Configuration Window
| Info | ||
|---|---|---|
| ||
In some cases, the Capricorn may be configured as a service. See this guide for instructions on how to launch the Capricorn if it is set up as a service. |
| Excerpt Include | ||||||
|---|---|---|---|---|---|---|
|
Capricorn Configuration Settings
Click on Integration Optionson Ack Management.
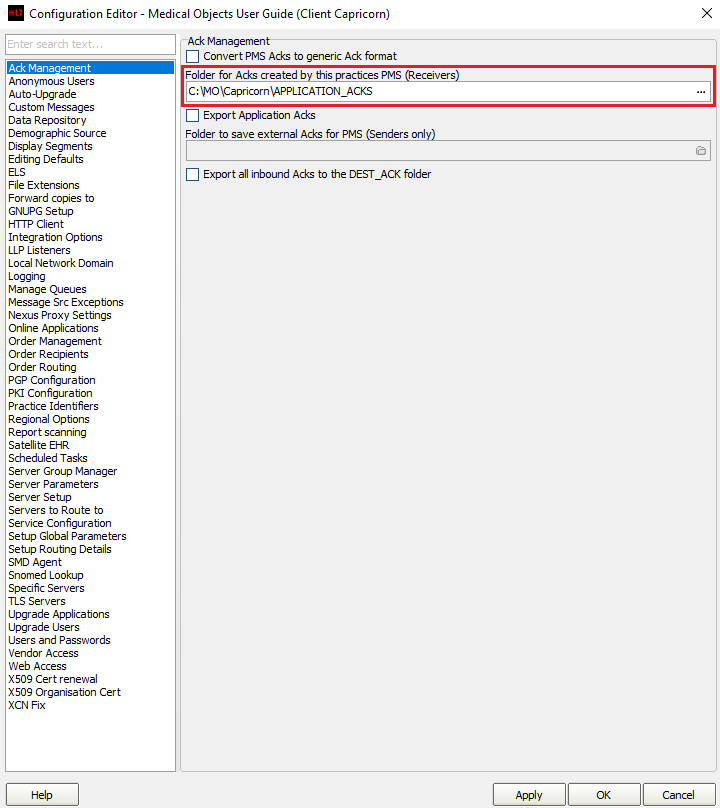
Make sure the Application Acks Path is set to C:\MO\Capricorn\APPLICATION_ACKS
Click on Integration Options.
3.1 Check that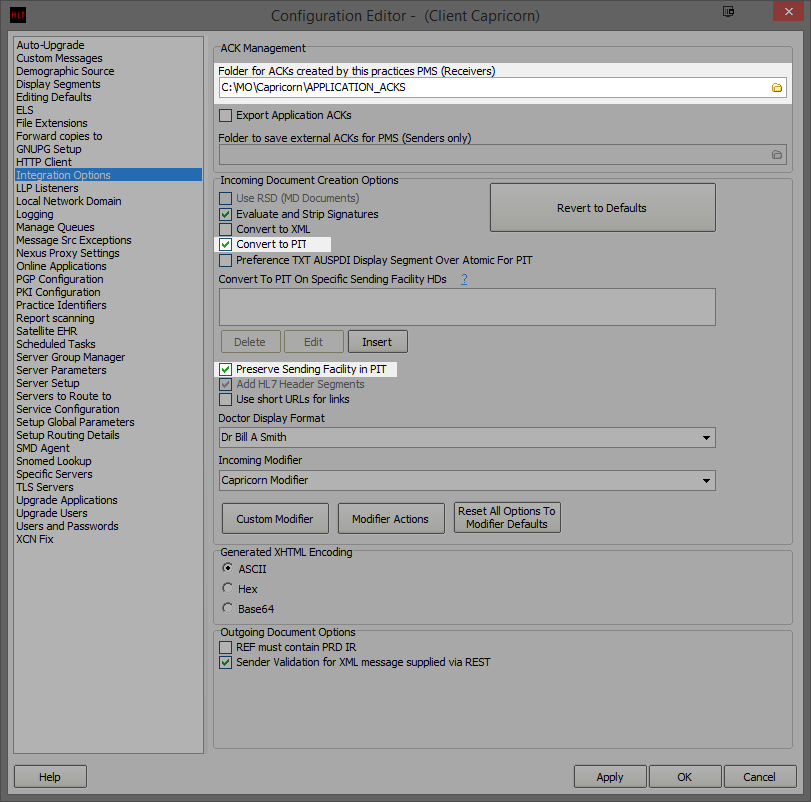
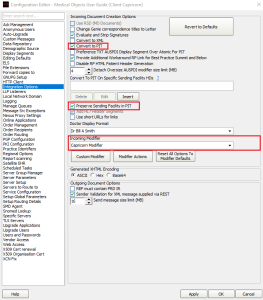
Make sure the Incoming Modifier is set to Capricorn Modifier.Info title PLEASE NOTE: You will need to have the options Convert to PIT and Preserve sending facility in PIT checked.
Select Server Parameters from the left hand panel.
Set the main directory to \\Server\\data\pathology\MedObj - or wherever the reports are currently set to import from. This directory may change depending on the practice's setup.
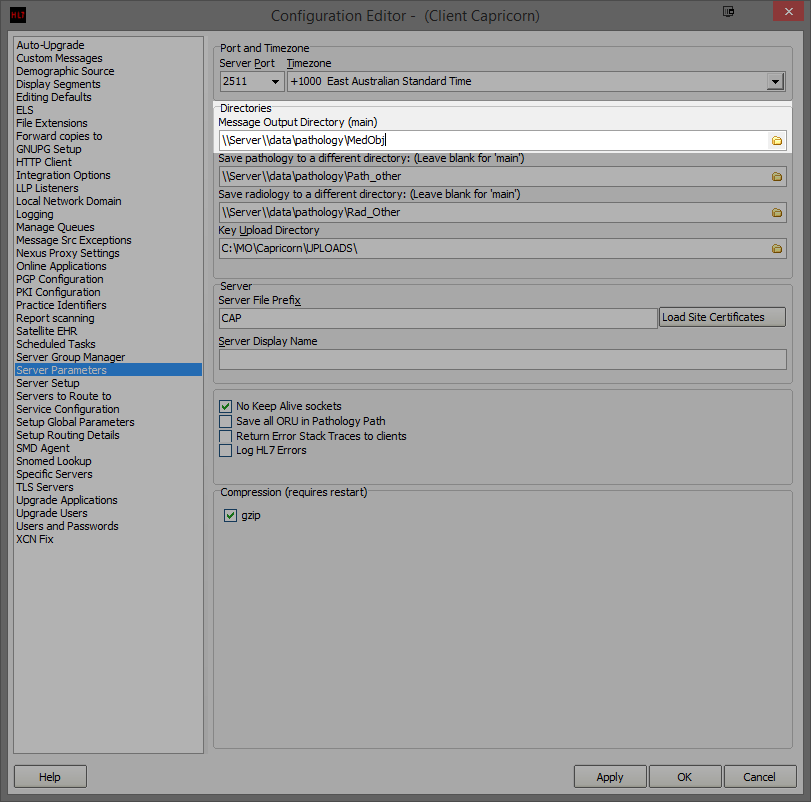
Info title Note: Please note that this path will need to be set up within Promadis as well.
For Pathology and radiology, You will need to set a folder for each company sending to the practice through message src exceptions. First, set the folders as follows.
\\Server\\data\pathology\ (Enter the name of the pathology company here, or leave as Path_other)
\\Server\\data\pathology\ (Enter the name of the Radiology company here, or leave as Rad_Other)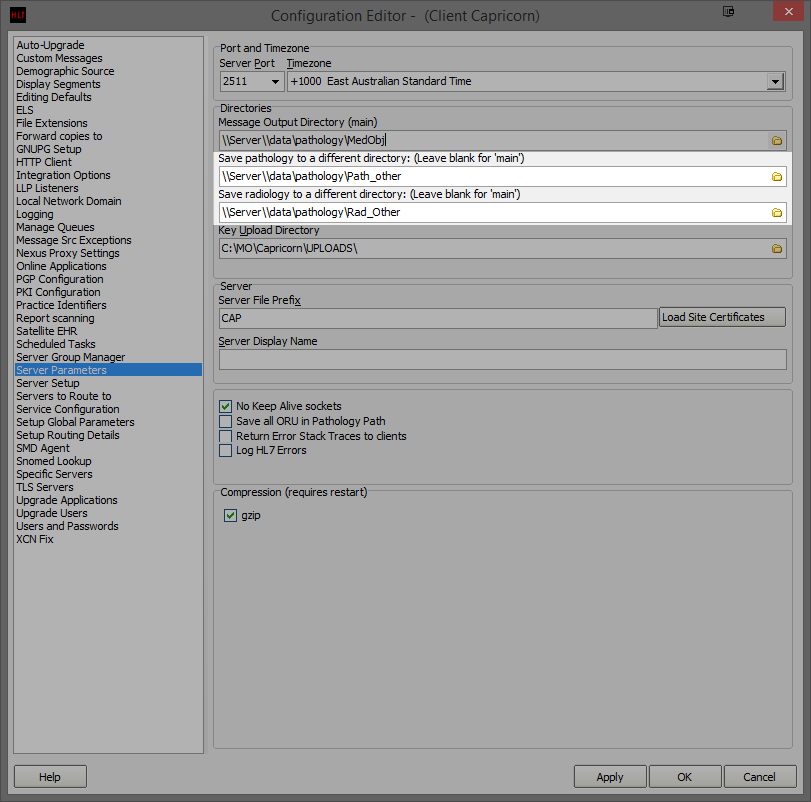
Info title Note: Please note that these paths will need to be set up within Promadis as well for each folder created.
- Select Message Src Exceptions from the left hand panel. Here you will need to add each Pathology/ Radiology company sending to the practice.
- Select the Add button highlighted below, and select Lookup sending Facility HD.
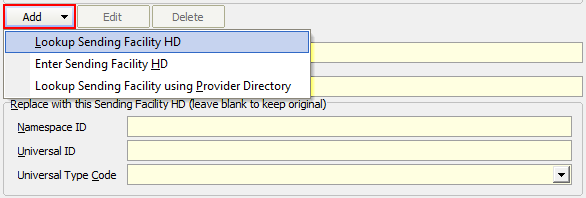
- Enter the name of the sending company - For Example, Woodville Diagnostic Imaging.
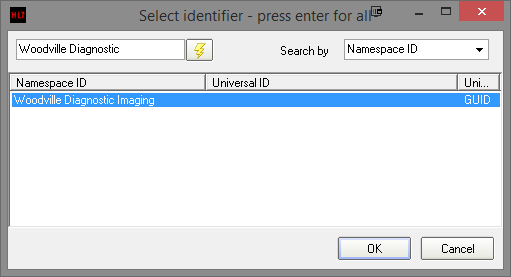
You will then be required to enter the save path for the files. Use the same file path structure, but name the folder accordingly.
eg: \\Server\\data\pathology\WoodvilleInfo title Note: Please note that this path will need to be set up within Promadis as well for each sending Path and Rad company.
- This will put all future messages from the sending company into the relating folder for Promadis to import.
| Table of Contents | ||||
|---|---|---|---|---|
|