Overview
This guide provides an overview of configuring the Medical-Objects Download Client (Capricorn) and Medical Director to import electronic results. This guide is written for Medical Director Version 3.12 and above.
If you require any assistance with the installation or configuration, or if you have any questions, please contact the Medical-Objects Helpdesk on (07) 5456 6000.
If you have not Installed the Medical-Objects Download client, Please see the guide for Installing Capricorn on Windows.
Configuring Capricorn Software
Accessing the Capricorn Configuration Window
| Info | ||
|---|---|---|
| ||
In some cases, the Capricorn may be configured as a service. See this guide for instructions on how to launch the Capricorn if it is set up as a service. |
| Excerpt Include | ||||||
|---|---|---|---|---|---|---|
|
Capricorn Configuration Settings
- Click on Integration Optionson Ack Management.
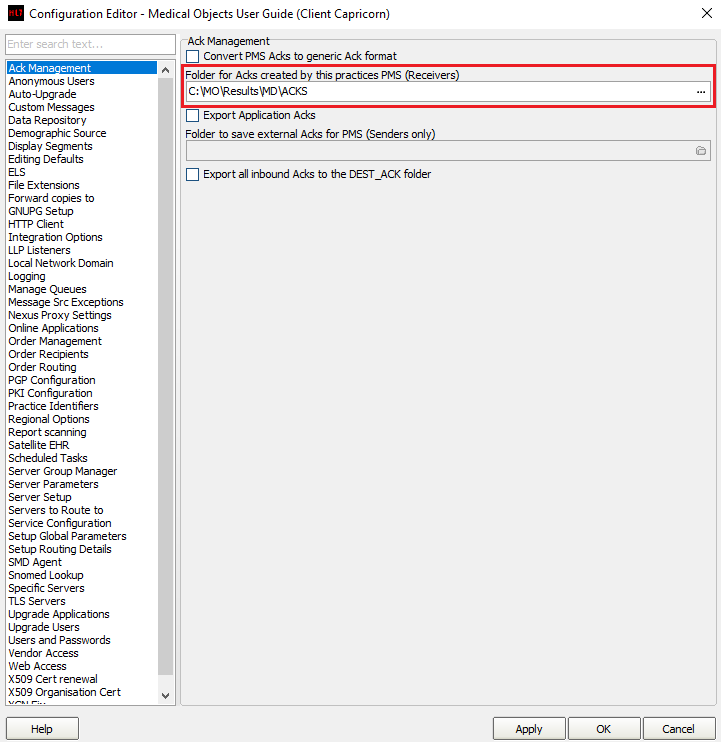
Set the ACK Management path to the C: Drive, For example:
No Format C:\MO\Results\MD\Acks
Info title Note: If the folder does not exist, you must create it.
Please make sure the Results folder has the Modify, Read and Write permissions, AND is shared over the Network.- Click on Integration Options.
3.1 Check that the Incoming Modifier is set to MD3 Results - Change MSH ID.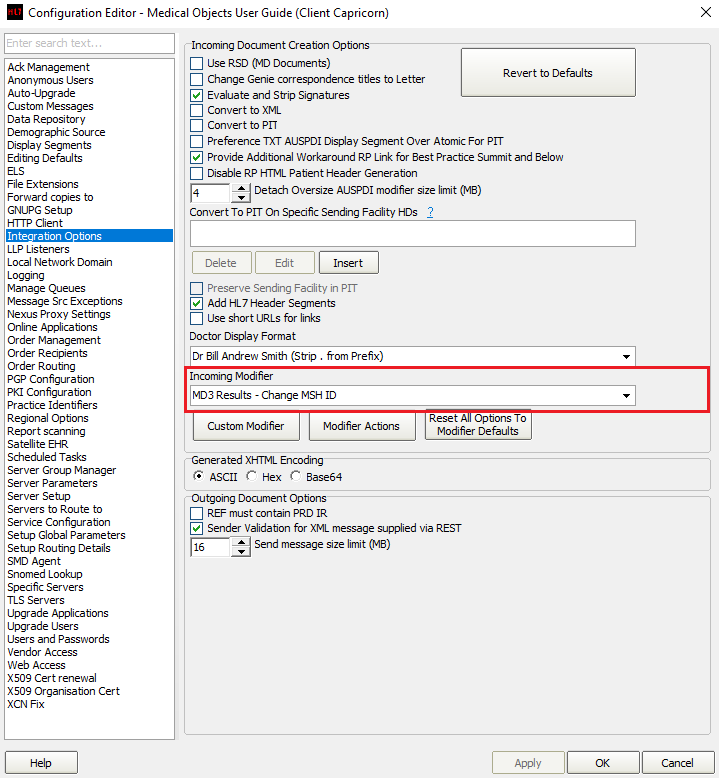
- Select Server Parameters from the left panel.
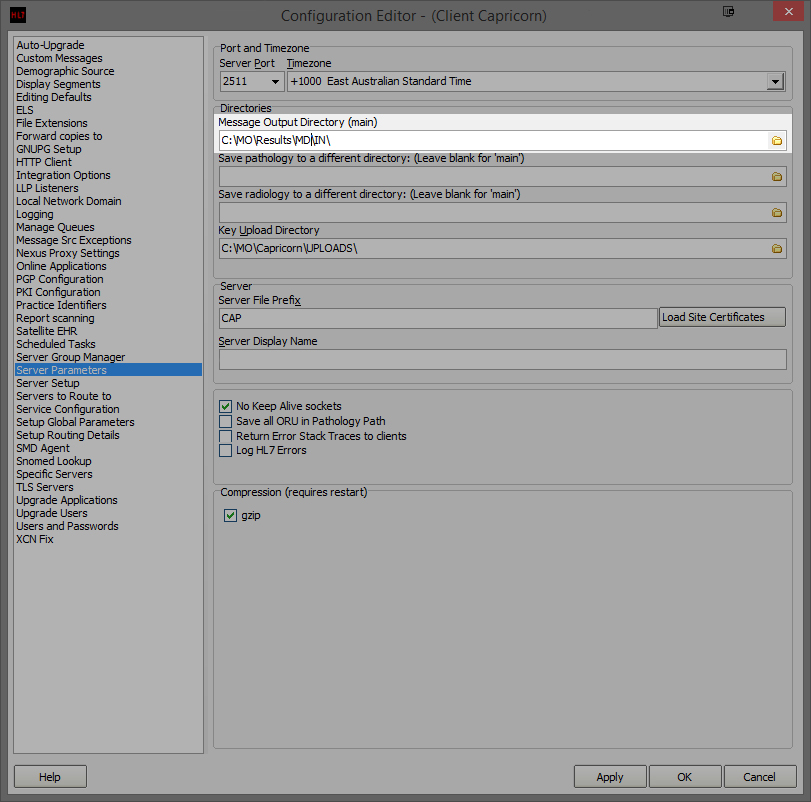
Under Message Output Directory (main), set the results import path.
Set the path to match the following:No Format C:\MO\Results\MD\IN
Info title Note: If the folder does not exist, you must create it.
Please make sure the Results folder has the Modify, Read and Write permissions, AND is shared over the Network.- The configuration is complete. Click Apply and OK.
Configuring Medical Director Incoming Correspondence and Acknowledgements
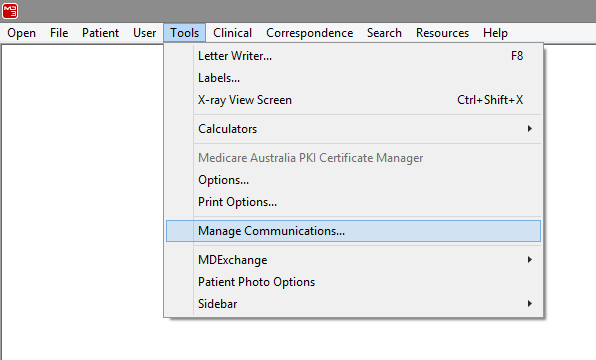
- Open Medical Director (MD) 3.12.

- Once Medical Director (MD) has opened, select Tools then Manage Communications.
- The following window will appear.
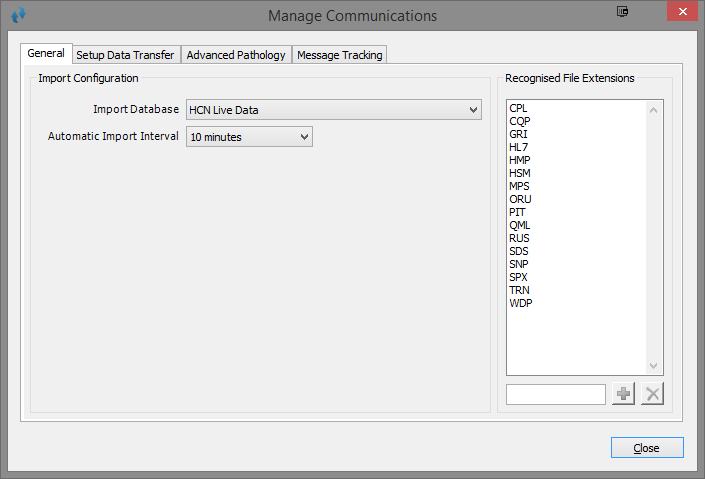
- Select the Setup Data Transfer Tab.
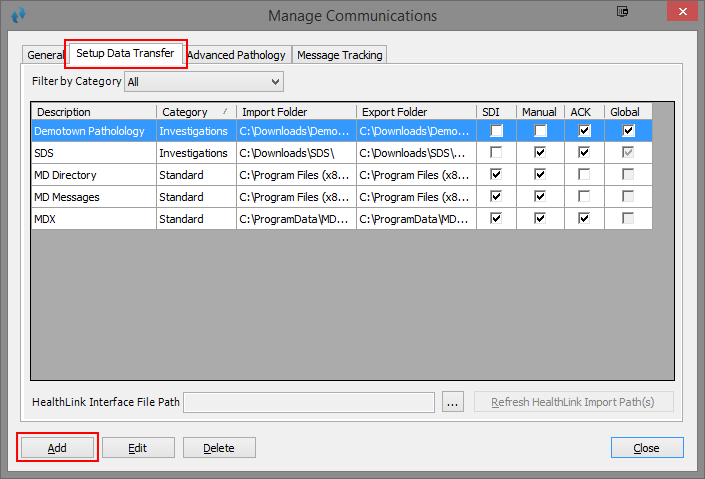
Click on Add to add a new rule for Medical-Objects. If Medical-Objects is already in the list please ensure it is configured correctly (see next step).
Description: Please use Medical-Objects
Category: Please use Medical-Objects
Info title Note: If there is nothing in the Drop Down Box, Please type Medical-Objects into the box.
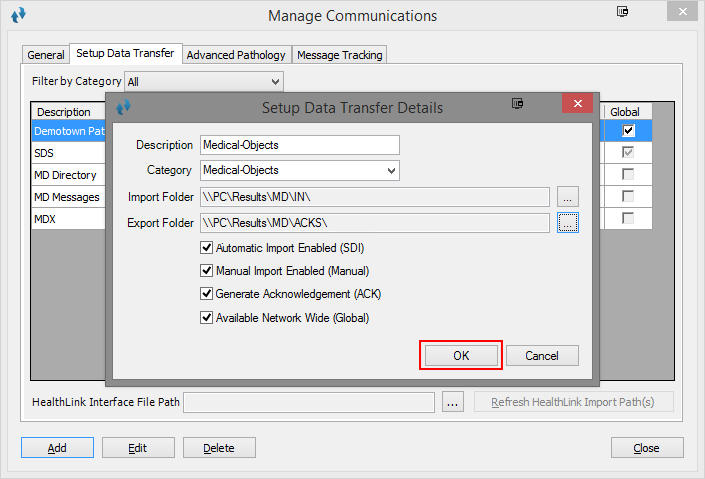
Set the file paths as follows:No Format Import Folder --> \\PC\Results\In Export Folder --> \\PC\Results\Acks
Info title Note: For Import and Export Folders, Please use the Network UNC Paths.
Check Boxes: Please Tick ALL four check boxes
Click on OK.
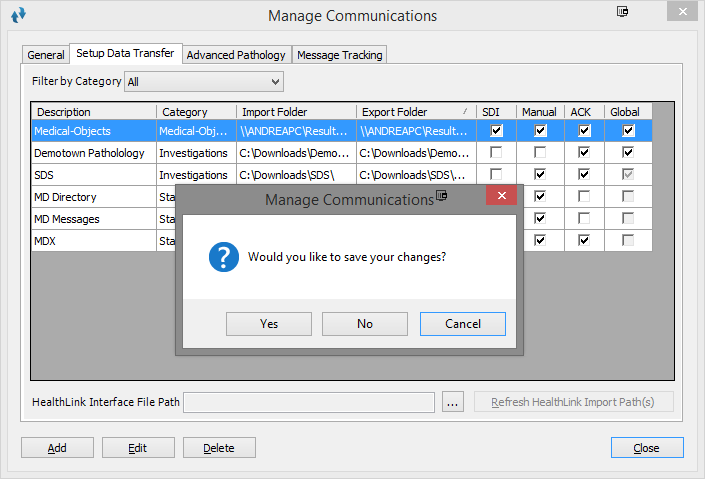
- The Medical-Objects rule has now been created. Click on close in the bottom right hand-side.

Once you click on close you will be prompted to save your work. Please click on Save.
The configuration is now complete for Medical Director.
| Table of Contents | ||||
|---|---|---|---|---|
|