Overview
This guide provides instruction on configuring both Medical-Objects Capricorn and ZedMed software to import electronic results.
If you require any assistance with the installation or configuration, or if you have any questions, please contact the Medical-Objects Helpdesk on (07) 5456 6000.
If you have not Installed the Medical-Objects Download client, Please see the guide for Installing Capricorn on Windows.
Capricorn Configuration
Accessing the Capricorn Configuration Window
| Info | ||
|---|---|---|
| ||
In some cases, the Capricorn may be configured as a service. See this guide for instructions on how to launch the Capricorn if it is set up as a service. |
| Excerpt Include | ||||||
|---|---|---|---|---|---|---|
|
Capricorn Incoming Settings
- Click on Ack Management.
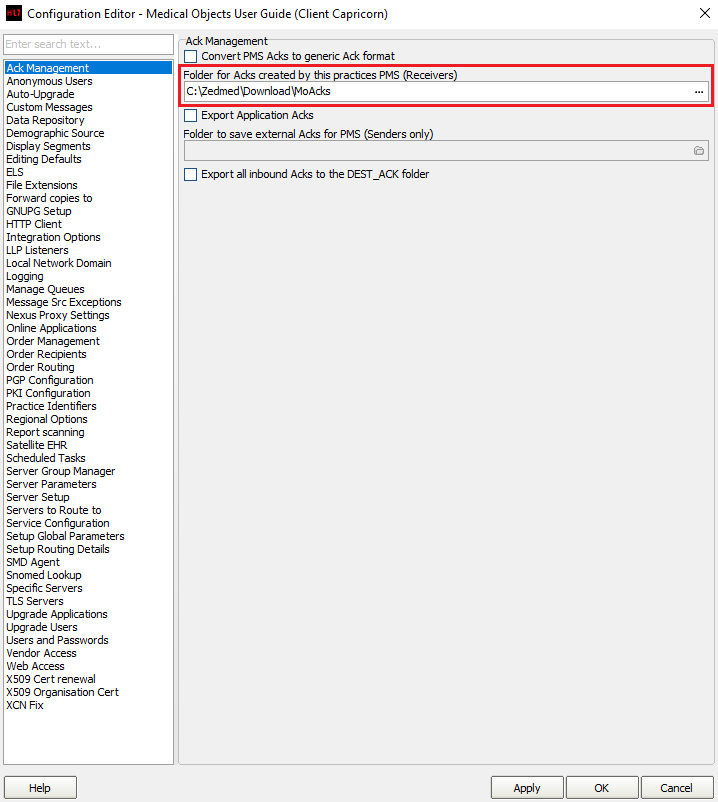
Set the ACK Management path to the local Import folder on the server or the network path on a workstation, that points to the server import folder.
For example:
Newer Versions of ZedMedNo Format (Capricorn installed on the Server) --> C:\Zedmed\Download\MoAcks Or (Capricorn installed on the Workstation) --> \\server\Zedmed\Download\MoAcks
Older Versions of ZedMedNo Format (Capricorn installed on the Server) --> C:\Patients\Download\MoAcks Or (Capricorn installed on the Workstation) --> \\Server\Patients\Download\MoAcks
Info title Note: If the folders do not exist, you must create them.
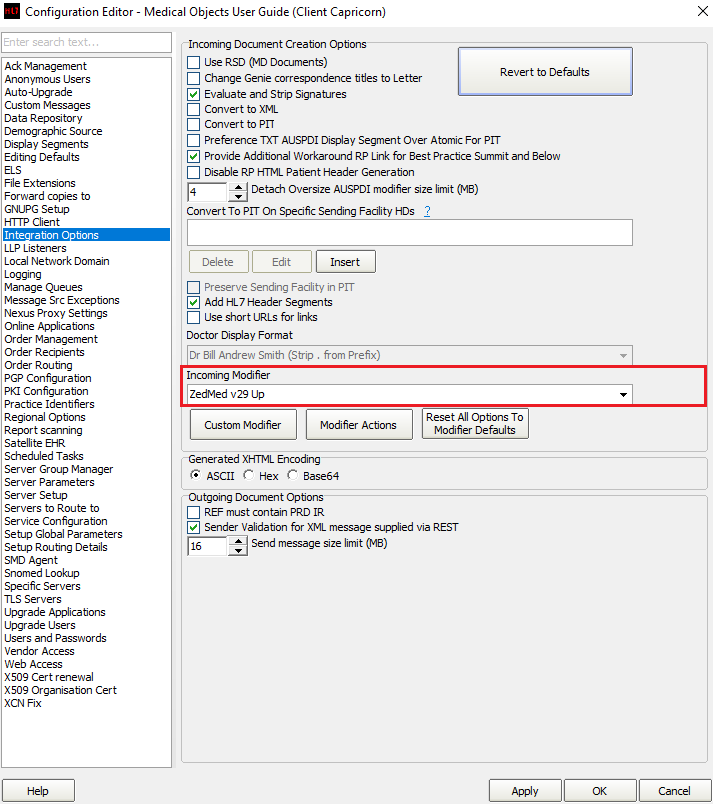
- Click on Integration Options.
3.1 Check that the Incoming Modifier is set to ZedMed Modifierv29 Up.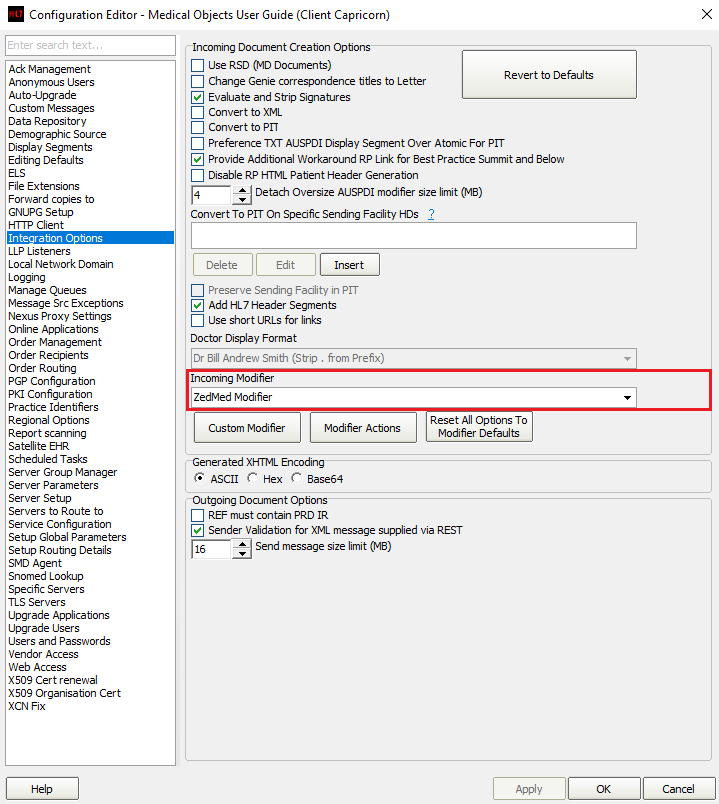
- Select Server Parameters from the left panel.
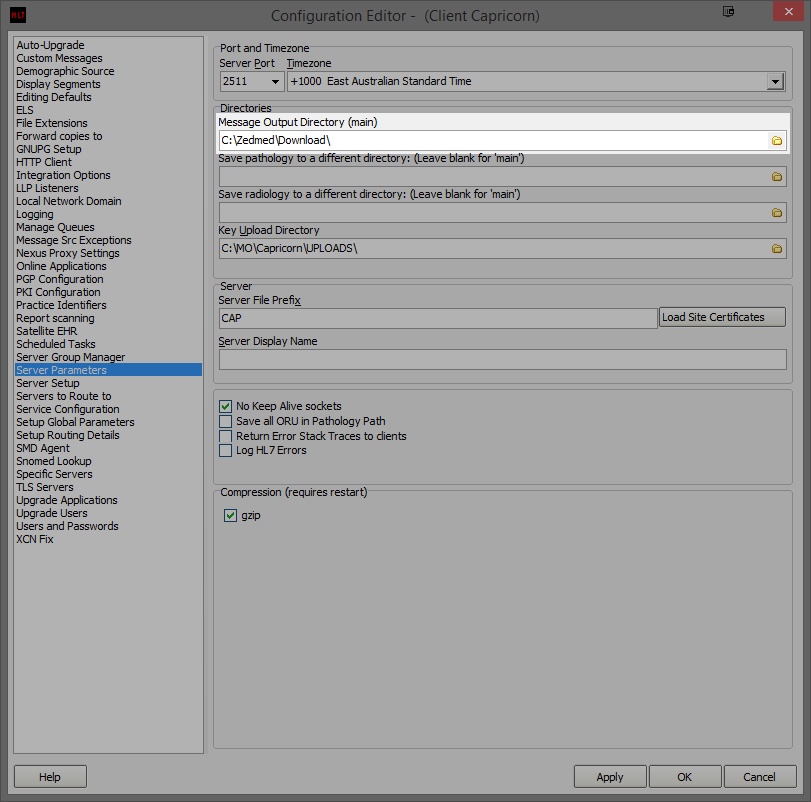
Under the Message Output Directory (main) set the results import path.
The path can be different depending on where the Capricorn is installed.
For example:
Newer Versions of ZedMedNo Format (Capricorn installed on the Server) --> C:\Zedmed\Download\ Or (Capricorn installed on the Workstation) --> \\server\Zedmed\Download\
Older Versions of ZedMedNo Format (Capricorn installed on the Server) --> C:\Patients\Download\ Or (Capricorn installed on the Workstation) --> \\Server\Patients\Download\
Info title Note: If the folders do not exist, you must create them.
- The configuration is complete. Click Apply and OK.
Manage Queues
- Click on the Manage Queues link in the left hand panel.
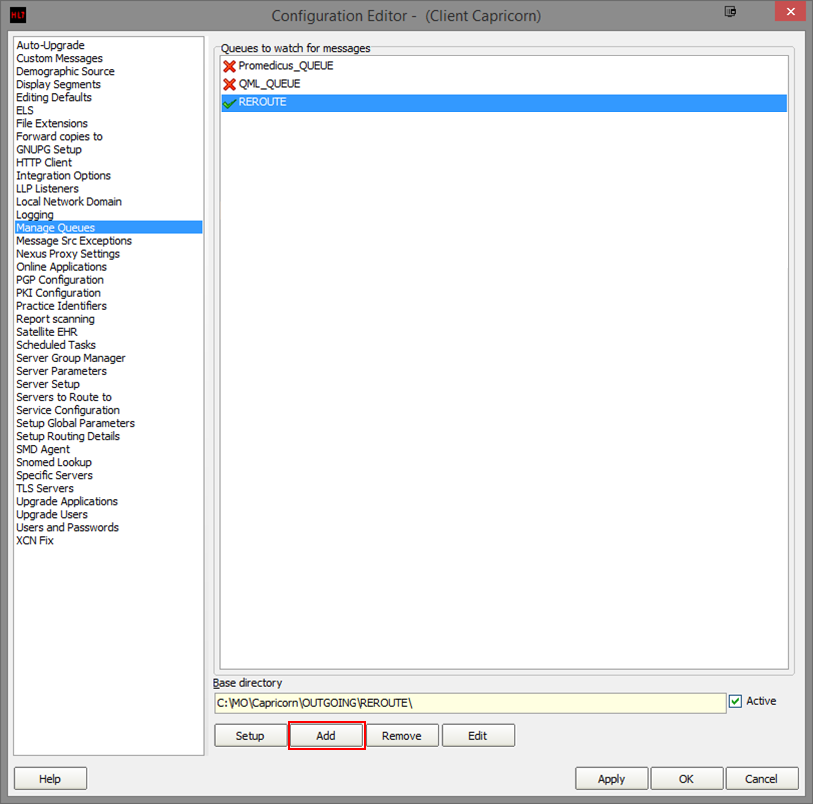
Click the Add button highlighted above.
Anchor Step3 Step3 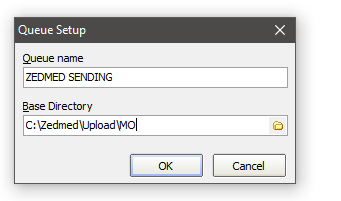
Info title Sending Queue Queue Name --> ZEDMED SENDING Base Directory --> C:\Zedmed\Upload\MOWill need to create a subfolder within C:\Zedmed\Upload for our going reports. Eg: C:\Zedmed\Upload\MO.This is to prevent multiple companies pulling reports from the same directory.See Step 6b.
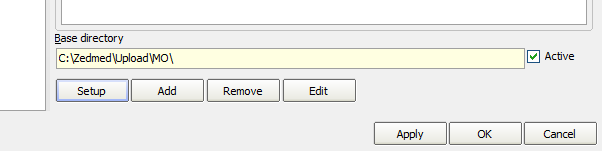
- Once the queue is added, Click the Setup button.
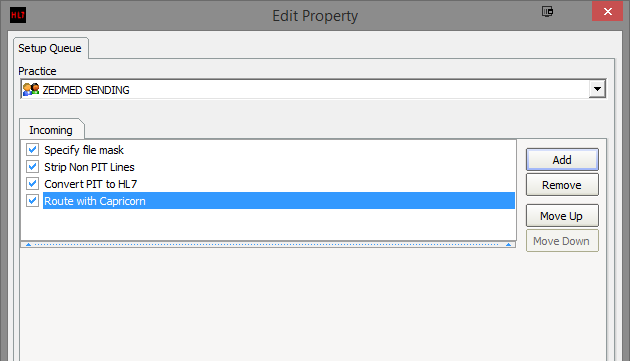
In the window that appears, Click the Add button. Add the following decorators by searching each one and clicking OK.
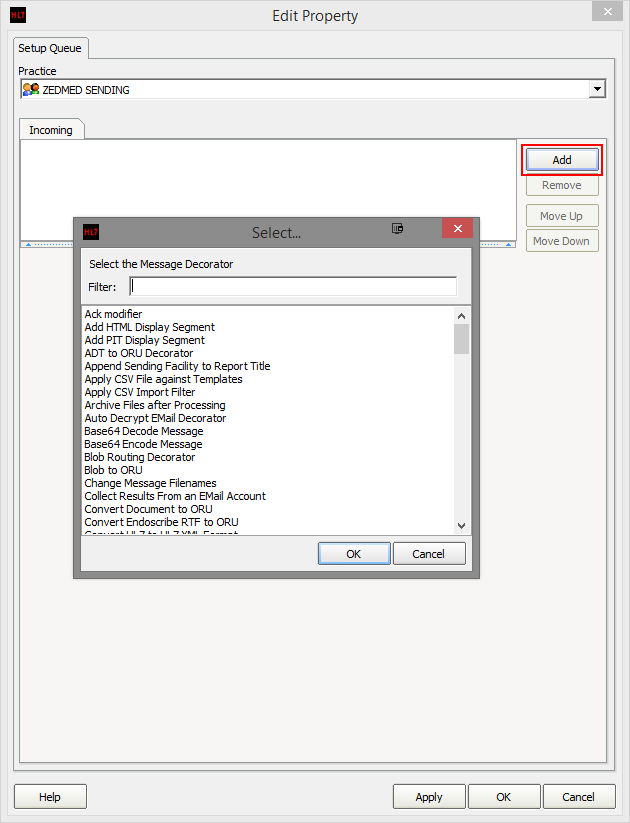
No Format Specify file mask --> Set to 'PIT' Strip Non PIT lines Convert PIT to HL7 --> (Leave settings as they are) Set Diagnostic Service ID to “Clinical letter or report [PHY]” Route with Capricorn
- Your queue should look like this.
- Click Apply and OK to close the configuration.
Configuring Zedmed
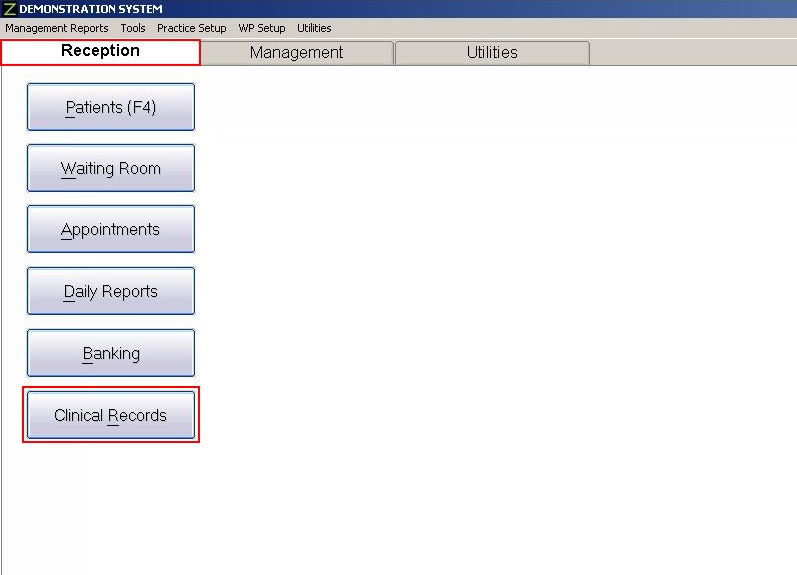
- Open Zedmed, and Click on the Reception tab. Then Click the button titled Clinical Records.
- Open Zedmed and go to Tools > Global Options.

Select the Communications tab, and the General tab. Then, set the Send Path to:
No Format \\SERVER\Zedmed\Upload\MO

- Select the Communications tab, and select Messaging Provider tab.
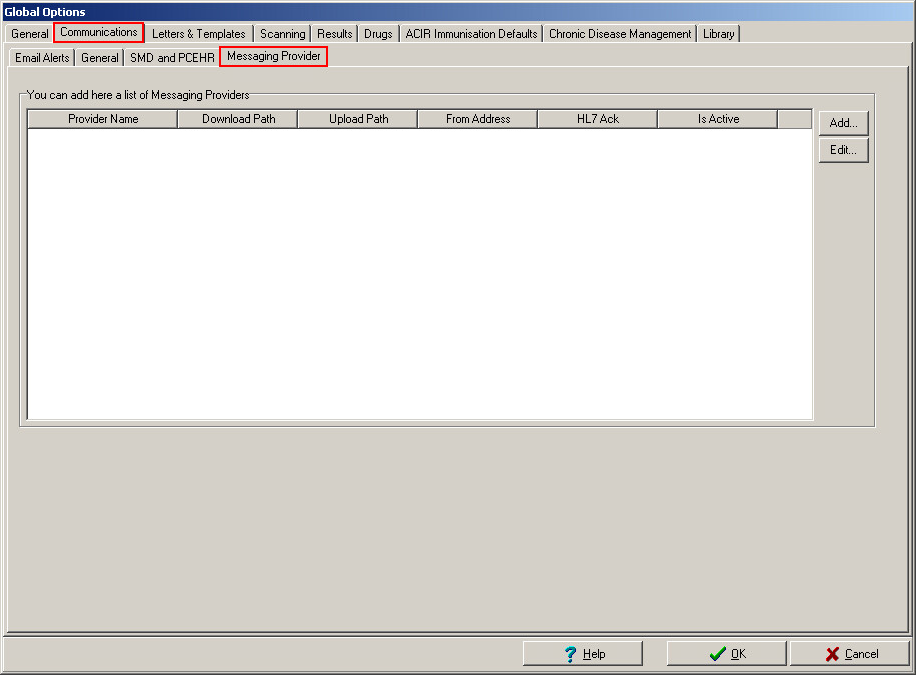
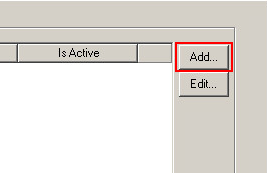
- Click the Add button.
- Enter the Provider name Medical-Objects.
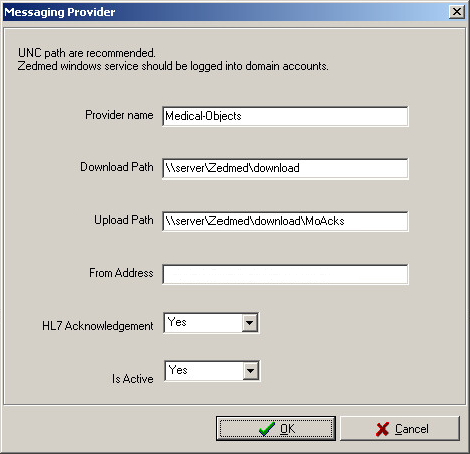
Set the download path to the Message Output Directory path set earlier, for example
No Format \\server\Zedmed\Download\
If possible, Use a UNC path.
Set the upload path to the ACK management path set earlier. For example:
No Format \\Server\Patients\Download\MoAcks
- Make sure HL7 Acknowledgement and Is Active are set to Yes.
ZedMed Extensions Check
- Open Zedmed, and Click on the Reception tab. Then Click the button titled Clinical Records.
- Open Zedmed and go to Tools > Global Options.
Select the Communications tab, and the General tab.
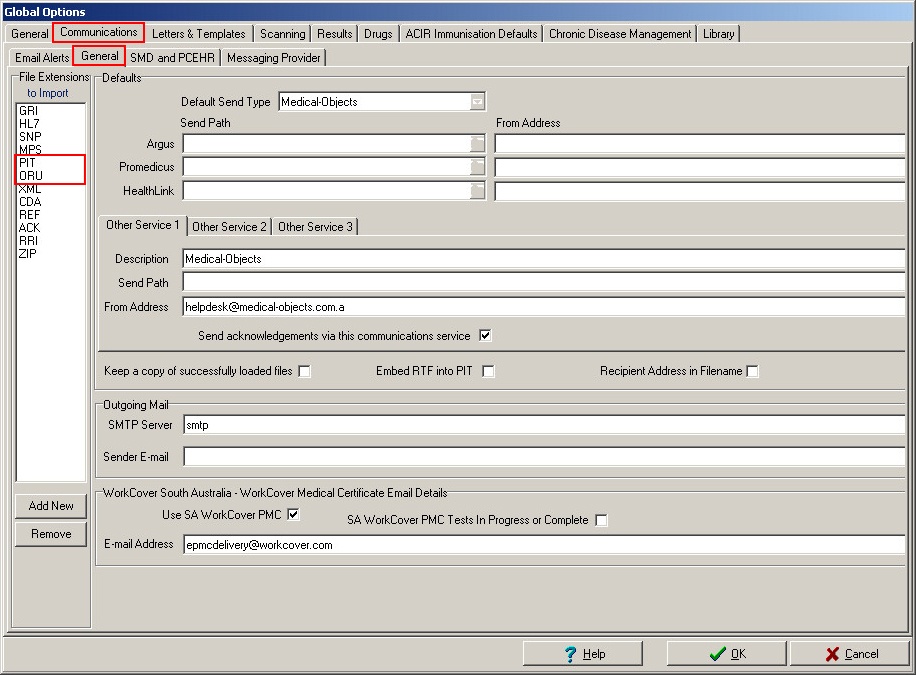
- Make sure that ORU and PIT are in the extension list on the left panel.
Importing Results in Zedmed
- Open Zedmed, and Click on the Reception tab. Then Click the button titled Clinical Records.
- From the top menu select Results > Import Laboratory Results (CTRL+F6)
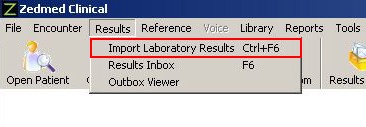
- Once imported then hit the Results Inbox button.
If results don't import, check the settings below.
| Table of Contents | ||||
|---|---|---|---|---|
|