Overview
This guide provides an overview on configuring the Medical-Objects Download Client (Capricorn) and Genie Software to import electronic results. This process is based on the Microsoft Windows environment.
If you require any assistance with the installation or configuration, or if you have any questions, please contact the Medical-Objects Helpdesk on (07) 5456 6000.
If you have not Installed the Medical-Objects Download client, Please see the guide for Installing Capricorn on Windows.
Genie Auto import Pre-Configuration Check
Prior to installing the Medical-Objects Capricorn, the following must be checked and the installation performed accordingly to allow Genie to automatically import the results received via Medical-Objects.
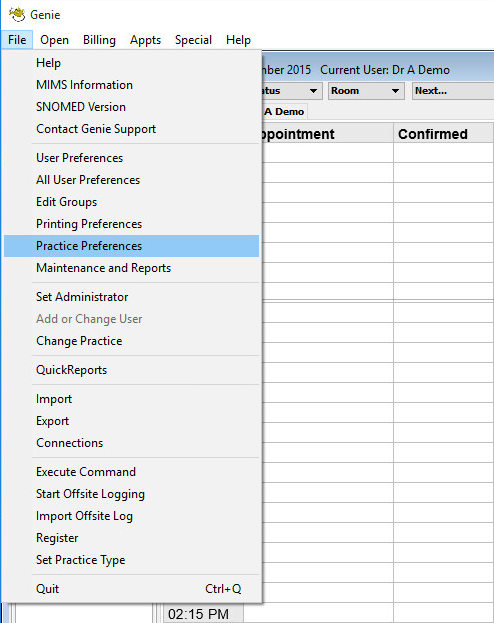
- Log into Genie and click on File, and select Practice Preferences.
Select the Practice whose configuration you want to check.
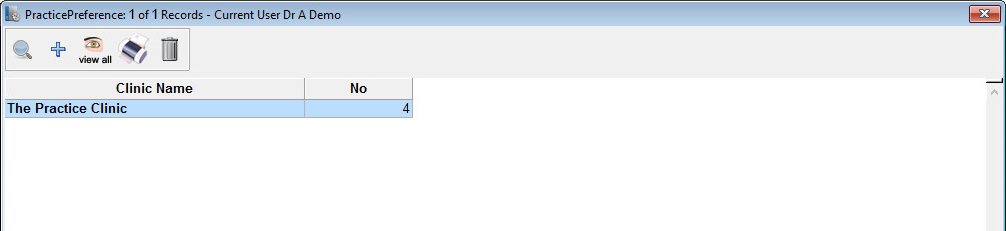
- On the Practice Configuration window, Find the practice that you want to check the auto-import settings for in the clinic name column and double click the entry.
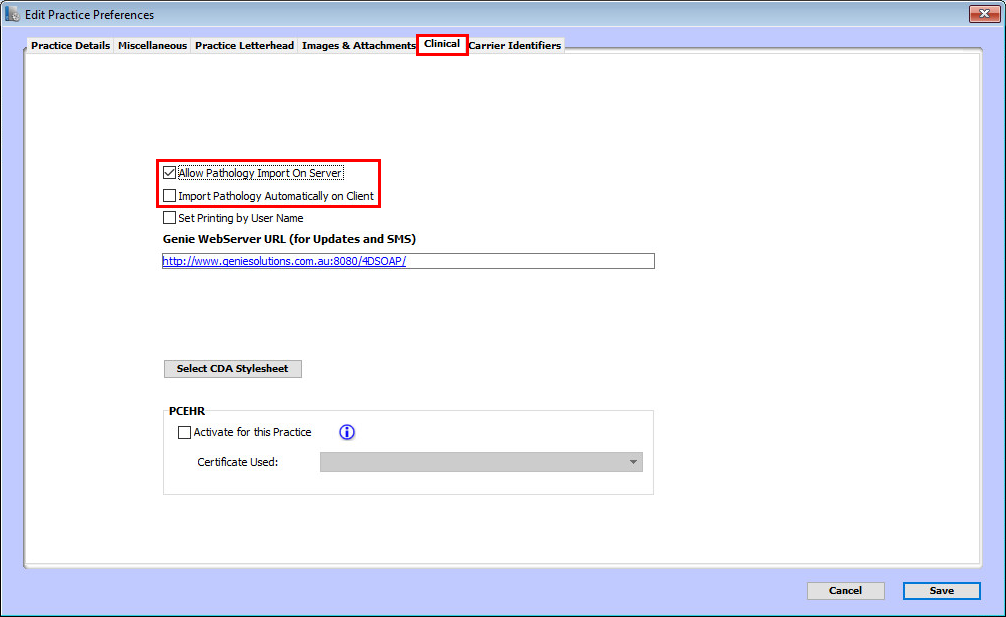
- In the Edit Practice Preferences window, click on the Clinical tab.
Note the checkboxes named Allow Pathology Import on Server and Import Pathology Automatically on Client.
Example: As we can see in the screenshot below Genie is set to import results on the Server, If you are required to install the Medical-Objects Capricorn on a Genie client workstation then it must be set to download the results across the network to the Genie server to allow Genie to automatically import the downloaded results.
If Genie is set to import from the server and results are downloaded to a workstation, then a manual import must be run from the Genie client installed on the workstation where the results are downloaded and vice versa.
Capricorn Configuration
Accessing the Capricorn Configuration Window
| Excerpt Include | ||||||
|---|---|---|---|---|---|---|
|
Capricorn Configuration Settings
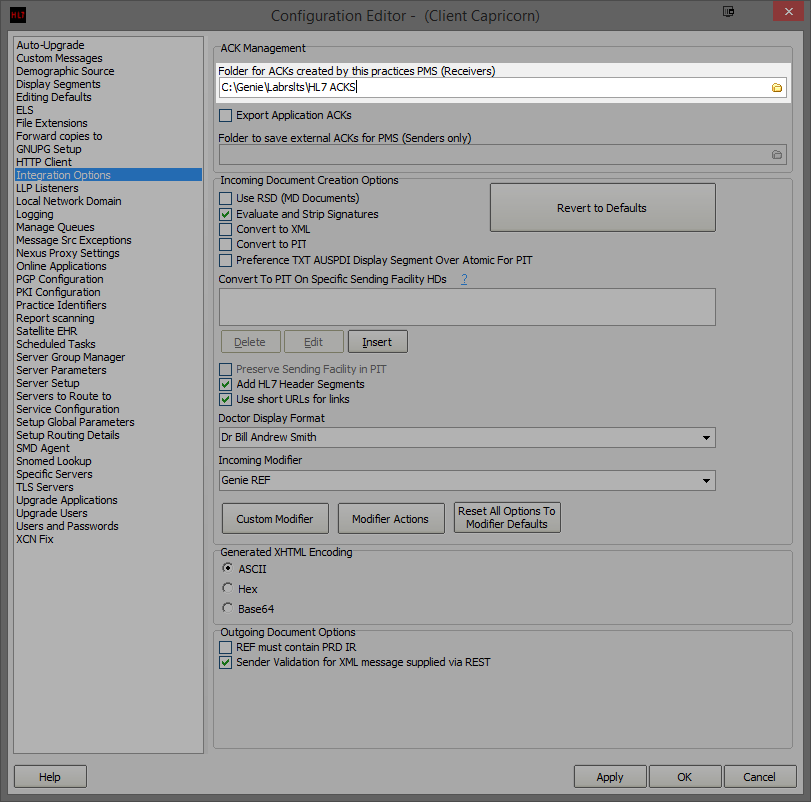
- Click on Integration OptionsAck Management.
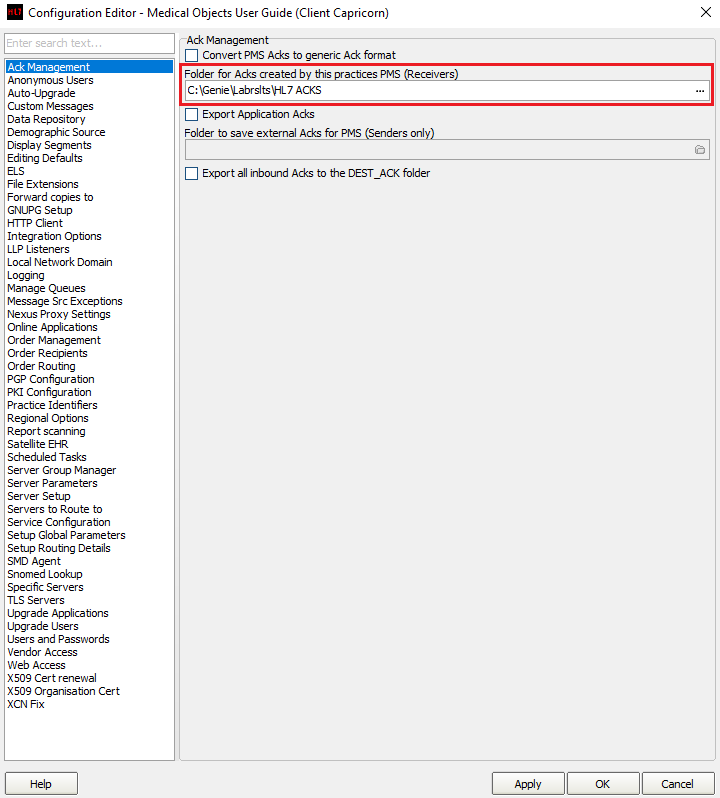
Set the ACK Management path as below:
No Format (Capricorn installed on a Genie Server Machine) --> C:\Genie\Labrslts\Hl7 ACKS (Capricorn installed on a Genie Client Machine) --> \\server\Genie\Labrslts\Hl7 ACKS\
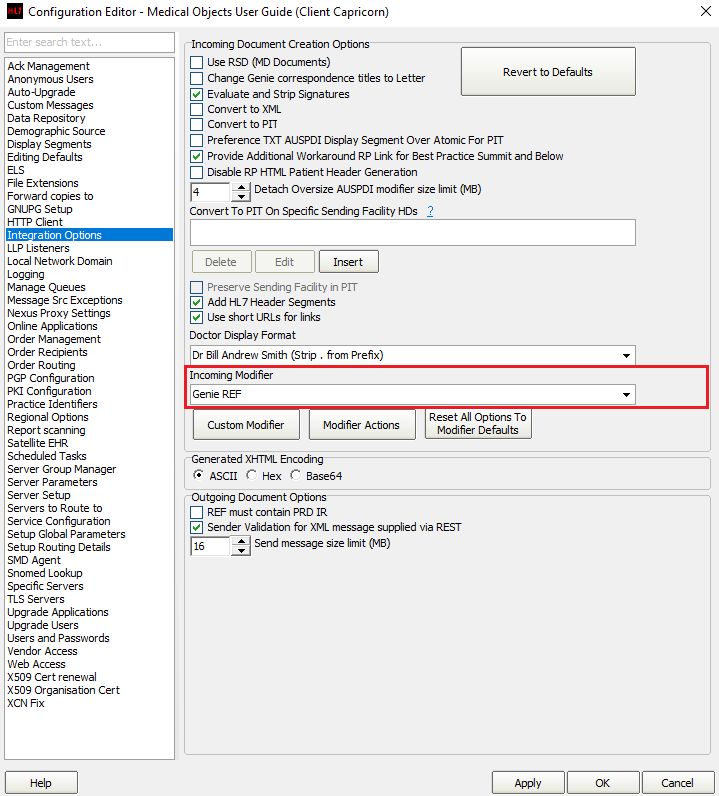
- Click on Integration Options.
- You will now need to set the incoming modifier. There are a few options to choose from depending on what the practices preferences are and the version of Genie in use.
Genie V8: Puts all incoming correspondence into Pathology and Radiology. For Genie versions 8 and above.
Genie REF V8: Splits incoming correspondence between Pathology and Radiology and Incoming Letters as appropriate. For Genie versions 8 and above.
Genie: Puts all incoming correspondence into Pathology and Radiology. For Genie versions before 8.
Genie REF: Splits incoming correspondence between Pathology and Radiology and Incoming Letters as appropriate. For Genie versions before 8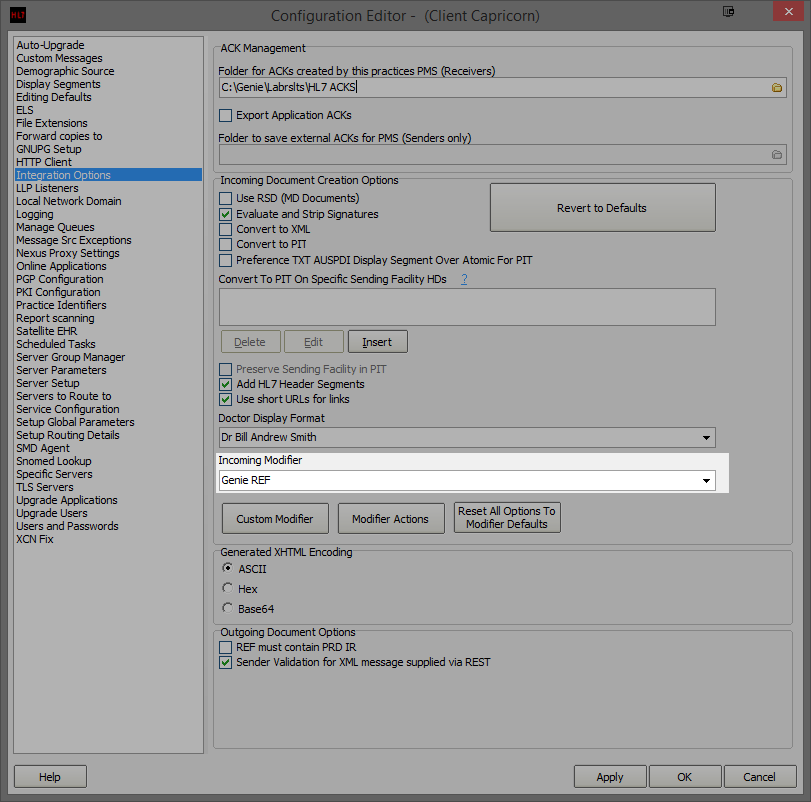
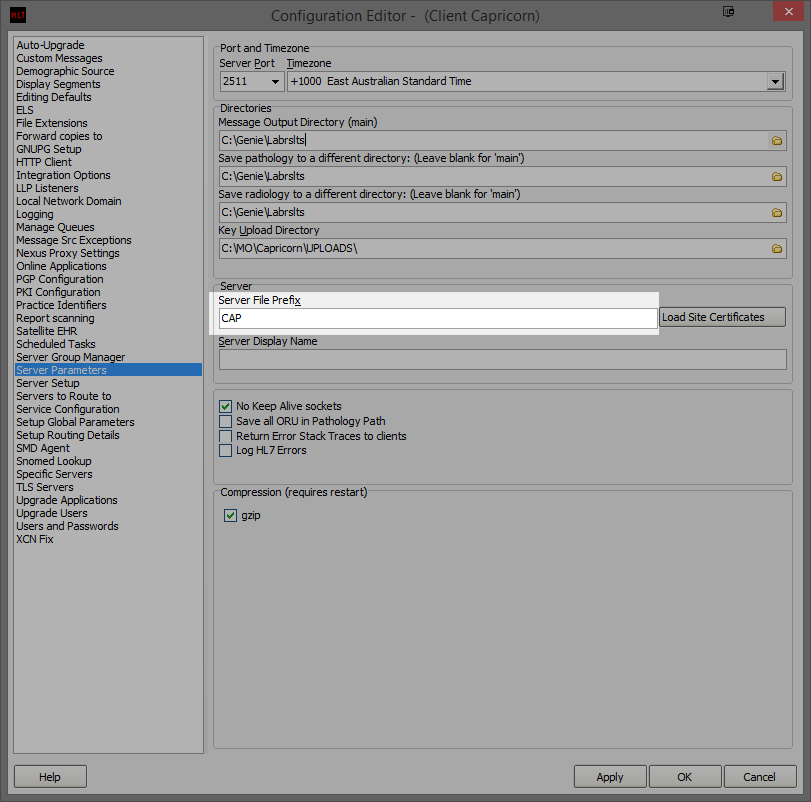
- Select Server Parameters from the left panel.
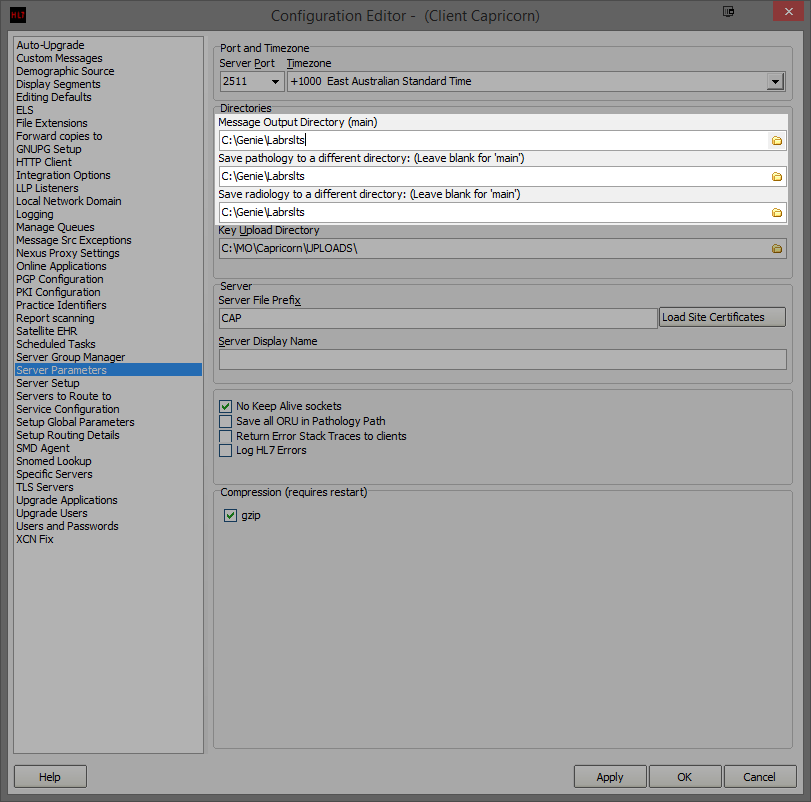
The paths above are set as follows:
(Capricorn installed on a Genie Server Machine) -->No Format Message Output Directory --> C:\Genie\Labrslts\ Save Pathology --> C:\Genie\Labrslts\ Save Radiology --> C:\Genie\Labrslts\
(Capricorn installed on a Genie Client Machine) -->No Format Message Output Directory --> \\server\Genie\Labrslts\ Save Pathology --> \\server\Genie\Labrslts\ Save Radiology --> \\server\Genie\Labrslts\
Make Sure that Save all ORU in Pathology Path is UNTICKED
- The Medical-Objects configuration is complete. Click Apply and OK.
Manage Queues Configuration
Click on Manage Queues in the left hand side panel.
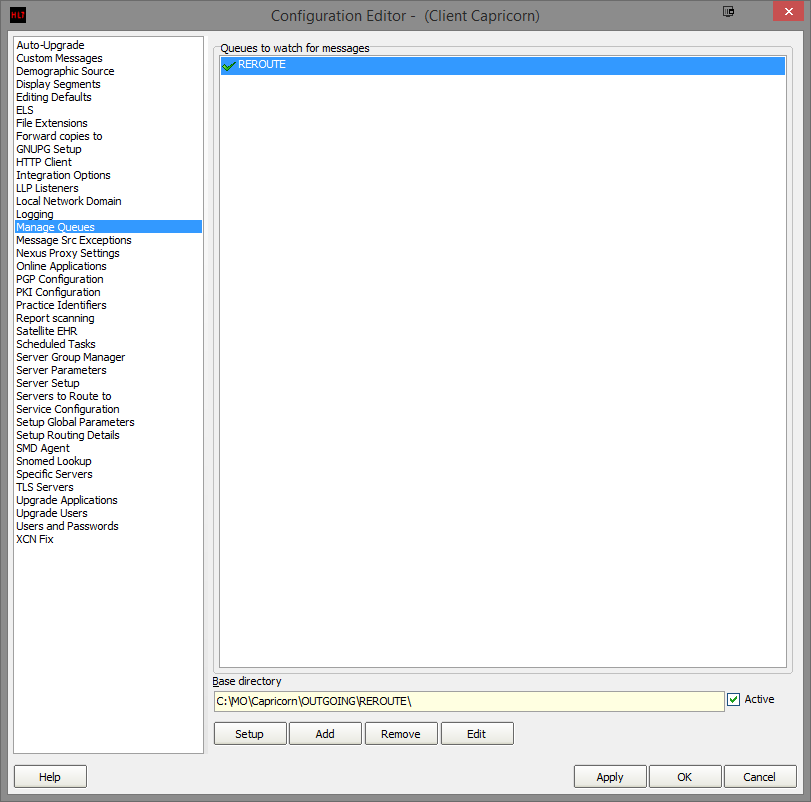
Click Add.
Enter HL7 Outgoing for the Queue name.
Enter C:\Genie\Medical Objects\Outgoing\ for the Base Directory.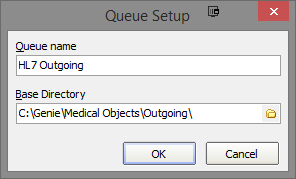
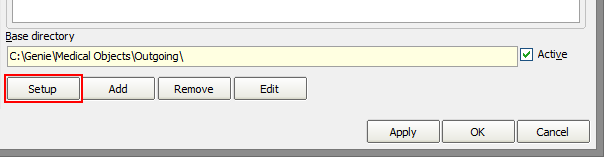
Warning Please make sure any duplicate Medical Objects Outgoing folders are removed across the network. These will affect document delivery. - Click on HL7 OUTGOING in the Queues to watch for messages pane and then click on Setup.
Click on Add in the window that appears and choose the following decorator from the menu that appears.

No Format Specify File Mask

Repeat Step 4 for the following decorators.
No Format Strip Illegal Characters Move ACKs to Application ACK Folder Fix REF Message Modify Message with HL7 Script --> Use Code Snippet Following Route with Capricorn
No Format //Genie currently doesn't populate MO IDs in the correct fields. program GenieMOIDs; var i: Integer; recipient: string; begin for i := 0 to HL7Data.SegmentCount - 1 do begin if SameText(HL7Data.SegmentName[i], 'MSH') then begin recipient := HL7Data.GetFieldValue(i, 5, 0, 0, 0); break; end; end; if ValidateMedicalObjectsID(recipient, false) then begin for i := 0 to HL7Data.SegmentCount - 1 do begin if SameText(HL7Data.SegmentName[i], 'PRD') and SameText(HL7Data.GetFieldValue(i, 1, 0, 0, 0), 'RT') then begin HL7Data.SetFieldValue(recipient, i, 7, 0, 0, 0); end; if SameText(HL7Data.SegmentName[i], 'PV1') then begin HL7Data.SetFieldValue(recipient, i, 9, 0, 0, 0); end; end; end; end.Warning Historically Convert REF message to ORU format was part of the queue before Route with Capricorn but is no longer needed for new configurations.
If you get an error at anytime sending from Genie that looks similar to the following: EFTInvalidFormatCode:Invalid escape sequence format code ".RTF"' then you will have to add the following decorator after the Strip Illegal Characters Decorator.No Format Modify Message with HL7 Script
Once you have added the Decorator, add to it the following code in its main settings box just under the Edit button.No Format Program Test; var i:Integer; s : String; OBXStart: Integer; begin //HL7 Data is a precreated object with the HL7Data loaded OBXStart := HL7Data.IndexofSegment('OBX'); writeln('OBX Index is '+ inttostr(OBXStart)); for i := OBXStart + 1 to HL7Data.segmentCount-1 do begin if HL7data[inttostr(i) + '.3.1.1'] = 'RTF' then begin HL7Data.DeleteSegment(i); break; end; end; end.Go to the Server Parameters option on the left hand menu. Here you need to Enter the Server File Prefix. Enter a 3 letter acronym for the practice. This prefix will be used when naming outgoing messages.
| Table of Contents | ||||
|---|---|---|---|---|
|